Clockwork PicoCalc · Volume 8
PicoCalc Volume 8 — Pi Zero 2 W Compute Path
Real Linux in the case via the ZeroCalc adapter — bring-up, distros, pen-test, retro emulation, ham radio
Contents
1. About this Volume
This volume covers the PicoCalc when its compute module is a Raspberry Pi Zero 2 W mounted on a ZeroCalc adapter PCB. With this combination the PicoCalc becomes a small Linux machine: ~1 GHz quad-core ARM, 512 MB RAM, full networking, persistent filesystem on the SD card, and the entire Debian / Raspberry Pi OS / Kali / RetroPie ecosystem on tap.
The trade-off vs. a Pico module is power and complexity. Pi Zero idles at ~120 mA against the AXP2101’s 7 V system rail (~0.85 W), versus a Pico 2 H at ~40 mA (~0.13 W). Active loads can hit 250-500 mA peak. Battery life on two 18650s drops from “all-day” (Pico) to “an evening” (Pi Zero). Boot time goes from instant to ~30 s. In return you get full Linux, X11/Wayland if you want it, full digital-mode amateur radio software, full Kali pen-test toolset, and PICO-8 at native frame rate.
This volume:
- Chapter 2 — Pi Zero 2 W silicon and variants.
- Chapter 3 — the ZeroCalc adapter (premade and DIY; full schematic-level treatment is in Volume 7 §9).
- Chapter 4 — operating-system choices, with an opinion on which to pick when.
- Chapter 5 — first-boot bring-up, end-to-end.
- Chapter 6 — firmware and bootloader updates.
- Chapter 7 — Kali Linux pen-test playbook.
- Chapter 8 — RetroPie and emulation.
- Chapter 9 — PICO-8 fantasy console.
- Chapter 10 — ham radio: the full digital-mode stack.
- Chapter 11 — power and battery-life considerations.
- Chapter 12 — troubleshooting.
- Chapters 13-14 — references and index.
2. The Pi Zero 2 W
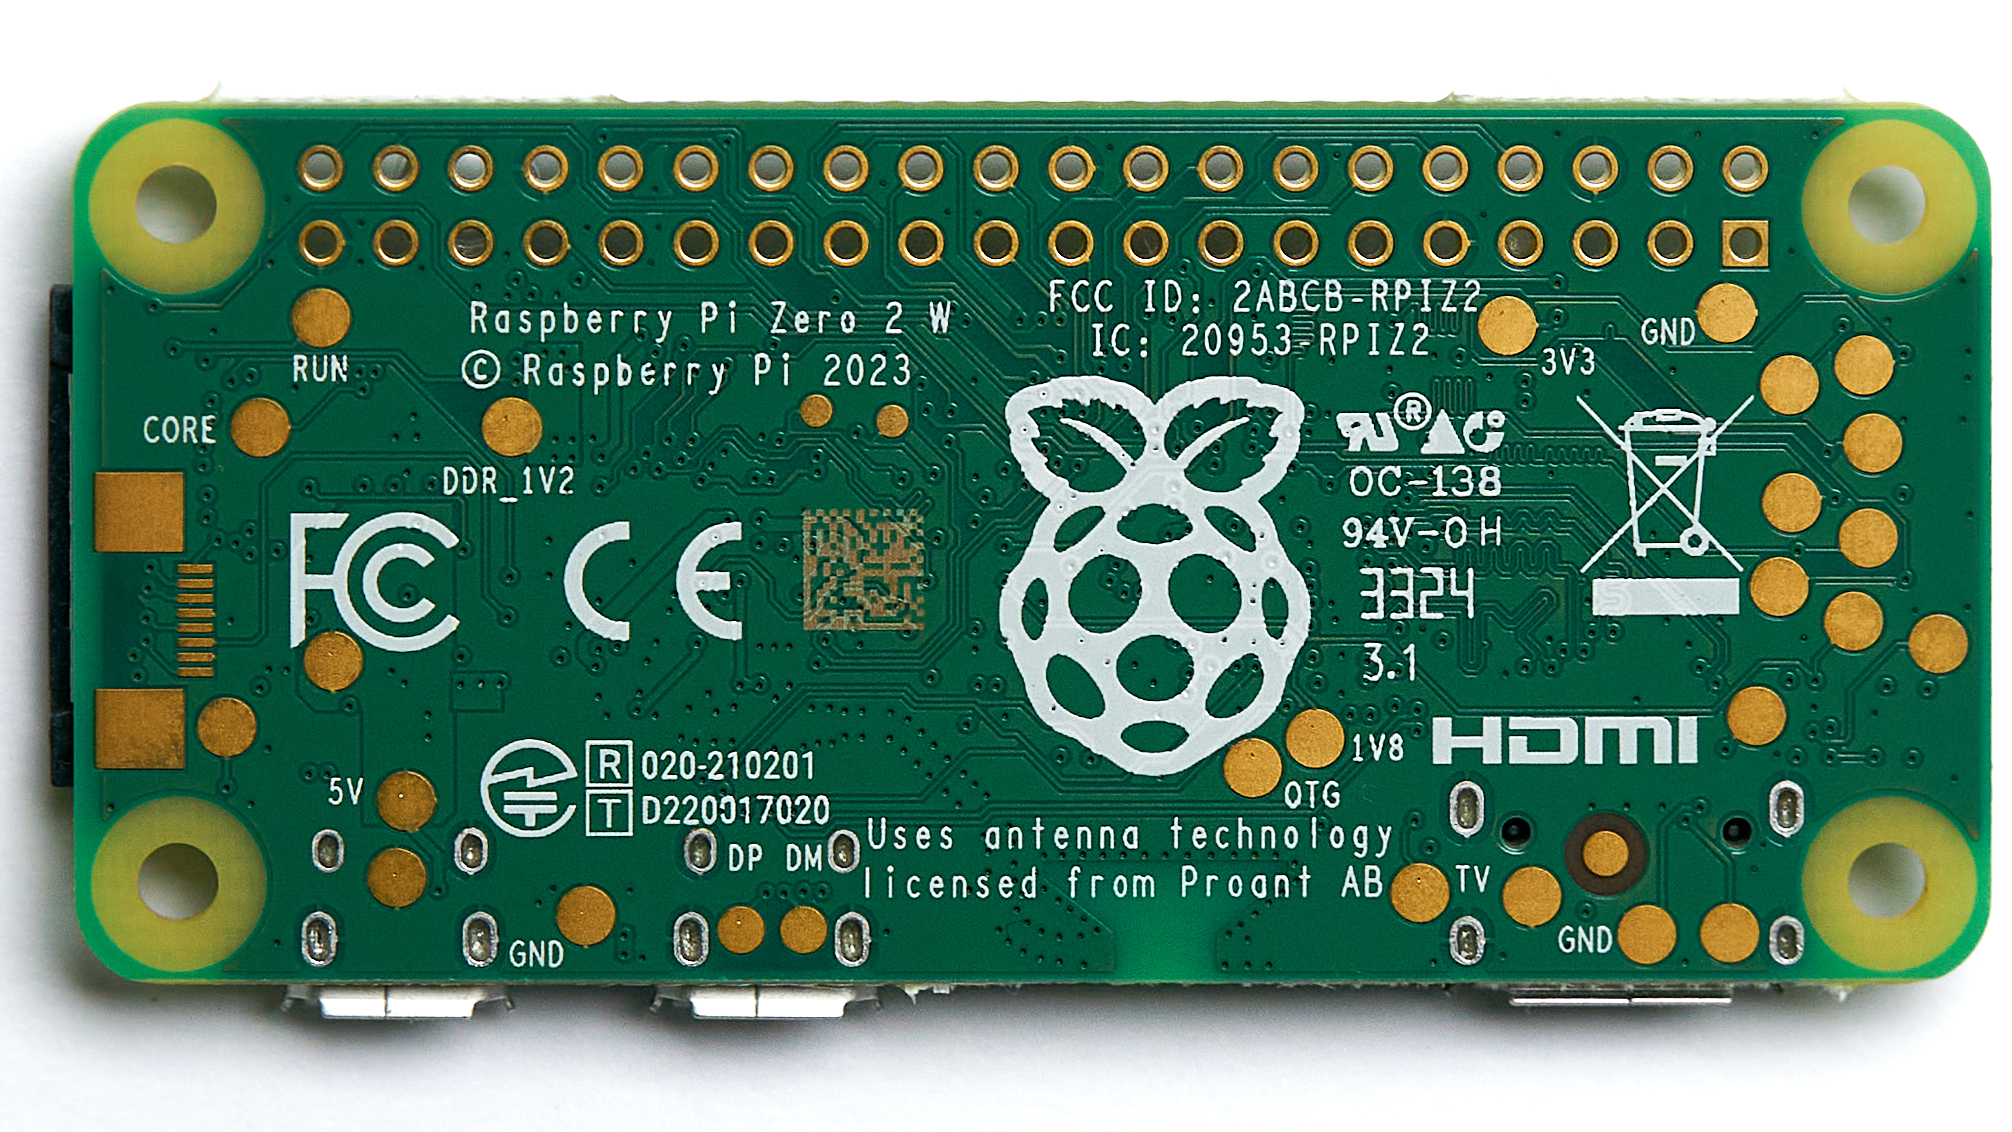
Figure 2.0 — Raspberry Pi Zero 2 W. File:Raspberry Pi Zero 2 W — 2024 — 0012.jpg by Anil Öztas. License: CC BY 4.0. Via Wikimedia Commons.
2.1 Silicon
Broadcom BCM2710A1, a quad-core Cortex-A53 at up to 1 GHz on a 40 nm process1. The BCM2710 is the same silicon family as the Raspberry Pi 3, scaled down for the Zero form factor. Single-channel LPDDR2-933 / 512 MB RAM is mounted as a PoP (package-on-package) on top of the SoC. There is no GPU acceleration enabled in default Pi Zero 2 W firmware (the VideoCore IV is present but rarely used outside omxplayer).
2.2 Wireless
Cypress (now Infineon) CYW43436 — 2.4 GHz 802.11 b/g/n (Wi-Fi 4) and Bluetooth 4.2 / BLE. The radio chip is on the Pi Zero module, integrated antenna routed to a small printed inverted-F antenna on the PCB. There is no U.FL connector by default; a documented (but advanced) modification (§6.3) routes the antenna to an external SMA via a chip-resistor swap.
Wi-Fi 4 ceiling is ~72 Mbps PHY, ~30 Mbps real on a clean 2.4 GHz band. BT 4.2 / BLE works with bluetoothctl and is functional but not as polished as a desktop Linux machine.
2.3 USB
Single micro-USB OTG on the Pi Zero, plus a second port for power. The OTG port can act as either USB host (with an OTG cable) or USB device (with a normal USB cable). On the ZeroCalc adapter, the OTG port is repurposed: the case’s USB-C connector routes through a small hub IC inside the adapter so the PicoCalc presents one USB-C while the Pi Zero sees host-mode USB internally for things like USB WiFi dongles.
Some adapter designs (the simpler ones) route USB-C only to OTG without a hub — they then can’t host more than one USB device. Verify before you buy if USB-host matters to you.
2.4 Display interface
The Pi Zero has both a CSI camera connector and a DSI display connector — neither is wired by the ZeroCalc adapter. Instead, the adapter wires the Pi Zero’s SPI0 bus to the carrier’s LCD (just as the Pico did), and the kernel drives the display via the fbtft or fb_ili9488 framebuffer driver in software. A /dev/fb0 is presented, and console + X11 use it transparently.
Performance: the SPI-driven LCD tops out around 25-40 fps full-screen, slower than the Pi Zero’s native CSI-DSI capability would offer but adequate for everything in this volume.
2.5 Keyboard interface
The carrier’s STM32 keyboard MCU exposes the I²C slave at address 0x1F exactly the same way it does to the Pico. The Linux kernel module picocalc-keyboard (out-of-tree, available from the ZeroCalc community) hooks this up as a standard evdev input device — /dev/input/event0 becomes a keyboard from the rest of Linux’s perspective.
The kernel module does the polling at ~50 Hz from a kernel thread; latency is good enough for terminal use but not gaming-grade. For pure-input-driven games (PICO-8, RetroPie), the polling rate is fine.
2.6 Audio
The carrier’s stereo PWM audio (Volume 6 §15) is wired to two of the Pi Zero’s GPIO. The kernel’s PWM audio driver (bcm2835-audio in PWM mode) presents /dev/snd/pcmC0D0p as a 44.1/48 kHz mono-effective stereo output. Quality is the same hissy mono-effective output the Pico gets — for real audio you need the I²S DAC mod from Volume 7 §5, which on the Pi Zero side appears as a separate ALSA card and is selectable via /etc/asound.conf.
3. The ZeroCalc Adapter PCB
3.1 What the adapter does
A small PCB that:
- Presents a 40-pin male header matching the Pico pinout on its bottom side — drops into the carrier’s socket.
- Has a 40-pin female header on its top side — the Pi Zero 2 W mounts here.
- Routes the carrier’s signals (LCD SPI, keyboard I²C, audio PWM, SD SPI) to the Pi Zero’s equivalent pins.
- Provides a separate buck regulator to step VBUS (5 V from USB-C) down to 3.3 V for the carrier-side logic, while the Pi Zero powers itself from VBUS directly.
Schematic-level theory and DIY recipe is in Volume 7 §9. This volume focuses on the use of the ZeroCalc adapter, not its design.
3.2 Premade adapters
| Variant | Source | Approx price | Notes |
|---|---|---|---|
| Original ZeroCalc | Tindie, various sellers | $18-22 | First community design |
| PicoCalc Trixie adapter | Tindie (search “PicoCalc Trixie”) | $25-30 | Adds USB-C cutout, cleaner mechanical |
ZeroCalc-PCB GitHub | https://github.com/topics/zerocalc | DIY ~$15 | Open KiCad, fab yourself |
Stock at the smaller vendors is intermittent; check the forum before ordering.
4. Operating Systems
4.1 Distro decision matrix
| Distro | Best for | RAM after boot | First-boot setup |
|---|---|---|---|
| Raspberry Pi OS Bookworm | Daily-driver, beginners | ~120 MB | Easy |
| Raspberry Pi OS Trixie | Latest packages, Wayland | ~140 MB | Easy |
| Kali Linux ARM (Pi Zero) | Pen-testing | ~180 MB | Medium |
| RetroPie | Retro emulation | ~110 MB | Medium |
| DietPi | Minimal, server-class | ~60 MB | Hard |
| Buildroot custom | Embedded, minimal, fast boot | ~30 MB | Hard |
| Ubuntu Server (Pi) | Cloud/network workflows | ~150 MB | Easy |
4.2 Recommended starting point — Raspberry Pi OS Bookworm Lite
The 64-bit Lite (no desktop) image gives you the most-comfortable setup with the least hassle:
- Download from https://www.raspberrypi.com/software/operating-systems/.
- Flash with Raspberry Pi Imager2 — pre-configure SSH, WiFi, hostname, and locale on first boot via the imager’s “Advanced options” gear icon.
- SSH in headless on first boot to install the PicoCalc display and keyboard kernel modules.
- Reboot into the now-native PicoCalc console.

Figure 4.3a — Kali Linux. File:Kali-dragon-icon.svg by Abiss21. License: CC BY-SA 4.0. Via Wikimedia Commons.
4.3 Kali Linux ARM
Kali ships a Pi-Zero-2-specific image: https://www.kali.org/get-kali/#kali-arm. After flash, the standard apt update && apt full-upgrade brings in all current pen-test tools. Caveats:
kali-linux-defaultpackage set is large (~5 GB on disk). Usekali-linux-headlessfor the curated subset that fits on a 16 GB card.- WiFi monitor mode requires a USB WiFi adapter — the on-module CYW43436 does not officially support
airmon-ng. Recommended adapter: any RTL8188EUS / RTL8812BU-based USB WiFi dongle. - Default password is
kali / kali; change immediately.
4.4 RetroPie
https://retropie.org.uk/. Pi Zero 2 W is supported. Image, flash, boot, configure controllers via the EmulationStation UI (driven by the PicoCalc keyboard). Per-system performance:
- NES, Master System, Game Gear, Game Boy, GBC: full speed.
- GBA: full speed with
mGBA, ~95% withgpSP. - SNES: 80-95% with
snes9x(game-dependent), choppy withSnes9x2010. - PS1: unplayable on Pi Zero 2 W; use the better-suited PiZero 2 W only for sub-PS1 systems in practice.
4.5 DietPi
https://dietpi.com/. Optimized for low-RAM systems. Boots in ~15 seconds on Pi Zero 2 W. The DietPi installer offers à-la-carte software selection — useful when you want, say, just a music-streaming server or a portable WiFi access-point.
4.6 Custom Buildroot
For embedded use where boot-time matters and Debian’s overhead is intolerable. Build skeleton:
git clone https://git.busybox.net/buildroot
cd buildroot
make raspberrypizero2w_defconfig
make menuconfig    # add packages: openssh, picocalc-modules, ...
make -j8           # ~30 minutes on a desktop
Boot time with a tuned config: ~6 seconds from power-on to login prompt. RAM footprint: ~30 MB.
4.7 Multi-OS via swappable SD cards
The cleanest way to keep multiple distros ready is one SD per distro. Label each card (a P-touch sticker on the card itself works), keep a small storage pouch for the ones you’re not using right now. Swapping is a power-cycle and a card swap.
5. First-Boot Bring-Up
A complete bring-up of a fresh Pi Zero 2 W on the ZeroCalc adapter from a flashed SD card to a usable PicoCalc console:
5.1 Prerequisites
- ZeroCalc adapter installed in the carrier socket; Pi Zero 2 W mounted on the adapter.
- microSD with Pi OS Bookworm Lite flashed (Imager step above).
- USB-C power, ideally a 2 A or higher charger.
- Network: WiFi credentials pre-configured via Imager, or Ethernet via a USB-OTG adapter.
5.2 First boot
- Insert SD into PicoCalc.
- Connect USB-C.
- Press power button (~1 s).
- Display will be blank for ~20 seconds while the kernel boots without LCD support.
- Once the kernel finds the LCD via the framebuffer overlay, the console appears.
- Login at the prompt (
pi / <password set in imager>).
5.3 Installing the PicoCalc kernel modules
The display and keyboard modules are out-of-tree. Install:
There is no apt repository as of 2026-Q2 — the modules ship as source. Build from upstream:
git clone https://github.com/clockworkpi/picocalc-linux-modules.git
cd picocalc-linux-modules
make
sudo make install
sudo modprobe picocalc-display
sudo modprobe picocalc-keyboard
(If a community apt repository appears, the standard curl … | apt-key add + deb … pattern would apply, with the actual signing-key URL substituted for the placeholder used in earlier draft revisions.)
Verify with dmesg | tail (look for “picocalc-display: registered fb0” and “picocalc-keyboard: registered evdev”).
5.4 Mapping function keys
The PicoCalc has keys (F1-F10, brightness, etc.) that don’t have a standard Linux scancode. The kernel module emits them as KEY_F1 through KEY_F10 plus a few custom codes. Map to higher-level functions in /etc/inittab or your shell’s keybindings:
# .bashrc
bind '"\eOP": "tmux next-window"'    # F1 → next tmux window
bind '"\eOQ": "tmux previous-window"' # F2 → previous
For X11 / Wayland: xmodmap or wlroots-specific keybinding.
5.5 Brightness control
The carrier’s LCD backlight is controlled by the STM32 over I²C from the Pico — but on the Pi Zero, the kernel module re-exposes this as /sys/class/backlight/picocalc_bl/brightness (0-255). Manage with xbacklight (X11), brightnessctl (Wayland), or echo 200 > /sys/class/backlight/picocalc_bl/brightness.
5.6 Audio routing
The default bcm2835-audio PWM output is hissy. Swap to the I²S DAC if installed:
sudo bash -c 'echo "dtoverlay=hifiberry-dac" >> /boot/config.txt'
sudo reboot
On reboot the I²S DAC appears as the default ALSA card. Test: aplay /usr/share/sounds/alsa/Front_Center.wav.
6. Firmware and Bootloader Updates
6.1 Pi Zero 2 W EEPROM
Unlike the Pi 4/5 series, the Pi Zero 2 W has no separate EEPROM bootloader — the bootloader is in /boot/firmware/start.elf on the SD card and updates automatically when you apt upgrade raspberrypi-bootloader.
sudo apt update
sudo apt install raspberrypi-bootloader raspberrypi-kernel
sudo reboot
6.2 Kernel updates
Standard apt upgrade. Reboot to load. Pi Zero 2 W ships with the 64-bit kernel as of late 2024; older arm 32-bit kernels are deprecated.
6.3 External-antenna mod (advanced)
The CYW43436 antenna is a printed inverted-F on the Pi Zero PCB. To route to an external SMA:
- Open the Pi Zero, locate the antenna’s series resistor (R10 on most revisions; check your PCB rev).
- Remove R10 (it’s a 0 Ω 0402); install on the alternate trace going to a U.FL pad nearby.
- Solder a U.FL connector to that pad.
- Wire U.FL to an external SMA antenna via a pigtail.
Improvement: typically +6 dB on RX, +3-4 dB on TX. ~30 minutes of soldering for someone comfortable with 0402 work.
6.4 USB WiFi adapter (easier)
Skip the antenna mod and just plug an RTL8188EUS USB WiFi dongle into the Pi Zero’s USB-host. Set as default:
# /etc/wpa_supplicant/wpa_supplicant.conf — add wlan1
sudo systemctl restart wpa_supplicant@wlan1
7. Kali Linux Pen-Test Playbook
7.1 Setup checklist
- Flash Kali ARM Pi Zero image.
- First boot, change default password.
apt update && apt install kali-linux-headless(smaller subset).- Install PicoCalc kernel modules (§5.3).
- Plug in monitor-mode-capable USB WiFi dongle.
- Verify monitor mode:
sudo airmon-ng start wlan1.
7.2 Wireless auditing
aircrack-ng suite works; kismet works; bettercap works. Realistic workload: opportunistic handshake capture, WPS bruteforce, deauth. The PicoCalc’s small screen makes long-form analysis painful — capture handshakes in the field, post-process on a desktop.
7.3 Network scanning
nmap, masscan, arp-scan — all work. For Bluetooth, bluetoothctl and bluez-tools.
7.4 Web app testing
burpsuite — the JVM is slow to start on Pi Zero (~30 s) but usable. nikto, wfuzz, sqlmap — all work.
7.5 Password cracking
hashcat works but is slow on the BCM2710A1 (no GPU acceleration). john is faster for CPU-bound modes. For real cracking, capture on Pi Zero, transfer to a GPU desktop.
7.6 Capture analysis
wireshark is too heavy for the LCD; use tshark from the command line. Port to a desktop for graphical analysis.
7.7 Legal reminder
../_shared/legal_ethics.md applies. Pen-testing on networks you don’t own and don’t have written authorization for is a federal offense in the US and equivalent laws elsewhere.
8. Retro Emulation
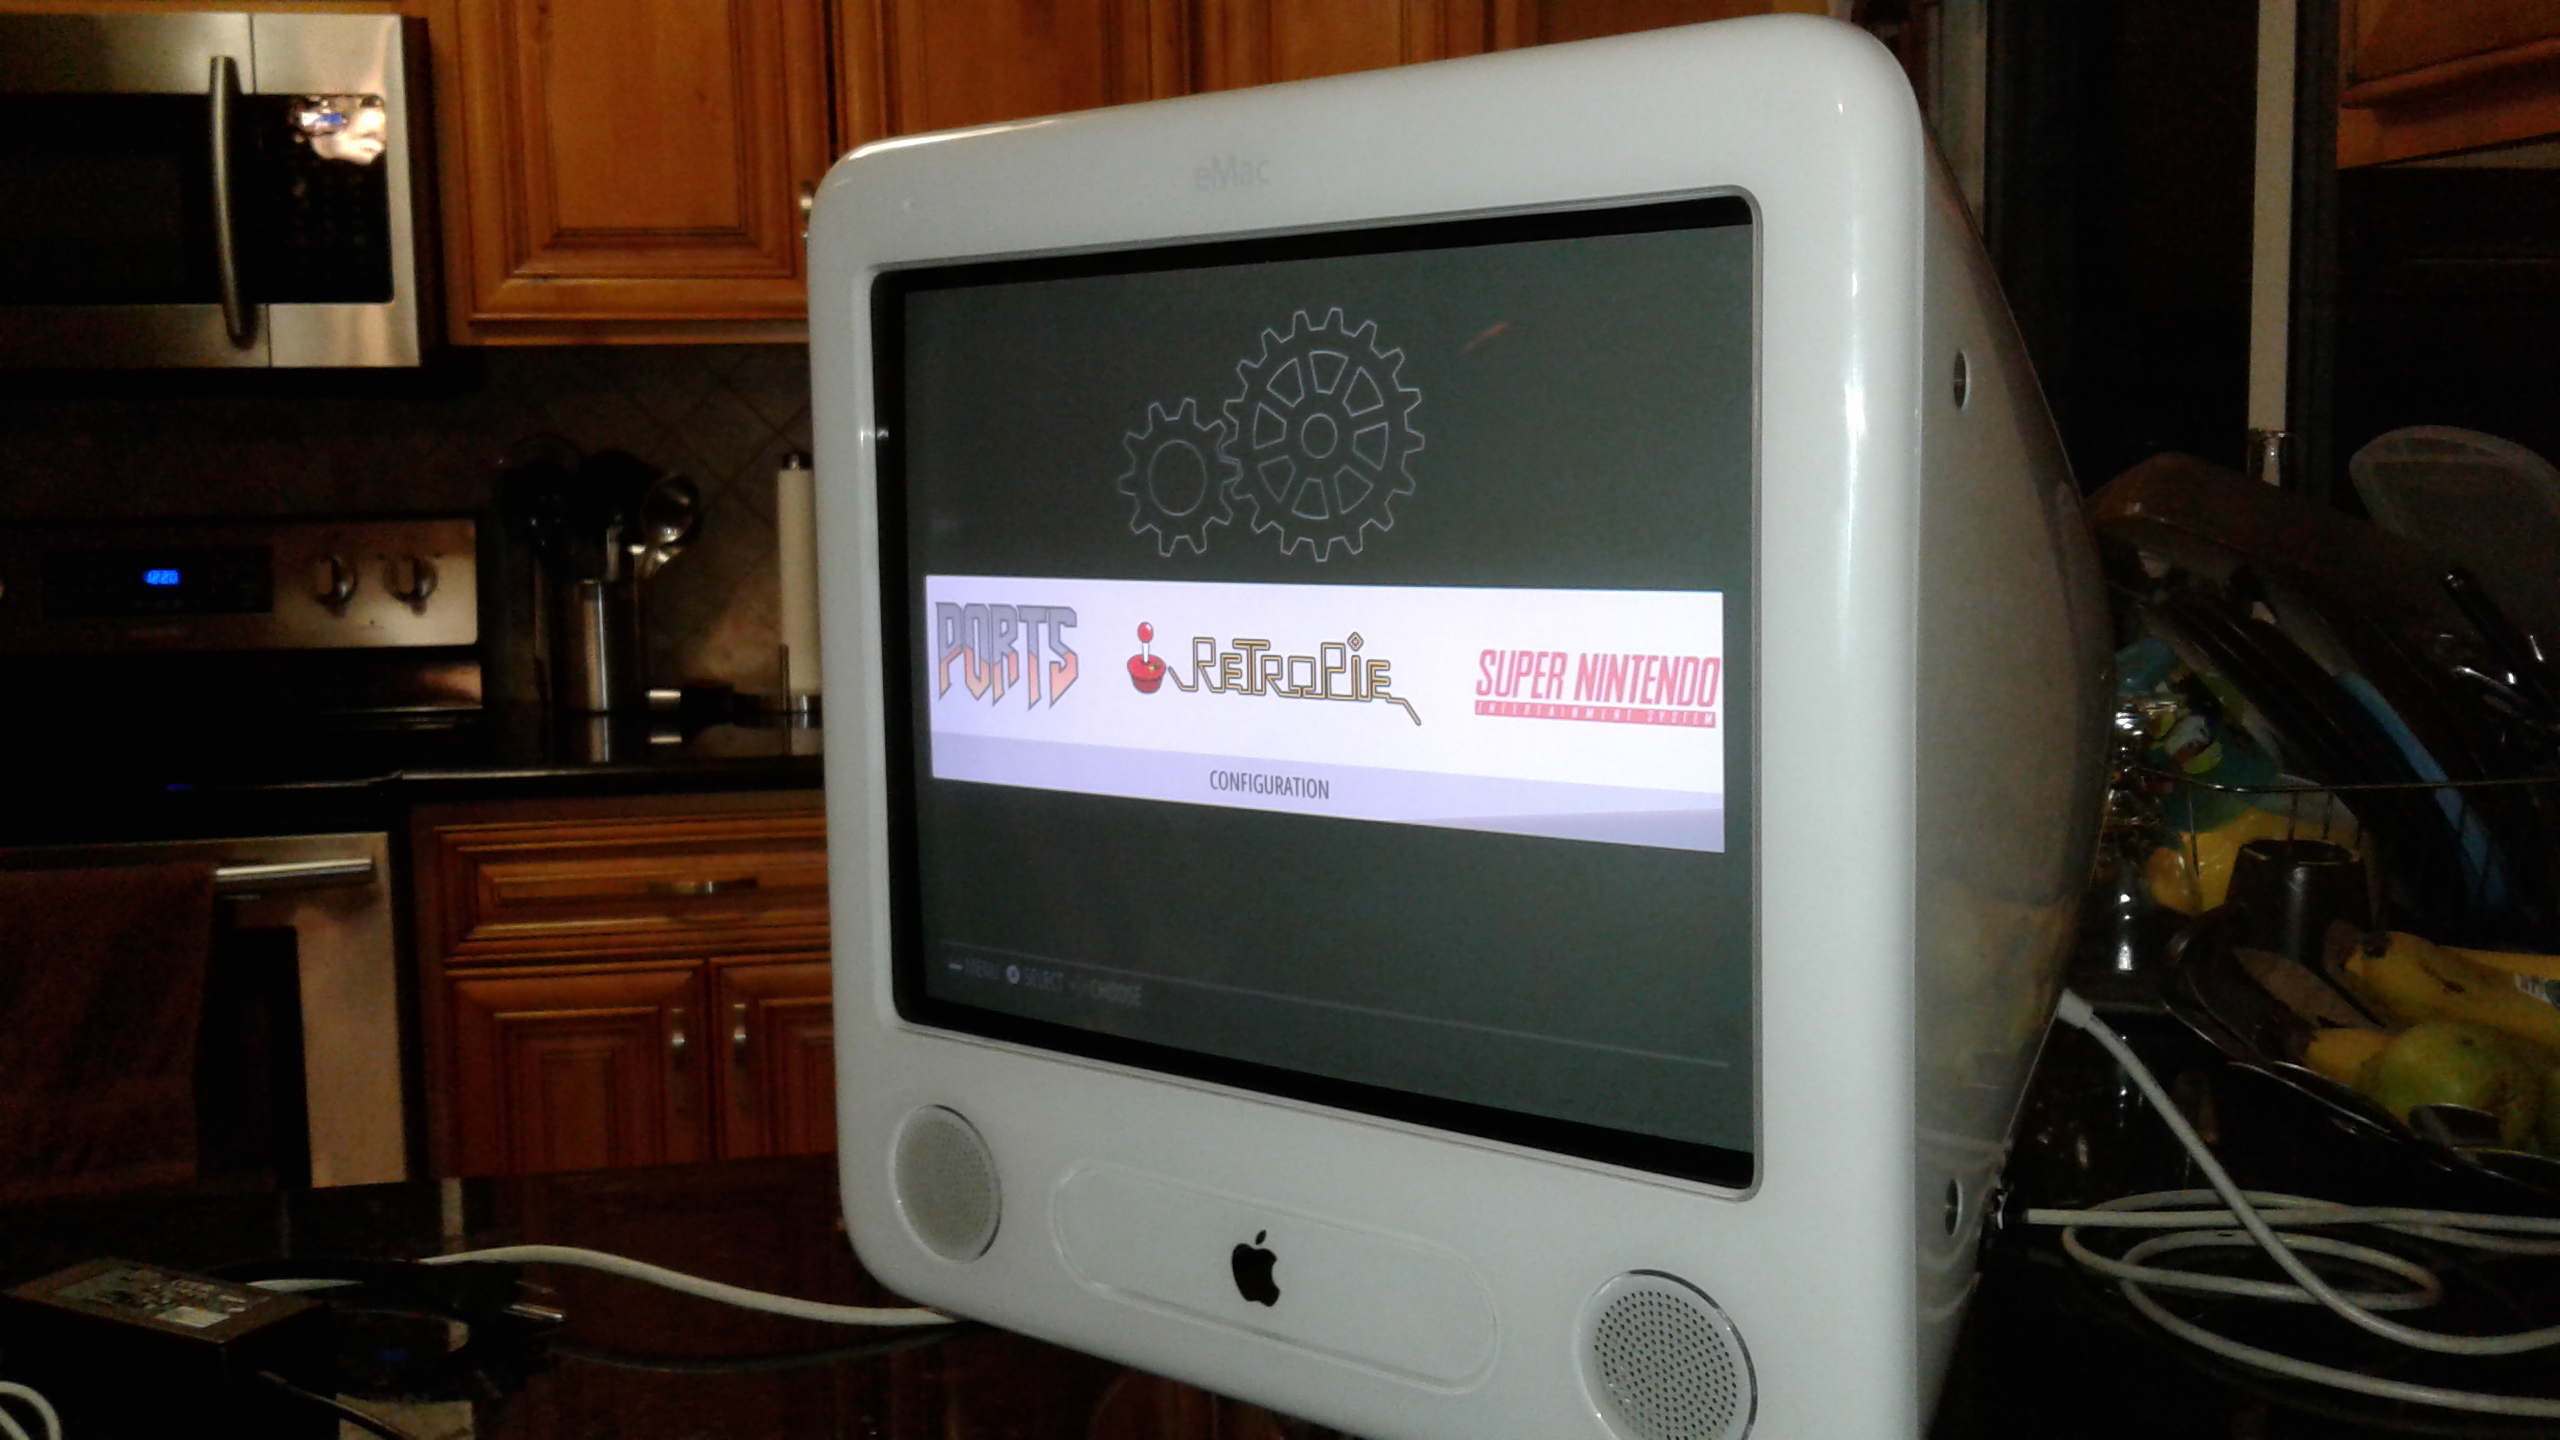
Figure 8.0 — RetroPie reference image. File:PieMacSideViewRetroPie.jpg by RockyHIll. License: CC BY-SA 4.0. Via Wikimedia Commons.
8.1 RetroPie setup
- Download RetroPie image for Pi Zero 2 W.
- Flash, install PicoCalc kernel modules, boot.
- EmulationStation will run; configure keyboard mapping in its first-run wizard.
8.2 Per-system configuration
For each emulator, key map in /opt/retropie/configs/<system>/retroarch.cfg:
input_player1_a = "x"
input_player1_b = "z"
input_player1_x = "s"
input_player1_y = "a"
input_player1_start = "enter"
input_player1_select = "rshift"
input_player1_up = "up"
input_player1_down = "down"
input_player1_left = "left"
input_player1_right = "right"
8.3 ROM sourcing
- Public domain / homebrew: https://nesworld.com, itch.io homebrew tags.
- Dump from your own carts: open-source NES dumper hardware available; legally safest.
- Don’t pirate retail ROMs — laws vary but copyright is typically still active for commercial titles.
9. PICO-8 Fantasy Console

Figure 9.0 — PICO-8 logo. File:PICO-8 logo modern.svg by VectorVoyager. License: CC0. Via Wikimedia Commons.
9.1 What PICO-8 is
A “fantasy console” — an intentionally constrained virtual machine for making and playing small games. Limits: 128×128 pixel display, 16-color palette, 4 audio channels, 8 KB cart. The constraint makes it accessible.
9.2 Installation on Pi Zero 2 W
- Buy PICO-8 from https://www.lexaloffle.com/pico-8.php ($15). Receive download link.
- Download the Linux ARM build, scp to Pi Zero.
- Run:
./pico8_dyn. - Configure resolution to 256×256 (2× pixel scaling in the 320×320 PicoCalc display).
9.3 Keyboard mapping
PICO-8 uses 6 buttons per player. Default mapping:
- Up/Down/Left/Right: arrow keys.
- Z (button 1): X.
- X (button 2): C.
- ESC: Esc.
- Enter for menus.
9.4 SPLORE
PICO-8’s built-in cart browser. Start pico8 then type splore. Browses the BBS (community-uploaded carts) — thousands of free games. Install button downloads to local storage.
9.5 Authoring on-device
The PICO-8 IDE is on-device — code editor, sprite editor, sound editor, cart manager. The PicoCalc keyboard is small for sustained programming, but viable for tweaks. SSH from a desktop and edit via tmux is the more productive path.
9.6 Performance
Pi Zero 2 W runs nearly all PICO-8 carts at 30 fps. Some heavy carts drop to 15-20. The 320×320 display at 2× scaling shows a 256×256 region with thin borders — well-matched to PICO-8’s 128×128 native.
10. Ham Radio on Pi Zero 2 W
The Pi Zero is the right Pico-Calc compute path for a full digital-mode ham operating station. Pure-Linux audio handling, full WSJT-X, fldigi, JS8Call, hamlib — all the tools work. The platform constraint is power: WSJT-X with screen on, WiFi on, and decoding active pulls ~400 mA peak — call it 2 hours of battery operation per pair of 18650s. For real field operation, plug into an external pack.
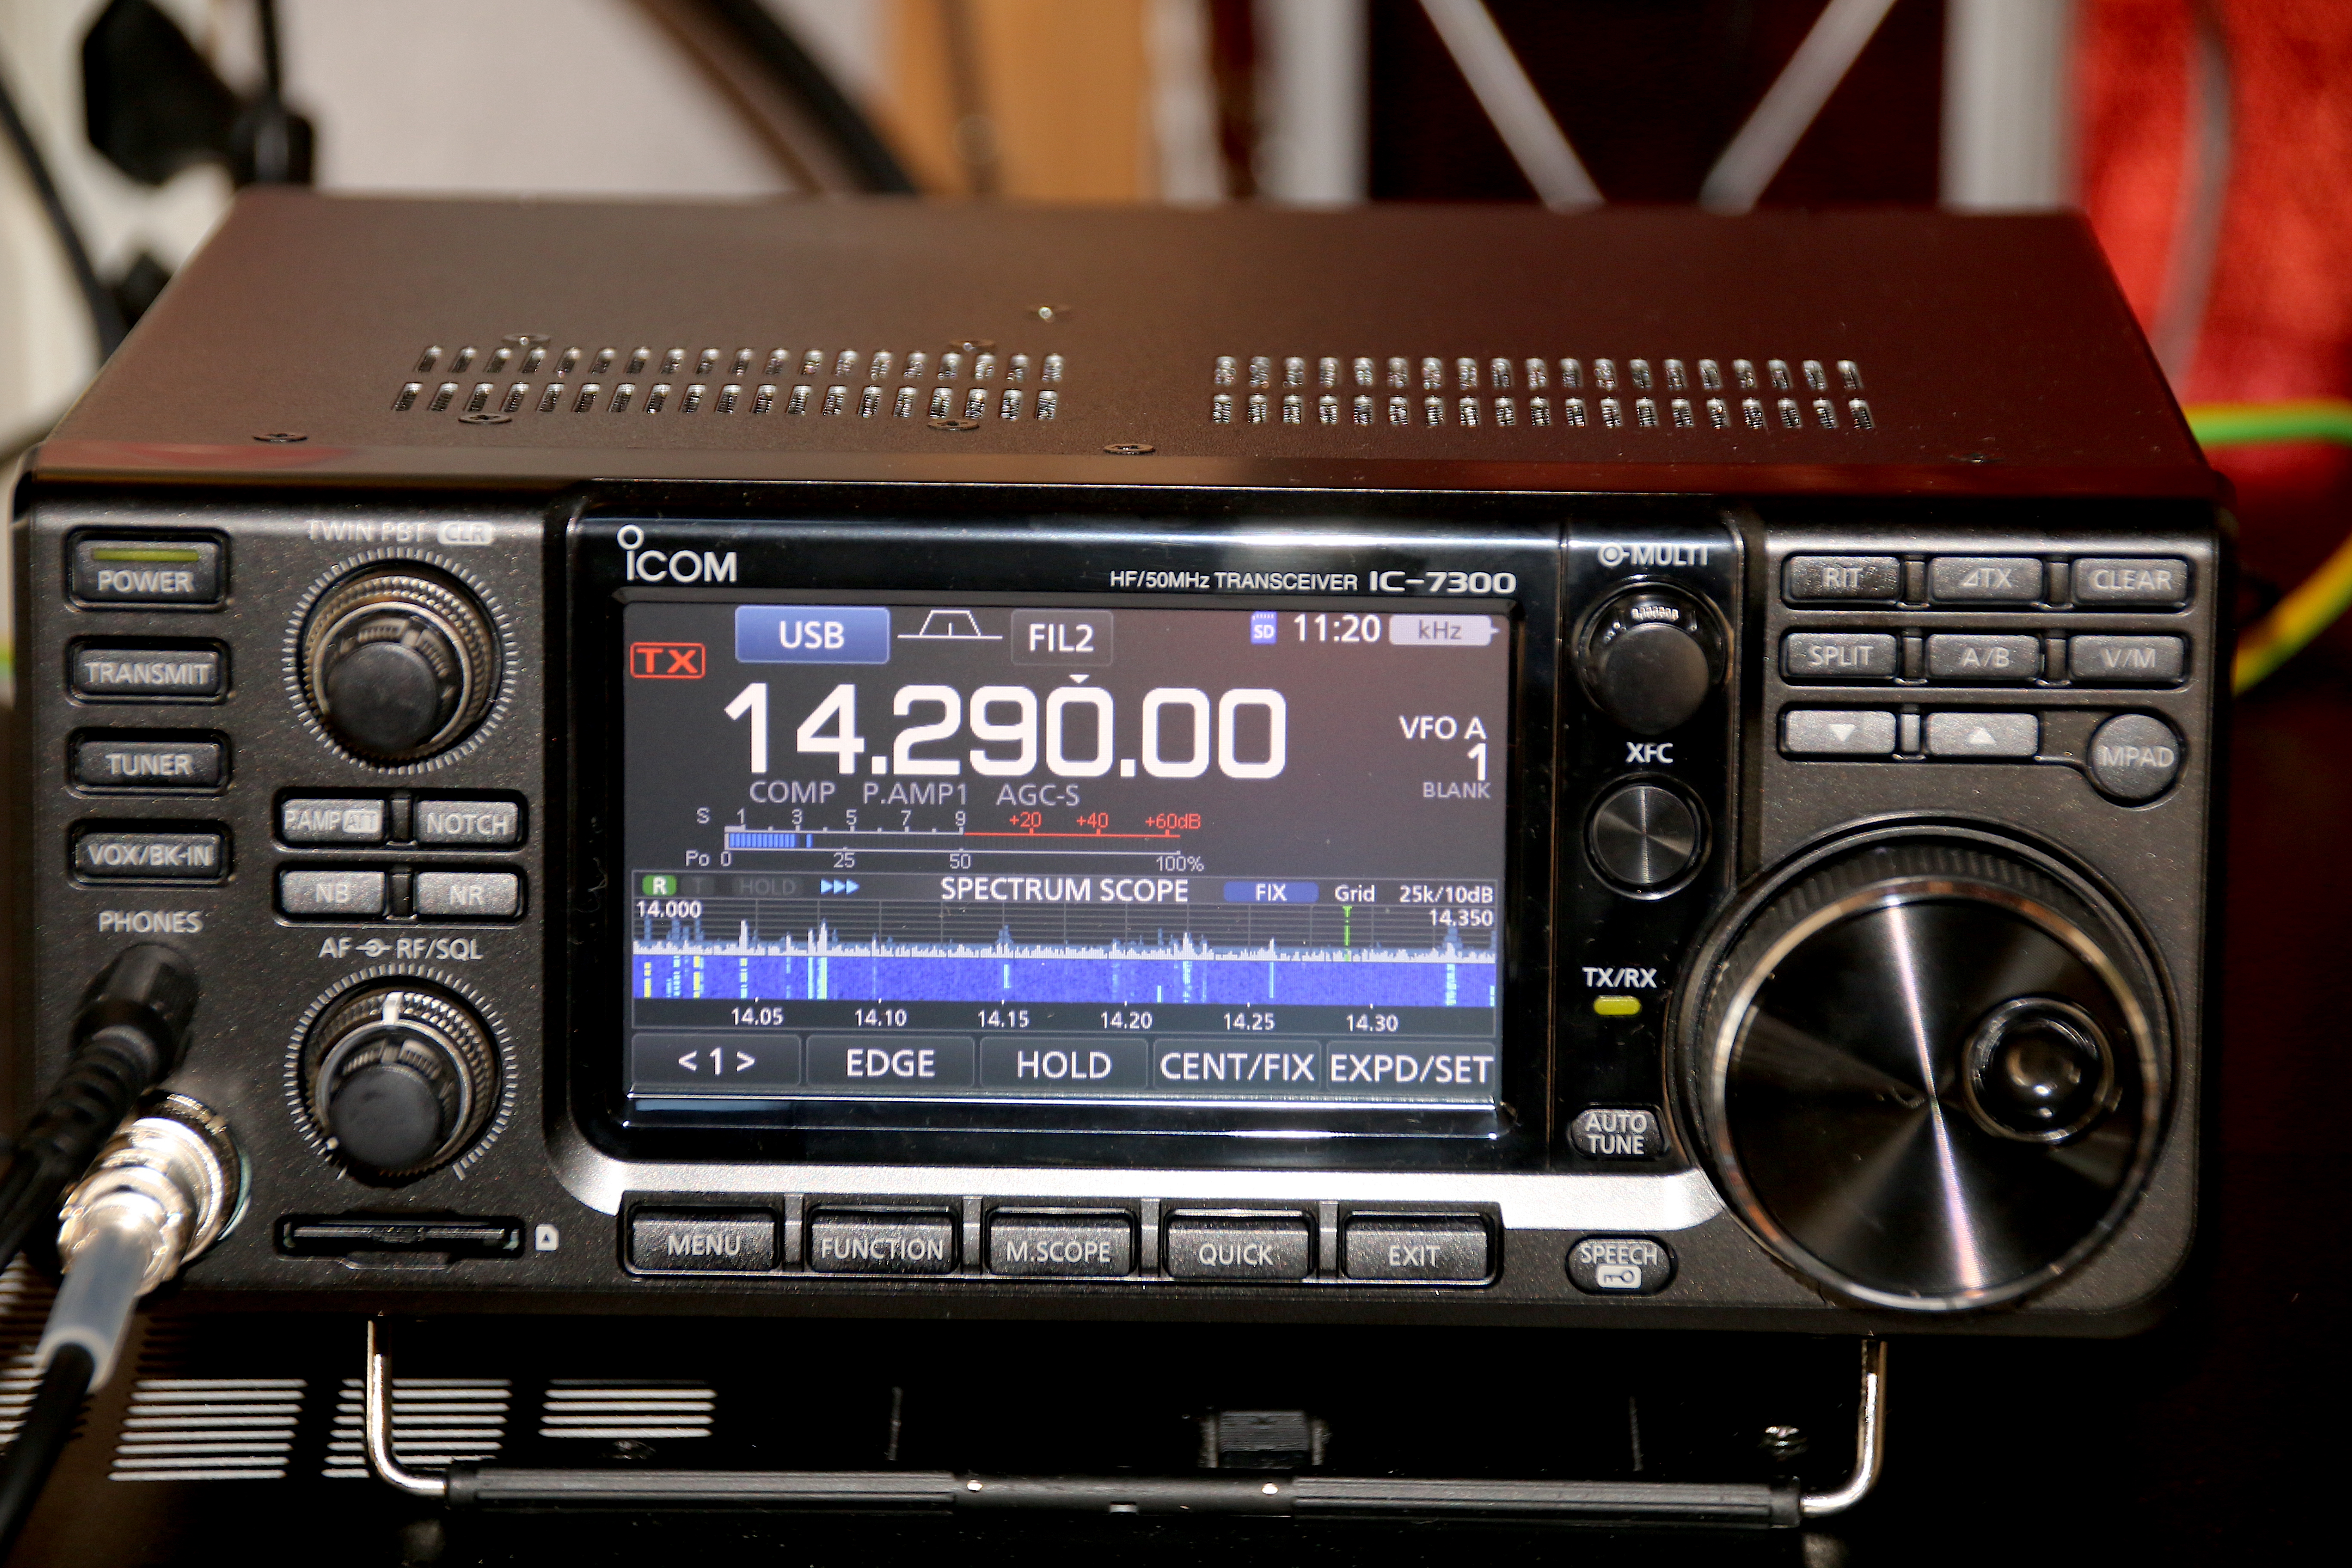
Figure 10.0 — Icom IC-7300 reference rig. File:IC-7300.jpg by Hp.Baumeler. License: CC BY-SA 4.0. Via Wikimedia Commons.
10.1 Audio interface to a real radio
Two paths:
- External USB sound card — RIGblaster Mobile, SignaLink USB, or any cheap CM108-based USB audio dongle. Plug into the Pi Zero’s USB host. ALSA sees it as a second card; route digital-mode software to it.
- I²S DAC + audio jack — the PCM5102A mod (Volume 7 §5) gives Pi Zero an I²S audio output. Wire to your rig’s mic input via a 1:1 isolation transformer (Triad Magnetics SP-67 or equivalent) to break ground loops and PTT-line transients.
A clean two-cable setup is mic-cable + PTT-cable. PTT can be:
- CAT-keyed via the rig’s serial port (preferred for digital modes — no separate cable).
- Hardware-keyed via a Pi Zero GPIO controlling a small optoisolator (4N28 or 6N137) that pulls the rig’s PTT line low.

Figure 10.2a — WSJT-X waterfall. File:Waterfall-diagram-ft87 WSJT-X Denis apel.jpg by Denis Apel. License: CC BY-SA 4.0. Via Wikimedia Commons.
10.2 WSJT-X (FT8, FT4, JT65, MSK144, Q65)
https://wsjt.sourceforge.io/. Install:
sudo apt install wsjtxConfigure radio (Settings → Radio): pick rig type, audio device (USB Audio Device), PTT method (CAT preferred). Test the audio levels with the Tune button — adjust your rig’s mic gain so the WSJT-X power meter reads ~30%.
PicoCalc display considerations: WSJT-X’s main window is sized for ≥1024×768. On the 320×320 LCD, only the waterfall and the message area are usefully visible. Workaround: SSH from a phone or tablet and run WSJT-X on the desktop while the radio physically sits with the PicoCalc.
Or: use WSJT-X-Lite (a slimmed-down clone) or ft8call’s minimal interface, which fit the small display better.
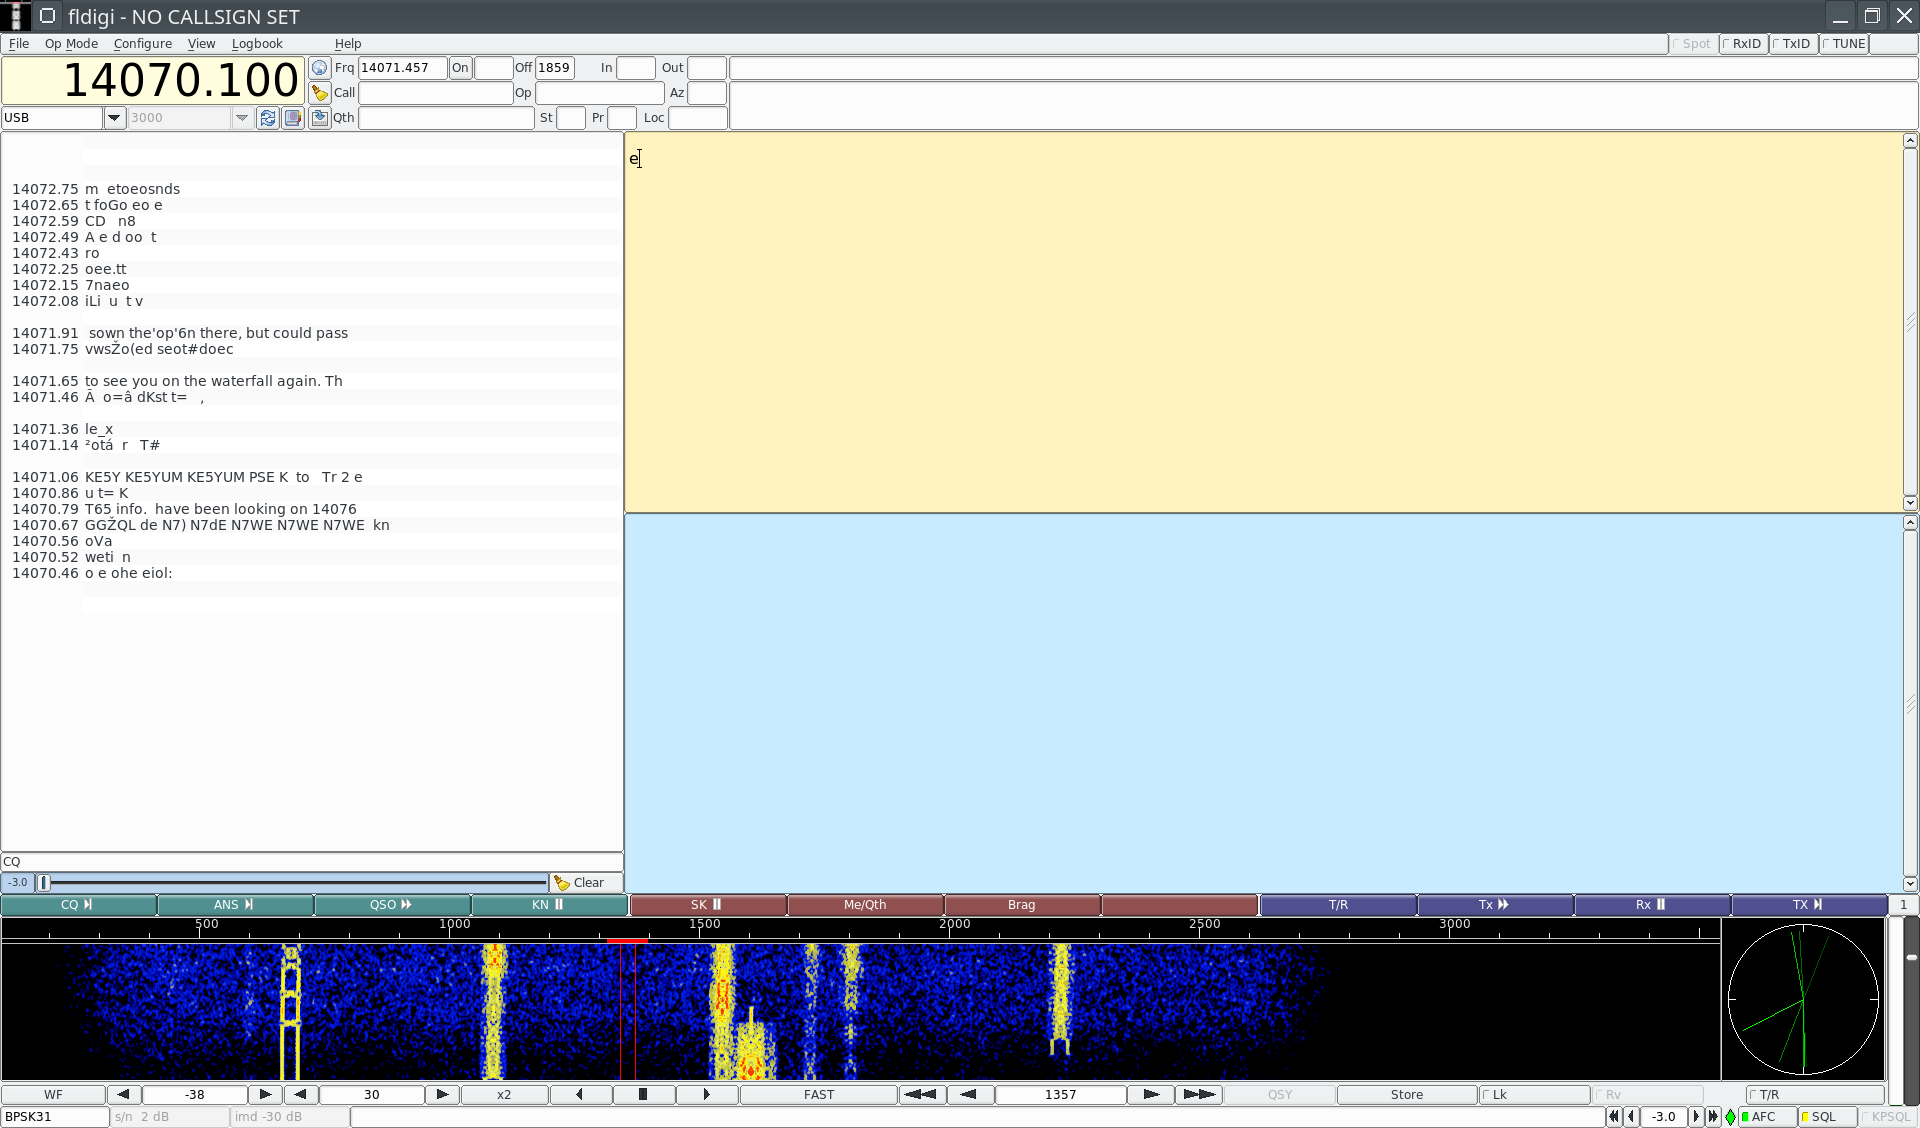
Figure 10.3a — fldigi PSK31 mode. File:Fldigi-PSK31.png by Kf4yfd. License: CC BY-SA 4.0. Via Wikimedia Commons.
10.3 fldigi (PSK31, RTTY, Olivia, MFSK)
http://www.w1hkj.com/. Install:
sudo apt install fldigifldigi’s main window is more compact than WSJT-X — fits the PicoCalc better. The waterfall, decoded text, and TX buffer all visible at once. Standard RIG control via hamlib (via flrig daemon).
10.4 JS8Call (FT8-derived chat mode)
http://js8call.com/. JS8Call uses FT8 modulation but with longer messages — like FT8 over text-message length. Useful for emergency/grid-down voice-replacement comms.
# JS8Call isn't in standard apt; download .deb from project page
wget http://files.js8call.com/2.2.0/js8call_2.2.0_armhf.deb
sudo apt install ./js8call_2.2.0_armhf.deb
Same audio + CAT setup as WSJT-X.
10.5 pat — Winlink client
https://getpat.io/. Pat speaks Winlink protocols (WL2K) for email-over-radio. Pi Zero handles it comfortably.
sudo apt install golang-go    # if not already
go install github.com/la5nta/pat@latest
Configure with your callsign and a Winlink RMS or VARA gateway.
10.6 hamlib + rigctld
The standard daemon for radio control. WSJT-X / fldigi / JS8Call / pat all speak to it.
sudo apt install libhamlib-utils
rigctld -m 234 -r /dev/ttyUSB0  # 234 = Yaesu FT-991 model code
rigctl -l lists supported rigs. CAT cable from rig to Pi Zero via a USB-serial adapter (FT232RL or CP2102 work; the adapter often needs to be the rig-vendor-specific cable for proper RTS/DTR handling).
10.7 GNU Radio Companion
Modest flowgraphs work — basic FM demod, AM demod, simple AFSK-modem chains. Heavy SDR processing (HF DSP, large IF chains) overruns Pi Zero’s CPU. For real GNU Radio work, use a desktop and hardware-tunnel to the rig.
sudo apt install gnuradio
gnuradio-companion
10.8 LoRa-APRS (separate from amateur HF/VHF)
If you have an RFM95 module wired to the side header (Volume 7 §6), the Pi Zero can run a full LoRa-APRS iGate or tracker:
git clone https://github.com/lora-aprs/LoRa_APRS_iGate.git
# Build and run per repo README
10.9 Memorable workflow
A practical operating session:
- Boot the PicoCalc with Pi Zero. Plug in USB audio dongle.
- Connect to the rig (mic + PTT cables; CAT cable via USB-serial).
- SSH from a tablet or phone to start
rigctldand the digital-mode app. - Use the PicoCalc keyboard for in-app text entry (typing into JS8Call, etc.).
- Watch the waterfall on the PicoCalc screen.
- After a session, dump logs to a USB stick or scp to a desktop.
10.10 License reminder
US: amateur HF/VHF/UHF transmit requires a Technician (or higher) FCC license. Receive-only is unrestricted. APRS, LoRa-APRS in ham bands, WSPR, CW, all digital modes — all require a license.
11. Power and Battery Life
| Workload | Average current | Battery (2× 35E) duration |
|---|---|---|
| Idle, screen on, WiFi off | ~140 mA | ~5 h |
| SSH session, LCD on | ~200 mA | ~3.5 h |
| WSJT-X RX only | ~250 mA | ~3 h |
| WSJT-X TX (radio on its own battery) | ~280 mA | ~2.5 h |
| RetroPie GBA emulation | ~320 mA | ~2.2 h |
| Kali full pen-test scan running | ~350 mA | ~2 h |
The rule of thumb: assume ~3 hours of mixed use per pair of 18650s. For a full operating session (4+ hours), plug into wall power.
12. Troubleshooting
| Symptom | Cause | Fix |
|---|---|---|
| Boot hangs at rainbow screen | Kernel panic, usually missing modules | Reflash; verify SD integrity |
| Display blank but kernel boots | Missing fb0 driver | Install picocalc-display kernel module |
| Keyboard not detected | Missing evdev driver | Install picocalc-keyboard kernel module |
| WiFi associates but slow | Antenna in metal case attenuated | External-antenna mod or USB WiFi dongle |
| Sound is mono, hissy | Default PWM audio | Add I²S DAC; reconfigure ALSA |
apt upgrade exhausts SD | Card too small | Use 32 GB+ card |
| Pi Zero overheats under load | No active cooling | Add thin heatsink (4×4 mm copper) on SoC |
| USB WiFi dongle drops out | USB hub overcurrent | Power dongle from external hub |
13. Mechanical Fit and Case Modifications
The Pi Zero 2 W is 65 × 30 × 5 mm versus the Pico’s 51 × 21 × 4 mm. It’s larger in every dimension, and the kit’s case wasn’t designed around it. This chapter covers the mechanical engineering of making the Pi Zero fit cleanly, with antenna routing, USB pass-through, thermal dissipation, and SD-card access all considered.
13.1 Why the standard case won’t close
With a Pi Zero 2 W on a typical ZeroCalc adapter, total stack height from the carrier PCB top surface is:
- ZeroCalc adapter: ~3 mm (PCB + headers stacked)
- Pi Zero PCB: 5 mm (LPDDR2 PoP package adds 1 mm)
- Headers and standoffs: ~2 mm
- Total: ~10 mm
The kit’s stock rear shell allows about 6 mm of clearance above the carrier. So you need a deeper rear shell, period. There is no “make it fit” without a swap.
13.2 3D-printable backs designed for ZeroCalc
| Design | Source | Notes |
|---|---|---|
| Kelpiscool modular back (Pi Zero variant) | https://github.com/Kelpiscool/picocalc-modular-back | Snap-fit; magnetic latch; can swap module without unscrewing the back; 3 mm deeper than stock |
| Odd Inventor “Pi Zero back with USB cutout” | https://www.printables.com/?q=picocalc+pi+zero | Adds a USB-A passthrough on the rear so a WiFi dongle can stick out |
| Mike Mayer “PicoCalc back panel” (Lyra/Zero) | https://www.printables.com/model/1260284-picocalc-back-panel-with-usb-port-and-back-access | Generic deeper back with USB-A cutout and SD-slot access window |
| ClockworkPi forum “Reverse-engineered case back” | https://forum.clockworkpi.com/t/reverse-engineered-case-back-for-the-picocalc/18269 | Step file source; modify in CAD for your specific Pi Zero adapter rev |
Print settings (PETG recommended for thermal margin — Pi Zero gets warm under load):
- 0.20 mm layer height, 4 walls, 25% gyroid infill.
- Print inside-face down so the screw bosses are supported. Tree supports under the USB cutout.
- Boss diameter: leave 0.10–0.15 mm undersize for clean M2.5 self-tap.
13.3 Antenna routing inside the case
The Pi Zero’s printed inverted-F antenna sits at one end of the PCB. With the metal-coated ABS PicoCalc shell closed, RX sensitivity drops by ~6–10 dB and TX by ~3–5 dB. Three options:
- Accept the loss. Fine for in-room WiFi, miserable for fringe coverage.
- Cut the case. A 20 × 10 mm window in the rear shell directly over the antenna recovers most of the loss without external modification. Cover with thin Kapton tape if you don’t want a visible hole.
- External SMA antenna mod. Detailed in §13.4. Best RF result, most invasive.
13.4 External-SMA antenna mod (advanced)
The Pi Zero 2 W routes the CYW43436’s antenna through a series 0 Ω resistor at R10 (verify on your board revision — some are R20). To redirect the radio to an external connector:
- Remove the existing 0 Ω at R10 with hot-air or fine-tip soldering iron.
- Reinstall the 0 Ω on the alternate pad pair (the silkscreen will show two solder-pad triangles meeting near R10).
- Install a U.FL connector on the corresponding U.FL footprint (a 1.5 mm × 1 mm SMD pad, look for the small dome-shaped silkscreen mark).
- Wire a U.FL → SMA pigtail to a panel-mount SMA connector mounted in a hole drilled in the case rear.
- Connect any 2.4 GHz antenna with SMA termination — a 2 dBi rubber-duck or a 5–9 dBi panel antenna works.
Improvement: typically +6 dB on RX, +3-4 dB on TX once you’re outside the metallized case.
This is a destructive mod — the Pi Zero will lose factory antenna calibration and is technically out of FCC compliance. Use only on your own hardware.
13.5 USB pass-through and ports
The Pi Zero has two micro-USB ports — one for power, one for OTG (data + power). On the ZeroCalc adapter:
- The carrier’s USB-C connector usually routes to the Pi Zero’s OTG port (D+/D−) plus the AXP2101’s VBUS.
- The Pi Zero’s “power” port is typically unused on the adapter — the AXP2101 supplies 5 V via VSYS.
For full USB-host capability (e.g., plugging a USB WiFi dongle into the Pi Zero), the adapter needs to either:
- Provide a small USB hub IC (CH334 / FE1.1) inside the case so the carrier’s single USB-C presents multiple ports internally; or
- Route an internal USB-A receptacle to the rear shell so dongles plug in through a cutout.
Verify which design the adapter you’re buying uses. Most Tindie ZeroCalc adapters in 2026 ship with the hub-IC design.
13.6 SD-card slot access
The Pi Zero’s microSD slot is on the underside of its PCB. With the Pi Zero installed on the ZeroCalc adapter facing up, the SD slot points downward into the carrier. Two access strategies:
- Cutout in the carrier: not feasible without modifying the kit’s mainboard. Don’t.
- Pre-load the SD before installation: insert the SD into the Pi Zero before mounting it on the ZeroCalc adapter; remove only when reflashing.
- External SD adapter: route the Pi Zero’s SD signals out to a side-panel SD slot via a 6-wire flying lead. Custom; more work than it’s worth unless you reflash often.
The pragmatic approach: keep a spare microSD ready, swap whole cards rather than reflash in place.
13.7 Thermal dissipation
Pi Zero 2 W’s BCM2710A1 hits 80 °C surface temperature under sustained load (compile, video transcode, Kali aircrack-ng). Without the case open, the temperature climbs further. Three mitigation options:
- Passive heatsink: a 14 × 14 × 8 mm anodized aluminum heatsink with thermal adhesive drops surface temperature by ~10 °C. Fits the case if you leave 5 mm clearance above. Pimoroni ships a Pi Zero 2 W heatsink kit.
- Copper shim + case venting: 0.5 mm copper foil bonded to the SoC with thermal paste, transferring heat to the case interior; combined with vent slots in the rear panel, drops surface temperature ~7 °C.
- Active cooling (40 mm fan): doesn’t fit inside the kit case but works for bench use with the back removed. Drops temperature by ~25 °C. Power from an unused side-header GPIO via a 2N2222 transistor.
13.8 Battery considerations
Pi Zero 2 W draws 120–500 mA continuously, so the AXP2101’s linear charger is the limiting factor for total battery duration:
- Two Samsung 35E (3500 mAh each, 3.6 V nominal) — typical real-world ~5 h light SSH use, ~2.5 h with WiFi running.
- For longer field operation, plug into USB-C from a 10,000 mAh USB power bank during use. The PicoCalc charges from VBUS through the polyfuse.
13.9 Cable management inside the case
The carrier PCB has 5–6 internal connectors (LCD ribbon, keyboard ribbon, speaker JST × 2, battery JST). When closing the case with a Pi Zero on top of the ZeroCalc adapter:
- Route ribbons against the carrier surface, not over the Pi Zero.
- Tuck the speaker leads under the carrier mounting standoffs.
- The LCD ribbon goes from carrier-front (under the Pi Zero) to the LCD; verify it isn’t pinched by the adapter’s PCB edge.
- Battery cells go in their holder on the rear shell side; battery leads route through a notch in the back.
14. Interfacing and I/O Cookbook
The Pi Zero 2 W is a fully-featured Linux machine — once it’s running, you can connect almost anything to it. This chapter is a recipe book of common interfacing tasks: USB peripherals, GPIO breakouts, network connections, file shares, and remote-access workflows.
14.1 SSH key authentication
First thing you do: turn off password auth.
# On the Pi
ssh-keygen -t ed25519
sudo nano /etc/ssh/sshd_config
# Set: PasswordAuthentication no
# Set: PermitRootLogin no
sudo systemctl restart sshd

# From your laptop
ssh-copy-id [email protected]
The Raspberry Pi Imager’s “Advanced options” gear icon during flash lets you paste an authorized_keys file pre-baked into /boot/firstrun.sh. Use that — it’s the cleanest path.
14.2 SCP / rsync for file transfer
# Pull a directory from Pi to laptop
rsync -avz [email protected]:/home/pi/projects/ ./projects/

# Push a directory the other way
rsync -avz ./code/ [email protected]:/home/pi/code/

# One-shot file copy
scp file.txt [email protected]:/home/pi/
14.3 Mount network shares
NFS (Linux server side):
# On the Pi (client)
sudo apt install nfs-common
sudo mkdir /mnt/nas
sudo mount -t nfs server:/srv/share /mnt/nas
# Persistent: add to /etc/fstab
Samba (Windows / cross-platform server):
sudo apt install cifs-utils
sudo mount -t cifs //server/share /mnt/share -o username=jeff,uid=1000,gid=1000
sshfs (anywhere with SSH):
sudo apt install sshfs
sshfs [email protected]:/home/jeff/data /mnt/data
14.4 USB peripherals — what works on Pi Zero 2 W
The OTG port supports USB host with an OTG cable or a hub-equipped adapter. Tested device classes:
| Class | Examples | Notes |
|---|---|---|
| USB Storage | USB sticks, SSDs | Works; high-endurance SSDs survive Kali / RetroPie better than SD |
| USB WiFi | RTL8188EUS, AWUS036ACS, AWUS036ACH | Plug-and-play with kernel modules; monitor mode varies (see §15.4) |
| USB Bluetooth | CSR / RTL8761 | Works; provides better range than on-board CYW43 BT |
| USB Audio | CM108, USB sound cards | Used for ham radio audio interface (Vol 11) |
| USB Ethernet | RTL8152, AX88179 | USB-Gigabit adapters work; expect ~250 Mbit on Pi Zero 2 W |
| USB Serial | FTDI, CH340, CP2102 | Standard; useful for CAT cable or arduino programming |
| USB SDR | RTL-SDR, HackRF, Airspy | Works for spectrum / SDR receive; HackRF transmit drains battery fast |
| USB GPS | GlobalSat BU-353, u-blox 7 | Provides /dev/ttyACM0 with NMEA stream |
| USB cameras (UVC) | Logitech C270 etc. | Works with v4l2-ctl |
| USB MIDI | M-Audio, generic class | Works for music software |
14.5 USB-OTG gadget mode (Pi Zero as a USB device)
The Pi Zero 2 W can present itself to a host PC as a USB device — keyboard, serial console, mass storage, or Ethernet. Useful for headless setup, BadUSB-style automation (with authorization), or as a portable file server.
# /boot/config.txt
dtoverlay=dwc2

# /boot/cmdline.txt — append (Ethernet over USB)
modules-load=dwc2,g_ether
After reboot, plug the Pi Zero’s data port (not power port) into a host PC; the host sees a USB-Ethernet device, the Pi Zero gets usb0 interface. Useful for headless onboarding.
For HID keyboard/mouse mode use g_hid instead. For mass storage, g_mass_storage.
14.6 Tailscale / WireGuard
Tailscale is the easiest way to reach the PicoCalc from anywhere:
curl -fsSL https://tailscale.com/install.sh | sh
sudo tailscale up
After auth, the Pi gets a 100.x.x.x IP and is reachable from any other device on your tailnet.
WireGuard (manual, no third-party):
sudo apt install wireguard
# Generate keys: wg genkey | tee privatekey | wg pubkey > publickey
sudo nano /etc/wireguard/wg0.conf
# Add Interface and Peer sections; sudo wg-quick up wg0
14.7 Bluetooth audio out (A2DP)
Pair the Pi Zero with Bluetooth speakers / headphones:
sudo apt install bluez pulseaudio pulseaudio-module-bluetooth
sudo systemctl start bluetooth
bluetoothctl
> agent on
> scan on
> pair AA:BB:CC:DD:EE:FF
> trust AA:BB:CC:DD:EE:FF
> connect AA:BB:CC:DD:EE:FF
> exit

# Make BT default audio output
pactl list sinks short
pactl set-default-sink bluez_sink.AA_BB_CC_DD_EE_FF.a2dp_sink
14.8 GPIO from the Pi Zero — accessing the carrier’s side header
The ZeroCalc adapter routes some of the Pi Zero’s GPIO to the carrier’s side header — but not all. Check your specific adapter’s pin map. Typically:
- I²C (SDA/SCL) is routed (used for keyboard).
- One UART is routed.
- 2–4 spare GPIO are exposed.
To use these from Linux:
sudo apt install pigpio python3-pigpio
sudo systemctl enable pigpiod
sudo systemctl start pigpiod

python3 -c '
import pigpio
pi = pigpio.pi()
pi.set_mode(17, pigpio.OUTPUT)  # GPIO17
pi.write(17, 1)
'
Or with gpiozero:
sudo apt install python3-gpiozero
python3 -c 'from gpiozero import LED; led = LED(17); led.on()'
14.9 Running things on boot
systemd is the right tool. A minimal unit file:
# /etc/systemd/system/myapp.service
[Unit]
Description=My App
After=network.target

[Service]
Type=simple
User=pi
ExecStart=/home/pi/myapp/run.sh
Restart=always

[Install]
WantedBy=multi-user.target
sudo systemctl daemon-reload
sudo systemctl enable --now myappFor Python apps, prefer Type=simple with the script writing its own logs to stdout (systemd captures via journald).
15. Best-of-Best Hardware Mods
This is the curated list of hardware modifications that meaningfully change the PicoCalc + Pi Zero experience. Everything here is field-tested by community members; links and part numbers are 2026-current.
15.1 Active cooling kit
Three-tier cooling, in order of impact:
- Pimoroni Pi Zero 2 W Heatsink Kit — $4 from Pimoroni. Anodized aluminum heatsink with pre-applied thermal pad. Drops surface temperature by ~10 °C under load. Fits inside the case with the right 3D-printed back.
- Copper shim + heat-spreader plate — DIY: 0.5 mm copper sheet cut to ~30 × 60 mm, bonded to the SoC with Kryonaut thermal compound, conducts heat to the case interior. Combined with vent slots, ~15 °C drop.
- Stack-mounted micro-fan — 12 mm fan from any drone-parts supplier, 3.7 V from a regulated GPIO. Drops temperature by ~25 °C but adds noise. Use only if running sustained workloads (compiling, video transcoding).
15.2 SDIO WiFi mod (faster than USB)
The Pi Zero exposes its SDIO bus on a few specific GPIO pins. With a custom adapter or carrier modification, an SDIO WiFi module (e.g., Mikroe-2336) gives you:
- ~150 Mbit throughput vs ~30 Mbit on USB
- No USB-port consumption
- Lower power than USB WiFi
The mod requires:
- Cutting the trace from the Pi’s antenna to the on-board CYW43436 (or accepting both radios coexist).
- Wiring SDIO_CLK / CMD / DAT0–3 to the new module.
- Patching the kernel device tree to declare the new SDIO controller.
This is a 4–6 hour project for someone comfortable with kernel device-tree overlays. Most users skip it in favor of a USB dongle.
15.3 SSD via USB host (high-endurance for Kali / RetroPie)
For sustained write workloads (Kali handshake captures, RetroPie ROM library, log-heavy applications), microSD cards wear out within months. A USB-SSD bypass:
- Plug a small USB-SSD (e.g., Samsung T7 Shield, 250 GB) into the Pi’s USB-host port.
- Boot from microSD, mount SSD at
/dataor move/var/logand/homeonto it. - For full SSD-boot, use
rpi-cloneto mirror the SD onto the SSD, edit/boot/cmdline.txtto point root at the SSD, and pull the SD card.
Not all Pi Zero 2 W firmware versions support USB-boot directly — verify with vcgencmd bootloader_config before betting on it.
15.4 Recommended USB WiFi adapters for Kali
For monitor-mode penetration testing the on-module CYW43436 is not sufficient. Recommended dongles:
| Adapter | Chipset | Monitor mode | Price | Notes |
|---|---|---|---|---|
| Alfa AWUS036ACS | RTL8812AU | Yes (with driver) | $30 | Dual-band 2.4/5 GHz; standard pen-test pick |
| Alfa AWUS036NEH | RTL8188EUS | Yes | $20 | 2.4 GHz only; smaller, cheaper |
| Alfa AWUS036ACH (legacy) | RTL8812AU | Yes | $35 | Slightly older driver maturity than ACS |
| Panda PAU09 N600 | RT5572 | Yes | $25 | Dual-band; less polished driver |
| TP-Link Archer T2U Plus | RTL8821AU | Yes (drivers needed) | $20 | High-gain antenna, but driver patches required |
Driver setup for RTL8812AU (most common):
sudo apt install realtek-rtl88xxau-dkms
# or build from source:
git clone https://github.com/aircrack-ng/rtl8812au
cd rtl8812au
sudo make dkms_install
15.5 External antenna selection
For pen-test / RF work, antenna gain affects everything. Picks:
| Antenna | Gain | Use case |
|---|---|---|
| Standard rubber-duck (5 cm, 2 dBi) | 2 dBi | General use, daily driver |
| 19 cm omnidirectional (5 dBi) | 5 dBi | Slightly extended range; still omnidirectional |
| Yagi 2.4 GHz (12 dBi) | 12 dBi | Directional pen-test surveys; needs aiming |
| Patch panel 2.4 GHz (8 dBi) | 8 dBi | Wall-mounted panel for fixed-position reception |
| Window-mount magnetic (3 dBi) | 3 dBi | Vehicle-mounted Wardriving |
All terminate in SMA; use a U.FL → SMA pigtail through a panel-mount on a 3D-printed back.
15.6 RTC battery-backed real-time clock
Pi Zero 2 W has no battery-backed RTC. Without internet, time resets at every boot. Add a DS3231 RTC module on I²C:
# Wire DS3231: VCC→3V3, GND→GND, SDA→GPIO2, SCL→GPIO3
sudo apt install i2c-tools
sudo i2cdetect -y 1   # should show 0x68

# Add to /boot/config.txt:
dtoverlay=i2c-rtc,ds3231

sudo apt purge fake-hwclock
sudo update-rc.d -f fake-hwclock remove
sudo systemctl disable fake-hwclock
sudo nano /lib/udev/hwclock-set
# Comment out the lines:
#   if [ -e /run/systemd/system ] ; then
#     exit 0
#   fi

sudo hwclock -w   # write current system time to RTC
sudo hwclock -r   # read RTC

# After reboot:
sudo timedatectl
CR2032 backup battery; module costs $1-3 from AliExpress.
15.7 GPS via UART
For ham APRS, geolocation, time sync without internet, or location-aware logging:
# Wire u-blox NEO-6M to the Pi's UART:
#   GPS TX → Pi RX (GPIO15)
#   GPS RX → Pi TX (GPIO14)
#   GPS VCC → 3V3
#   GPS GND → GND

# Disable serial console, enable serial port:
sudo raspi-config nonint do_serial 1   # console no, hardware yes

sudo apt install gpsd gpsd-clients python3-gps
sudo nano /etc/default/gpsd
# DEVICES="/dev/serial0"

sudo systemctl enable --now gpsd

cgps -s   # graphical satellite view
Combined with chrony, the GPS provides PPS-disciplined time accurate to <100 µs without network.
15.8 UPS HAT for battery-life extension
The PicoCalc’s stock 2× 18650 lasts ~3 h with Pi Zero. UPS HATs let you hot-swap the cells or extend with a USB-C power bank:
| HAT | Battery format | Source | Notes |
|---|---|---|---|
| Waveshare Pi Zero UPS HAT | 1× 14500 (LiPo) | https://www.waveshare.com/ | Stacks on Pi Zero header; doesn’t fit case w/o mod |
| PiSugar Zero (1500 mAh) | LiPo pouch | https://www.pisugar.com/ | Magnetic snap-on; external |
| External USB power bank | 18650 / 21700 cell | Anker, Nitecore, etc. | Plugs into USB-C; trivial if you don’t mind cable |
Most users skip the HATs and use an external power bank when extended runtime is needed.
15.9 PoE Power-over-Ethernet (advanced)
For installed/fixed-location use cases: a PoE splitter/converter board can power the Pi Zero from a PoE switch. Useful if you want the PicoCalc as a permanent monitoring station hung in an equipment rack.
- Adafruit PoE FeatherWing (or generic IEEE 802.3af splitter) → 5V / 2A out.
- Wires to the Pi Zero’s 5V/GND pads.
- Combined with USB-Ethernet adapter, you have a single-cable installation.
15.10 Audio DAC HATs that fit
Pi Zero’s stock PWM audio (over Pico’s audio path) is mediocre. For ham radio digital modes, the audio path is critical. Recommended I²S DAC HATs:
| HAT | DAC chip | Inputs/outputs | Notes |
|---|---|---|---|
| HiFiBerry DAC+ Zero | PCM5102A | 3.5 mm jack out | Stereo line-out; standard pick |
| HiFiBerry MiniAmp | TAS5713 | Speaker terminals | For driving small speakers directly |
| IQAudio Pi-DAC Zero | PCM5142 | 3.5 mm out + I²S header | Higher-end; supports DSD |
| Pirate Audio (Pimoroni) | PCM5100A | 3.5 mm + 240×240 LCD | Adds a small LCD; bypasses kit’s display |
| Adafruit Voice Bonnet | WM8960 | Speaker + 2x mic | Mic input — useful for ham radio RX |
Most fit inside the case if you use a deeper 3D-printed back.
15.11 Side-header signal pass-through
Some advanced ZeroCalc adapter revisions wire a few of the carrier’s side-header pins to spare Pi Zero GPIO. Check the specific adapter you bought. Where it’s wired, you can use the carrier’s side-header for accessories (CC1101, RFM95, PCM5102A) directly from the Pi Zero — no separate breakout needed.
For adapters that don’t wire side-header pass-through, a manual mod is to bridge specific pins with thin enameled wire (28 AWG) running over the adapter’s edge to a free Pi GPIO. Identify free GPIO with gpioinfo after boot.
16. Networking and Security
A Linux machine on your network is a target. This chapter covers hardening, VPN setup, and useful network services to run.
16.1 SSH hardening
Already covered key auth (§14.1). Additional steps:
# /etc/ssh/sshd_config
PermitRootLogin no
PasswordAuthentication no
PubkeyAuthentication yes
MaxAuthTries 3
ClientAliveInterval 300
ClientAliveCountMax 2

sudo systemctl restart sshd

# Install fail2ban
sudo apt install fail2ban
# Default config protects sshd; enable:
sudo systemctl enable --now fail2ban
16.2 Auto-updates
sudo apt install unattended-upgrades
sudo dpkg-reconfigure --priority=low unattended-upgrades

# Edit /etc/apt/apt.conf.d/50unattended-upgrades
# - Uncomment "${distro_id}:${distro_codename}-updates";
# - Add "${distro_id}:${distro_codename}-security";

# Edit /etc/apt/apt.conf.d/20auto-upgrades:
# APT::Periodic::Update-Package-Lists "1";
# APT::Periodic::Unattended-Upgrade "1";
16.3 Pi-hole DNS sinkhole
Run Pi-hole on the Pi Zero for network-wide ad-blocking:
curl -sSL https://install.pi-hole.net | bashConfigure your router to use the Pi Zero as DNS server. Pi-hole runs comfortably in 80 MB RAM.
16.4 Tor relay node
Anonymous routing relay (not exit relay — exit nodes are higher liability):
sudo apt install tor

# /etc/tor/torrc
ORPort 9001
ExitRelay 0
Nickname picocalc
ContactInfo [email protected]

sudo systemctl enable --now tor
Bandwidth: Pi Zero 2 W can sustain ~5 Mbit relay throughput.
16.5 WireGuard VPN endpoint
For accessing your home network from anywhere:
sudo apt install wireguard

# Generate keys
wg genkey | tee privatekey | wg pubkey > publickey

# /etc/wireguard/wg0.conf
[Interface]
Address = 10.0.0.1/24
ListenPort = 51820
PrivateKey = <privatekey-contents>

[Peer]
# Your laptop
PublicKey = <laptop-publickey>
AllowedIPs = 10.0.0.2/32

sudo systemctl enable --now wg-quick@wg0

# Forward port 51820/udp from your router to the Pi
16.6 Reverse proxy + HTTPS for self-hosted services
Caddy is the easiest:
sudo apt install caddy

# /etc/caddy/Caddyfile
mypicocalc.example.com {
    reverse_proxy localhost:8080
}

sudo systemctl reload caddy
Caddy auto-provisions Let’s Encrypt certs and renews them.
16.7 Firewall (ufw)
sudo apt install ufw
sudo ufw default deny incoming
sudo ufw default allow outgoing
sudo ufw allow ssh
sudo ufw allow 80/tcp
sudo ufw allow 443/tcp
sudo ufw enable
17. Performance Tuning
Pi Zero 2 W is RAM-constrained (512 MB) and CPU-constrained. These tunes help.
17.1 Overclocking
Pi Zero 2 W ships at 1 GHz; many units run stably at 1.1 GHz with adequate cooling.
# /boot/config.txt
arm_freq=1100
core_freq=500
sdram_freq=500
over_voltage=4
Reboot. Watch vcgencmd measure_temp — keep below 80 °C. If it throttles, back off.
17.2 CPU governor
# Default is "ondemand" (scales with load)
echo performance | sudo tee /sys/devices/system/cpu/cpu*/cpufreq/scaling_governor
# Sustained max performance — uses more power but no scaling overhead

# For battery operation, conservative governor:
echo conservative | sudo tee /sys/devices/system/cpu/cpu*/cpufreq/scaling_governor
Persist with cpufrequtils:
sudo apt install cpufrequtils
sudo nano /etc/default/cpufrequtils
# GOVERNOR="performance"
17.3 zram swap
Compresses swap in RAM rather than writing to SD. Saves SD wear, accelerates swap.
sudo apt install zram-tools
# Default config gives ~50% of RAM as zram swap; edit /etc/default/zramswap if needed
sudo systemctl enable --now zramswap
17.4 log2ram
Move /var/log to RAM, sync to SD on shutdown. Drastically reduces SD wear.
echo "deb http://packages.azlux.fr/debian/ bookworm main" | sudo tee /etc/apt/sources.list.d/azlux.list
sudo wget -O /usr/share/keyrings/azlux-archive-keyring.gpg https://azlux.fr/repo.gpg.key
sudo apt update && sudo apt install log2ram
Edit /etc/log2ram.conf to set size (default 40 MB is usually fine).
17.5 tmpfs for /tmp
# /etc/fstab
tmpfs /tmp tmpfs defaults,noatime,nosuid,size=64m 0 0
Reboot. /tmp is now in RAM.
17.6 Disable unused services
Common services to disable on a headless device:
sudo systemctl disable bluetooth.service       # if you don't use BT
sudo systemctl disable hciuart.service
sudo systemctl disable triggerhappy.service
sudo systemctl disable ModemManager.service    # rarely needed
sudo systemctl disable avahi-daemon.service    # if not using mDNS
Saves ~30 MB RAM and ~3% idle CPU.
17.7 GPU memory split
For headless / no-GUI use, drop GPU memory to free RAM:
# /boot/config.txt
gpu_mem=16
(Default is 64 MB. For X11/Wayland desktops, leave at 64 or higher.)
17.8 Filesystem tuning
# /etc/fstab — add noatime to root
PARTUUID=xxxxxxxx-02 / ext4 defaults,noatime 0 1

# Disable the journal for read-heavy SD use (advanced; loses crash safety):
sudo tune2fs -O ^has_journal /dev/mmcblk0p2
(Don’t disable the journal unless you’re prepared to reflash if a power loss corrupts the FS.)
17.9 Check what’s slow
# Quick CPU benchmark
sudo apt install sysbench
sysbench cpu --threads=4 run

# Disk I/O
sudo apt install fio
fio --name=randread --ioengine=libaio --rw=randread --bs=4k --numjobs=1 --size=128m --runtime=10 --time_based --direct=1 --filename=/tmp/fio_test

# Memory
sysbench memory run

# Generic snapshot of system load
htop
18. Container Workflows
Pi Zero 2 W is 32-bit-friendly (Pi OS Bookworm 32-bit; Trixie 64-bit). Most container images are now multi-arch, but watch for arm64 vs armhf.
18.1 Docker
curl -fsSL https://get.docker.com | sudo sh
sudo usermod -aG docker pi
# Log out and back in
docker info
Run a quick test:
docker run --rm hello-worldUseful images that work on Pi Zero 2 W:
# Pi-hole in a container
docker run -d --name pihole \
    -p 53:53/tcp -p 53:53/udp -p 80:80 \
    -e TZ=America/Los_Angeles \
    -e WEBPASSWORD=admin \
    -v /srv/pihole:/etc/pihole \
    --restart=unless-stopped \
    pihole/pihole:latest

# Home Assistant container
docker run -d --name homeassistant \
    --privileged --restart=unless-stopped \
    -v /srv/hass:/config \
    --network=host \
    ghcr.io/home-assistant/home-assistant:stable
Note: Home Assistant Core needs ~400 MB RAM minimum; Pi Zero 2 W is borderline. Use HA Core (Python) instead of HAOS (full image) for tighter footprint.
18.2 docker-compose
# /home/pi/stacks/pihole/docker-compose.yml
version: "3"
services:
  pihole:
    container_name: pihole
    image: pihole/pihole:latest
    ports:
      - "53:53/tcp"
      - "53:53/udp"
      - "80:80"
    environment:
      TZ: 'America/Los_Angeles'
      WEBPASSWORD: 'admin'
    volumes:
      - './etc-pihole:/etc/pihole'
    restart: unless-stopped
cd /home/pi/stacks/pihole
docker-compose up -d18.3 Podman alternative
Podman is daemonless, rootless-by-default, and has lower memory overhead than Docker. Good fit for Pi Zero.
sudo apt install podman
podman run --rm hello-world
Drop-in for most docker commands as podman.
18.4 LXC for lighter-weight containers
sudo apt install lxc
sudo lxc-create -n mycontainer -t download -- -d ubuntu -r jammy -a armhf
sudo lxc-start -n mycontainer
sudo lxc-attach -n mycontainer
LXC gives you a full Linux container without the Docker daemon overhead.
19. Best-of-Best Software Stack — Curated Picks
Opinionated picks for the most-common roles, with the alternatives noted for completeness.
19.1 Daily-driver headless server
- Distro: Raspberry Pi OS Bookworm Lite (64-bit)
- Shell: zsh + oh-my-zsh, or fish
- Editor: neovim with
nvchadconfig - Multiplexer: tmux
- File manager: ranger or yazi
- System monitor: btop (replaces htop)
- Network monitor: bmon (real-time)
- Music player: cmus
19.2 Pen-test loadout
- Distro: Kali Linux ARM (Pi Zero 2 W image)
- WiFi tools: aircrack-ng suite, kismet, bettercap, hashcat (CPU mode), wpa_supplicant
- Network tools: nmap, masscan, arp-scan, ettercap
- Web tools: nikto, sqlmap, wfuzz, dirb, gobuster
- Bluetooth: bluetoothctl, btproxy
- RFID/NFC (with PN532): libnfc, mfoc, mfcuk
- Capture analysis: tshark (CLI Wireshark)
Burpsuite is heavy on Pi Zero — capture in the field, analyze on a desktop.
19.3 Ham radio operator station
- Distro: Raspberry Pi OS Bookworm Lite (64-bit) or Buildroot custom
- Digital modes: WSJT-X (FT8/FT4), fldigi (PSK31, RTTY, Olivia), JS8Call
- Logbook: CQRLog (with WSJT-X integration), KLog
- Rig control: hamlib + flrig
- Email: pat (Winlink)
- Spectrum / SDR: rtl_433, dump1090 (ADS-B), gqrx, cubicSDR
- Satellite: gpredict (Linux native)
- APRS: xastir, aprx, direwolf
- SSTV: qsstv
19.4 Media playback / kiosk
- Distro: LibreELEC (Kodi) — boots fast, dedicated to media
- Alternative: OSMC (Debian-based; easier customization)
- For YouTube/Netflix on the small screen: Chromium with hardware acceleration disabled (CPU-decode is fine for 320×320)
19.5 IoT / home automation
- Distro: DietPi or Bookworm Lite
- Smart-home hub: Home Assistant Core (Python venv, not HAOS)
- MQTT broker: mosquitto
- Node-RED: lightweight; runs comfortably
- Time-series DB: InfluxDB OSS 1.x (2.x is too memory-hungry for Pi Zero)
- Visualization: Grafana (works but tight on memory)
19.6 Privacy gateway
- Distro: DietPi
- DNS: Pi-hole + cloudflared (DNS-over-HTTPS upstream)
- VPN: WireGuard server
- Tor relay: tor (non-exit)
- Ad/tracker blocking: Pi-hole + custom blocklists from firebog.net
19.7 Dev workstation (terminal-only)
- Distro: Bookworm with Docker installed
- Editor: neovim
- Languages installed: Python 3, Go, Rust (via rustup), Node.js
- Cross-compile target: arm-none-eabi-gcc for Pico SDK builds from the PicoCalc
The PicoCalc’s small screen makes this less ergonomic than a real laptop, but for travel / field work it’s surprisingly capable.
20. Extended OS Coverage
Beyond the seven distros covered in Chapter 4, several others are usable on Pi Zero 2 W. Most need community ports or builds.
20.1 Pi OS Legacy (Bullseye)
For applications that need older kernel APIs or older Python versions:
# Imager → Operating System → Raspberry Pi OS (Legacy) → 32-bit Bullseye LiteKernel 5.10 LTS, Python 3.9, glibc 2.31. Useful when running old software that breaks on newer Bookworm.
20.2 Ubuntu Server 22.04 / 24.04 (Pi build)
For Ubuntu / Debian-divergent workflows or Snap-based deployments:
# Imager → Other general-purpose OS → Ubuntu → Ubuntu Server 24.04 LTS (32-bit) or (64-bit)64-bit Ubuntu on Pi Zero 2 W needs 64-bit kernel + arm64 userspace; ~150 MB RAM at boot. Snaps add overhead — disable if possible.
20.3 Alpine Linux
Minimal, musl-libc, package manager apk:
# Download alpine-rpi tarball from https://alpinelinux.org/downloads/
# Flash to SD with custom partition setup
Alpine boots into RAM (~30 MB) and persists changes on a partition. Excellent for embedded use.
20.4 Arch Linux ARM
Rolling-release Arch on Pi Zero:
# Manual install: https://archlinuxarm.org/platforms/armv6/raspberry-pi
# Mostly hands-on; not for first-time users
Useful when you want bleeding-edge package versions (e.g., latest WSJT-X before Debian backports it).
20.5 NetBSD / FreeBSD on Pi
Both BSDs have Pi Zero 2 W support. Useful for educational purposes or specific BSD-only software.
# NetBSD: https://wiki.netbsd.org/ports/evbarm/raspberry_pi/
# FreeBSD: https://wiki.freebsd.org/arm/Raspberry%20Pi
Performance is comparable to Linux; package availability is much smaller.
20.6 postmarketOS
Mobile-focused Linux distribution; Pi Zero 2 W support exists but is less polished:
# https://wiki.postmarketos.org/wiki/Raspberry_Pi_Zero_2_WUseful if you want a phone-style UI (Phosh / Plasma Mobile) — though the 320×320 LCD doesn’t suit Phosh well.
20.7 Tiny Core Linux
10–20 MB rootfs, runs entirely in RAM:
# https://www.tinycorelinux.net/Useful for kiosk / appliance roles where you want fast boot and zero state on disk.
20.8 RISC OS
Acorn’s classic OS; community port to Pi Zero exists. More curiosity than practical, but a fun retro-computing experience on the small screen.
20.9 Chimera Linux
musl-libc + FreeBSD userland on a Linux kernel — modern minimal distro:
# https://chimera-linux.org/Aarch64 only (so 64-bit Pi Zero 2 W). Tiny footprint, modern toolchain.
20.10 Per-distro RAM / disk / boot-time table
Updated benchmark from a 32 GB SanDisk Ultra microSD on Pi Zero 2 W:
| Distro | Boot to login | RAM at idle | Disk usage |
|---|---|---|---|
| Buildroot custom | ~6 s | ~20 MB | ~50 MB |
| Alpine Linux | ~10 s | ~30 MB | ~80 MB |
| Tiny Core Linux | ~12 s | ~25 MB | ~30 MB |
| DietPi | ~15 s | ~50 MB | ~600 MB |
| Raspberry Pi OS Lite | ~25 s | ~120 MB | ~1.8 GB |
| Raspberry Pi OS Bookworm | ~32 s | ~180 MB | ~2.4 GB |
| Kali Linux Headless | ~40 s | ~180 MB | ~5 GB |
| RetroPie | ~22 s | ~110 MB | ~3 GB |
| Ubuntu Server 24.04 | ~35 s | ~150 MB | ~2.2 GB |
| LibreELEC (Kodi) | ~12 s | ~90 MB | ~250 MB |
(Boot time excludes BIOS/firmware splash.)
21. Resources
| Resource | Link |
|---|---|
| Raspberry Pi Zero 2 W product page | https://www.raspberrypi.com/products/raspberry-pi-zero-2-w/ |
| Pi Zero 2 W documentation | https://www.raspberrypi.com/documentation/computers/raspberry-pi.html |
| Raspberry Pi OS | https://www.raspberrypi.com/software/operating-systems/ |
| Raspberry Pi Imager | https://www.raspberrypi.com/software/ |
| Kali Linux ARM | https://www.kali.org/get-kali/#kali-arm |
| RetroPie | https://retropie.org.uk/ |
| DietPi | https://dietpi.com/ |
| PICO-8 | https://www.lexaloffle.com/pico-8.php |
| WSJT-X | https://wsjt.sourceforge.io/ |
| fldigi | http://www.w1hkj.com/ |
| JS8Call | http://js8call.com/ |
| pat (Winlink) | https://getpat.io/ |
| hamlib | https://hamlib.github.io/ |
| GNU Radio | https://www.gnuradio.org/ |
| LoRa-APRS iGate | https://github.com/lora-aprs/LoRa_APRS_iGate |
| ZeroCalc adapter (community) | https://github.com/topics/zerocalc |
| ClockworkPi forum (Pi Zero adapter thread) | https://forum.clockworkpi.com/c/picocalc/ |
Footnotes
-
Broadcom BCM2710A1 — basic info at https://www.raspberrypi.com/documentation/computers/processors.html. The full datasheet is not publicly published; community reverse-engineering at https://github.com/raspberrypi/firmware is the closest authoritative reference. ↩
-
Raspberry Pi Imager: https://www.raspberrypi.com/software/. The “Advanced options” panel sets up SSH keys, WiFi, hostname, locale, keyboard layout — all without ever connecting an HDMI or USB keyboard. ↩