DSTIKE Hackheld · Volume 10
DSTIKE Hackheld Volume 10 — Writing Your Own Code I — Arduino IDE
From zero to a working custom sketch on the Hackheld — Arduino IDE setup, libraries, and the first end-to-end project
10.1 Why Arduino IDE for this device
The Arduino IDE is the friendliest path into ESP8266 development. The board manager handles toolchain installation, the library manager handles dependencies, and the upload button handles the bootloader dance. For learning the chip and the firmware patterns, it’s the right starting tool.
Vol 11 covers the PlatformIO alternative, which is the production-grade option once you outgrow the IDE.
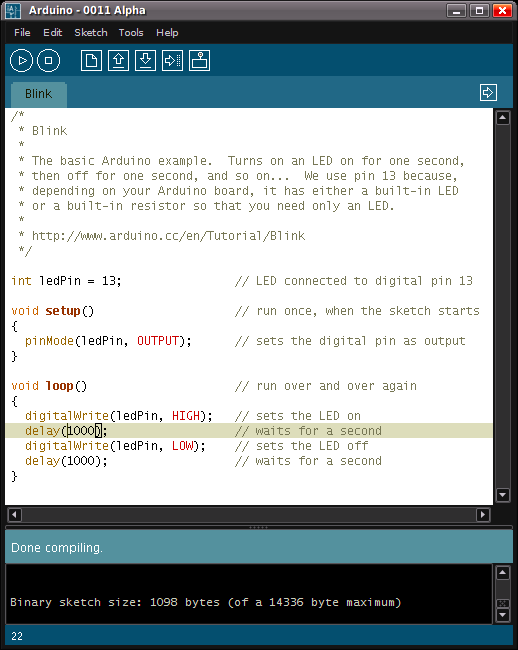
Figure 10.1 — Arduino IDE. Photo via Wikimedia Commons (CC-licensed; see photo_credits.txt).
10.2 Installation
Download the latest Arduino IDE 2.x from https://www.arduino.cc/en/software. Install per OS:
Table 1 — Download the latest Arduino IDE 2.x from <https://www.arduino.cc/en/software>. Install per OS
| OS | Notes |
|---|---|
| Windows | Run the installer; allow USB driver install when prompted; reboot helps |
| macOS | Open the .app from Applications; allow it in System Settings → Security & Privacy when first launched |
| Linux | AppImage or .deb / .rpm. The IDE needs dialout group membership: sudo usermod -aG dialout $USER then log out + back in |
After install, launch the IDE. You should see a blank sketch editor with two functions:
void setup() {
  // put your setup code here, to run once:
}

void loop() {
  // put your main code here, to run repeatedly:
}
This is the Arduino-framework convention. setup() runs once at boot; loop() runs forever after.
10.3 Adding the ESP8266 core
Out of the box, Arduino IDE supports only the Arduino-branded boards (Uno, Mega, Leonardo, etc.). The Hackheld is an ESP8266 — different silicon vendor, different toolchain.
To add ESP8266 support:
- Arduino IDE → File → Preferences (Windows/Linux) or Arduino IDE → Settings (macOS).
- In Additional boards manager URLs, paste:
If you already have other URLs there, separate with commas.https://arduino.esp8266.com/stable/package_esp8266com_index.json - Click OK.
- Tools → Board → Boards Manager.
- Search “esp8266” → install the package “esp8266 by ESP8266 Community”. This is ~150 MB; takes a few minutes.
After install, you should see ESP8266 boards in the Tools → Board menu.
10.4 Board / port / settings
For the Hackheld:
- Board: ESP8266 Boards → “Generic ESP8266 Module”
- Upload Speed: 115200 (raise to 460800 once stable)
- CPU Frequency: 80 MHz
- Flash Size: “4MB (FS:2MB OTA:~1019KB)” — matches Spacehuhn’s partition convention
- Flash Mode: DIO (the only mode that works on this module)
- Reset Method: “nodemcu” (uses DTR+RTS auto-reset via the CH340)
- Crystal Frequency: 26 MHz
- VTables: “Flash”
- Exceptions: “Disabled (new aborts on oom)”
- Erase Flash: “Only Sketch” (preserves SPIFFS — if you want to wipe SPIFFS, change this to “All Flash Contents”)
- SSL Support: “All SSL ciphers (most compatible)” — only matters if you write HTTPS code
- Port: pick the CH340 COM port
10.5 Libraries — what to install
For productive Hackheld development, install these via Tools → Manage Libraries:
Table 2 — For productive Hackheld development, install these via Tools → Manage Libraries
| Library | What it gives you |
|---|---|
| Adafruit GFX Library | Generic graphics primitives (lines, rectangles, text) used by the OLED library |
| Adafruit SSD1306 | The 0.96″ OLED driver |
| Bounce2 | Debounced button reading |
| ArduinoJson | JSON parsing / serialization (for the eventual web UI) |
| ESP Async TCP | Async TCP socket library (dependency of the async web server) |
| ESPAsyncWebServer | Async web server — vastly better than the built-in ESP8266WebServer for any non-trivial UI |
| PubSubClient (optional) | MQTT client, for IoT integration |
After install, IDE → Sketch → Include Library shows the installed libraries. Pick from there to add #include lines automatically, or just type them.
10.6 Sketch 1 — Hello World
The simplest test — serial-only, no hardware-specific code:
void setup() {
    Serial.begin(115200);
    delay(500);
    Serial.println("\n[hackheld] hello world");
    Serial.printf("[hackheld] chip ID: 0x%08X\n", ESP.getChipId());
    Serial.printf("[hackheld] free heap: %u bytes\n", ESP.getFreeHeap());
    Serial.printf("[hackheld] flash size: %u bytes\n", ESP.getFlashChipRealSize());
}

void loop() {
    static uint32_t counter = 0;
    Serial.printf("[hackheld] tick %u — heap %u\n", counter++, ESP.getFreeHeap());
    delay(1000);
}
Sketch → Upload. On success, open Tools → Serial Monitor at 115200. You should see the boot banner and a counter incrementing once per second.
What this proves: toolchain is installed, board is correctly identified, USB-to-serial works, the chip runs your code.
Heap reading should be in the ~40000–45000 range — confirms the chip has plenty of RAM for custom work before you’ve added any libraries.
10.7 Sketch 2 — OLED Hello World
Drive the 128×64 SSD1306 OLED. Hardware-specific because we need to know the I²C pins.
#include <Wire.h>
#include <Adafruit_GFX.h>
#include <Adafruit_SSD1306.h>

#define SCREEN_WIDTH  128
#define SCREEN_HEIGHT 64
#define OLED_RESET    -1     // No dedicated reset pin on this hardware
#define OLED_ADDR     0x3C   // Default for SSD1306 modules

// Hackheld I²C: SDA on GPIO 4, SCL on GPIO 5 (Arduino-ESP8266 defaults)
#define I2C_SDA 4
#define I2C_SCL 5

Adafruit_SSD1306 display(SCREEN_WIDTH, SCREEN_HEIGHT, &Wire, OLED_RESET);

void setup() {
    Serial.begin(115200);
    delay(500);
    Serial.println("\n[hackheld] booting");

    Wire.begin(I2C_SDA, I2C_SCL);
    if (!display.begin(SSD1306_SWITCHCAPVCC, OLED_ADDR)) {
        Serial.println("[hackheld] SSD1306 init FAILED");
        for (;;) delay(1000);   // Hang
    }

    display.clearDisplay();
    display.setTextSize(1);
    display.setTextColor(SSD1306_WHITE);
    display.setCursor(0, 0);
    display.println("Hackheld custom!");
    display.println("");
    display.printf("Heap: %u B\n", ESP.getFreeHeap());
    display.printf("Up: %u s\n", (uint32_t)(millis() / 1000));
    display.display();
}

void loop() {
    static uint32_t last = 0;
    if (millis() - last > 1000) {
        last = millis();
        display.fillRect(0, 24, SCREEN_WIDTH, 16, SSD1306_BLACK);  // clear bottom rows
        display.setCursor(0, 24);
        display.printf("Heap: %u B\n", ESP.getFreeHeap());
        display.printf("Up: %u s\n", (uint32_t)(millis() / 1000));
        display.display();
    }
}
On upload + boot, the OLED should show:
Hackheld custom!

Heap: 42816 B
Up: 5 s
The uptime counter updates once per second.
What this proves: I²C bus works on GPIO 4/5; the OLED is at 0x3C; the Adafruit library compiles cleanly; you can draw text and refresh the display.
If the OLED stays black: try changing OLED_ADDR from 0x3C to 0x3D (the alternate address). If still nothing, the I²C pins might be different on the specific Hackheld revision — the right answer is to put a multimeter on the OLED’s SDA/SCL pads and trace them back to the ESP8266 GPIO header.
10.8 Sketch 3 — Buttons + display menu
A 3-item menu navigable with UP/DOWN/A buttons.
#include <Wire.h>
#include <Adafruit_GFX.h>
#include <Adafruit_SSD1306.h>
#include <Bounce2.h>

#define SCREEN_WIDTH  128
#define SCREEN_HEIGHT 64
#define OLED_RESET    -1
#define OLED_ADDR     0x3C

#define BTN_UP    12
#define BTN_DOWN  13
#define BTN_A     14

Adafruit_SSD1306 display(SCREEN_WIDTH, SCREEN_HEIGHT, &Wire, OLED_RESET);

Bounce btnUp = Bounce();
Bounce btnDown = Bounce();
Bounce btnA = Bounce();

const char* menu[] = {
    "Wi-Fi Scan",
    "Beacon Spam",
    "Settings"
};
const int menuLen = 3;
int selected = 0;

void renderMenu() {
    display.clearDisplay();
    display.setTextSize(1);
    display.setCursor(0, 0);
    display.println("Hackheld Menu");
    display.drawLine(0, 9, SCREEN_WIDTH, 9, SSD1306_WHITE);
    for (int i = 0; i < menuLen; i++) {
        display.setCursor(0, 14 + i * 12);
        display.print(i == selected ? "> " : "  ");
        display.println(menu[i]);
    }
    display.display();
}

void setup() {
    Serial.begin(115200);
    Wire.begin(4, 5);
    display.begin(SSD1306_SWITCHCAPVCC, OLED_ADDR);

    btnUp.attach(BTN_UP, INPUT_PULLUP);
    btnDown.attach(BTN_DOWN, INPUT_PULLUP);
    btnA.attach(BTN_A, INPUT_PULLUP);
    btnUp.interval(20);
    btnDown.interval(20);
    btnA.interval(20);

    renderMenu();
}

void loop() {
    btnUp.update();
    btnDown.update();
    btnA.update();

    if (btnUp.fell() && selected > 0) {
        selected--;
        renderMenu();
    }
    if (btnDown.fell() && selected < menuLen - 1) {
        selected++;
        renderMenu();
    }
    if (btnA.fell()) {
        Serial.printf("[hackheld] selected: %s\n", menu[selected]);
        display.clearDisplay();
        display.setCursor(0, 28);
        display.print("Selected: ");
        display.println(menu[selected]);
        display.display();
        delay(1500);
        renderMenu();
    }
}
What this proves: button library works; pin assignments for UP / DOWN / A are correct (or need adjustment — change the #defines to match your unit’s actual pinout); display + buttons coexist on the bus.
10.9 Sketch 4 — Wi-Fi scanner with OLED output
#include <ESP8266WiFi.h>
#include <Wire.h>
#include <Adafruit_GFX.h>
#include <Adafruit_SSD1306.h>

Adafruit_SSD1306 display(128, 64, &Wire, -1);

void setup() {
    Serial.begin(115200);
    Wire.begin(4, 5);
    display.begin(SSD1306_SWITCHCAPVCC, 0x3C);
    display.clearDisplay();
    display.setTextSize(1);
    display.setTextColor(SSD1306_WHITE);

    WiFi.mode(WIFI_STA);
    WiFi.disconnect();
}

void loop() {
    display.clearDisplay();
    display.setCursor(0, 0);
    display.println("Scanning...");
    display.display();

    int n = WiFi.scanNetworks();

    display.clearDisplay();
    display.setCursor(0, 0);
    display.printf("Found %d APs\n", n);

    int shown = 0;
    for (int i = 0; i < n && shown < 4; i++) {
        // Show only APs with RSSI > -80 (filter weak ones)
        if (WiFi.RSSI(i) > -80) {
            display.printf("%3d %s\n", WiFi.RSSI(i), WiFi.SSID(i).c_str());
            shown++;
        }
    }
    display.display();

    delay(10000);
}
What this proves: the Wi-Fi stack works; you can call into it for scans; results integrate with the display.
This is, in essence, a minimal Spacehuhn Deauther — minus the attack engines. You can build everything from here.
10.10 Sketch 5 — minimal web UI
The web-UI-from-scratch example. Uses ESPAsyncWebServer for a non-blocking server.
#include <ESP8266WiFi.h>
#include <ESPAsyncTCP.h>
#include <ESPAsyncWebServer.h>

const char* ssid = "MyHackheld";
const char* password = "supersecret";

AsyncWebServer server(80);

const char index_html[] PROGMEM = R"rawliteral(
<!DOCTYPE html>
<html><head><title>Hackheld</title>
<style>
body { font-family: monospace; background: #000; color: #f33; padding: 20px; }
h1 { font-size: 2em; }
a { display: block; padding: 10px; border: 1px solid #f33; margin: 5px 0; color: #f33; text-decoration: none; }
a:hover { background: #f33; color: #000; }
</style></head><body>
<h1>HACKHELD</h1>
<a href="/scan">Scan Wi-Fi</a>
<a href="/info">Info</a>
</body></html>
)rawliteral";

void setup() {
    Serial.begin(115200);

    WiFi.softAP(ssid, password);
    Serial.printf("[hackheld] AP: %s, IP %s\n", ssid, WiFi.softAPIP().toString().c_str());

    server.on("/", HTTP_GET, [](AsyncWebServerRequest *req) {
        req->send_P(200, "text/html", index_html);
    });

    server.on("/scan", HTTP_GET, [](AsyncWebServerRequest *req) {
        int n = WiFi.scanNetworks();
        String out = "<pre>Found " + String(n) + " APs:\n";
        for (int i = 0; i < n; i++) {
            out += String(WiFi.RSSI(i)) + " dBm " + WiFi.SSID(i) + "\n";
        }
        out += "</pre><a href=/>back</a>";
        req->send(200, "text/html", out);
    });

    server.on("/info", HTTP_GET, [](AsyncWebServerRequest *req) {
        String out = "<pre>";
        out += "Chip ID: 0x" + String(ESP.getChipId(), HEX) + "\n";
        out += "Heap: " + String(ESP.getFreeHeap()) + " bytes\n";
        out += "Up: " + String(millis() / 1000) + " s\n";
        out += "</pre><a href=/>back</a>";
        req->send(200, "text/html", out);
    });

    server.begin();
}

void loop() {
    // Async server handles requests in background; nothing to poll
}
Connect from your phone → SSID MyHackheld, password supersecret → browse to http://192.168.4.1. You see the (extremely minimal) HACKHELD page; click Scan Wi-Fi or Info to see the dynamic content.
What this proves: full web-UI stack works from scratch with about 50 lines of code.
From here, you have the building blocks for any custom firmware on the Hackheld — Vol 11 takes this further with async patterns, persistent storage, and OTA updates.
10.11 Common Arduino-IDE pitfalls
Table 3 — 11. Common Arduino-IDE pitfalls
| Symptom | Cause | Fix |
|---|---|---|
| ”Failed to connect to ESP8266” | Not in bootloader mode | Do the FLASH+RESET dance; or try a different USB cable |
| ”Sketch too big” | Code + libraries exceed 1 MB sketch partition | Tools → Flash Size → reduce OTA size; or shrink code |
| ”ld returned 1 exit status” | Library version conflict | Tools → Manage Libraries → check for duplicate Adafruit_GFX versions; remove old ones |
| Chip boots but display stays black | Wrong I²C pins, wrong address, missing pull-ups | Try address 0x3D; verify SDA/SCL with multimeter; check that OLED is powered (3.3 V on the OLED’s VCC pin) |
| Wi-Fi scan returns 0 networks | RF antenna disconnected; module damaged | Cross-check against the stock Spacehuhn firmware — if that works, the antenna is OK and the issue is in your code |
| Heap drops fast | String fragmentation; large local-scope buffers | Use char[] + snprintf; mark constants as PROGMEM |
| ”WatchdogTimer triggered” | Tight loop without yield() or delay() | Sprinkle yield() in long-running loops; the Wi-Fi stack needs frequent yields |
10.12 What’s next
→ Vol 11 — Writing Your Own Code II — PlatformIO + advanced patterns — PlatformIO for production-grade development, async patterns, OTA updates, a custom Spacehuhn fork, and sample apps in apps/ you can build on.
Comments (0)