SquachWatch · Volume 5
SquachWatch Volume 5 — Flashing it
The web flasher end to end, drivers, the white-screen problem, flashing by hand, and signed over-the-air updates with rollback
5.1 Three ways onto the board
Firmware reaches a SquachWatch three ways: the browser-based web flasher at squachwatch.com (the default, and the project’s recommended path), a PlatformIO build from source over USB (Vol 6), and over-the-air updates once a board is already running SquachWatch. The first install must be over USB — a factory CYD has nothing on it that can accept an OTA image.
                     Is SquachWatch already on the board?
                        │                          │
                       no                         yes
                        │                          │
           Changing the code?               Settings → SYSTEM →
              │            │                UPDATE FIRMWARE
             no           yes                  │       │       │
              │            │                WiFi     BLE     USB
              ▼            ▼               (all)   (S3 only) (always works)
        WEB FLASHER   PlatformIO              │       │       │
        squachwatch   pio run -e <env>        ▼       ▼       ▼
        .com          -t upload           signed image → spare slot →
        (desktop      (Vol 6)             30 s probation → confirm or roll back
        browser)
Table 1 — 1. Three ways onto the board
| Route | Needs | Preserves settings? | Notes |
|---|---|---|---|
| Web flasher | Desktop browser with Web Serial; USB data cable | Yes, since it stopped serving the merged image | Always matches the newest release; older releases selectable |
PlatformIO -t upload | Toolchain (~200 MB first build) | Yes — writes only bootloader, partition table and app | Only route for unreleased builds (cyd-gps, freenove-s3-40, bench builds) |
| UPDATE OVER WIFI | A saved or typed Wi-Fi network that can reach squachwatch.com | Yes | Every board |
| UPDATE OVER BLUETOOTH (BETA) | Chrome/Edge desktop or Chrome on Android, at squachwatch.com/update | Yes | S3 boards only; CYDs dropped it in v1.22.0 |
| UPDATE SQUAD | SquachMesh squad in range, REMOTE UPDATE on | Yes | One board pulls the rest along (Vol 9) |
5.2 The web flasher, step by step
5.2.1 Browser requirements
The flasher is built on esp-web-tools (the <esp-web-install-button> element) and so needs Web Serial over HTTPS. The page’s own text: “Flashing needs Web Serial — Firefox, Chrome, Edge or another Chromium browser, on a computer. Phones and tablets can’t do it at all, whatever browser they’re running.” If the CONNECT & INSTALL button reports that the browser cannot flash, switching to a Chromium browser on a desktop is the fix.
5.2.2 The three steps on the page
  squachwatch.com
  ┌──────────────────────────────────────────────────────────────┐
  │ FLASH YOUR DETECTOR             latest firmware: v1.x.y      │
  │                                                              │
  │ 1  PICK YOUR BOARD                                           │
  │    Code on the back (optional): [ ESP32-2432S028R      ]     │
  │      → "That's the 2.8" CYD. If the screen goes white,..."   │
  │    Or pick from the list:  [ 2.8" CYD · ST7789 ...   ▼ ]     │
  │                                                              │
  │ 2  INSTALL         [ CONNECT & INSTALL ]                     │
  │    ▸ Advanced: older versions, overclock                     │
  │        Firmware version [ v1.36.0 ▼ ]   [x] 80 MHz screen    │
  │                                                              │
  │ 3  AFTER INSTALLING                                          │
  │    [ IDENTIFY MY BOARD ]  [ SET TIME & ZONE ]                │
  │    [ DOWNLOAD WIGLE FILE ]                                   │
  │                                                              │
  │ Board not showing up as a port? CH340 driver:                │
  │   Windows · macOS · Linux                                    │
  └──────────────────────────────────────────────────────────────┘
        (layout redrawn from web-flasher/index.html, not a screenshot)
The install procedure the page gives is four lines: plug the board in over USB; click Connect & Install; “Pick the right serial port from the browser’s popup”; “Click Install and leave it be — don’t unplug until it says done.”
[FIGURE SLOT — Vol 5 §2] Screenshot of squachwatch.com in a desktop browser with the 2.8” CYD ST7789 entry selected, the Advanced panel expanded showing the version selector and the 80 MHz checkbox.
[FIGURE SLOT — Vol 5 §2] The browser’s Web Serial port-picker popup listing a CH340 port (“USB-SERIAL CH340” or
/dev/ttyUSB0), over the flasher page.
5.2.3 The board list
The list as served by the flasher, with the manifest each entry loads and the PlatformIO environment behind it:
Table 2 — The list as served by the flasher, with the manifest each entry loads and the PlatformIO environment behind it
| Flasher entry | Manifest | PlatformIO env | Status |
|---|---|---|---|
| 2.8” CYD · ST7789 — ESP32-2432S028R, the usual screen | manifest-cyd.json / -cyd-fast | cyd / cyd-fast | Release; 80 MHz ticked by default since v1.32.0 |
| 2.8” CYD · ILI9341 — older screen | manifest-cyd-ili9341.json | cyd-ili9341 | Release; 80 MHz “usually can’t keep up” |
| 3.2” resistive — Freenove FNK0103 | manifest-freenove32.json | freenove32 | Release |
| 3.2” capacitive — ESP32-2432S032C (NEW) | manifest-cyd32c.json | cyd32c | Release; already 80 MHz |
| 3.5” resistive — ESP32-3248S035R | manifest-cyd35-fast.json | cyd35-fast | BETA; 80 MHz only |
| 3.5” capacitive — ESP32-3248S035C | manifest-cyd35c-fast.json | cyd35c-fast | BETA; 80 MHz only |
| AWOK 2.4” — ESP32 Marauder v6.1 | manifest-awok.json | awok | Release; no overclock offered |
| RL Phantom 2.4” — ESP32-2432S024R | manifest-rlphantom-r.json | rlphantom-r | Release; resistive only |
| Freenove ESP32-S3 2.8” — FNK0104 | manifest-freenove-s3.json | freenove-s3 | BETA |
| Freenove ESP32-S3 3.5” — FNK0104N | manifest-freenove-s3-35.json | freenove-s3-35 | BETA |
| Elecrow CrowPanel Advance 7.0 | manifest-crowpanel7.json | crowpanel7 | BETA |
| LilyGo T-Deck Plus | manifest-tdeck-plus.json | tdeck-plus | BETA |
| RockBase NM-CYD-C5 2.8” | manifest-nm-cyd-c5.json | nm-cyd-c5 | BETA |
| Marauder V8 | manifest-marauder-v8.json | marauder-v8 | BETA |
| M5Stack StickS3 | manifest-sticks3.json | sticks3 | BETA |
| M5Stack Cardputer ADV | manifest-cardputer-adv.json | cardputer-adv | BETA |
| LilyGo T-Watch S3 / S3 Plus | manifest-twatch-s3.json | twatch-s3 | BETA; clock set automatically after install |
5.2.4 The board finder
Typing the code printed on the board into the box selects the entry. The matcher is a list of regular expressions over the upper-cased, space-stripped input; a selection of what it recognises:
Table 3 — Typing the code printed on the board into the box selects the entry. The matcher is a list of regular expressions over the upper-cased, space-stripped input; a selection of what it recognises
| Typed code (pattern) | Selects | What it says |
|---|---|---|
2432S028 | 2.8” CYD ST7789 | Untick 80 MHz first if white; then try ILI9341 |
E32R28 / “32E” + 2.8 | 2.8” CYD ILI9341 build | The ESP32-32E 2.8” (E32R28T); leave overclock unticked |
E32R35 / “32E” + 3.5 | 3.5” resistive | The ESP32-32E 3.5” (E32R35T) |
2432S032C | 3.2” capacitive | |
FNK0103, 2432S032R | 3.2” resistive | |
3248S035C / 3248S035 | 3.5” capacitive / resistive | |
2432S024R | RL Phantom | |
2432S024C | nothing | ”The capacitive 2.4” isn’t on the flasher yet.” |
FNK0104N / FNK0104 | Freenove S3 3.5” / 2.8” | |
T-WATCH, T-DECK, STICKS3/K150, CARDPUTER ADV | the matching BETA board | |
CARDPUTER (no ADV) | nothing | Only the ADV is supported |
| anything else | nothing | ”Not on the list yet. Tell us what it is on GitHub” |
5.2.5 Advanced: older versions and the 80 MHz box
The Firmware version selector is populated from a versions.json on the site and appears only when there is something to roll back to; its hint reads “On the latest build and stuck in a boot loop? Flash the one before it.” A board added in a later release reports “this board is not in that version — pick a newer one” against an older version.
The 80 MHz screen (faster) checkbox swaps the manifest for the -fast build: “About 34 frames a second instead of 20. If the screen stays white or shows torn lines, untick this and flash again.” In platformio.ini the -fast environments differ from their stock twins by exactly one flag, -DSPI_FREQUENCY=80000000, which overrides the header’s 40 MHz default; the comment calls it “above the panel’s rated write clock” and explains why it is a reflash rather than a menu setting: undoing it from a menu would mean navigating “a display that may be the thing that broke.”
5.2.6 What actually gets written
Each manifest lists four parts at fixed offsets — never a single merged image:
Table 4 — Each manifest lists four parts at fixed offsets — never a single merged image
| Part | ESP32 (CYDs) | ESP32-S3 | ESP32-C5 |
|---|---|---|---|
| Bootloader | 0x1000 | 0x0 | 0x2000 |
| Partition table | 0x8000 | 0x8000 | 0x8000 |
| otadata / boot_app0 | 0xE000 | 0xE000 | 0xE000 |
| Application | 0x10000 | 0x10000 | 0x10000 |
   ESP32 4 MB flash map (partitions_ota.csv)          written by the flasher?
   0x001000  bootloader                                yes
   0x008000  partition table                           yes
   0x009000  nvs        20 KB  settings, PIN, squad    NO  ← survives
   0x00E000  otadata     8 KB  which slot boots        yes
   0x010000  app0     1.9 MB                           yes (app image)
   0x1F0000  app1     1.9 MB  OTA landing slot         no
   0x3D0000  (free)  128 KB                            no
   0x3F0000  coredump  64 KB  crash summary            no
The gap at 0x9000 is the point. The platformio.ini comment records the bug this layout fixes: the flasher once served a single merged image “padded with 0xFF across the gaps between those regions, and one of those gaps is NVS, so flashing it at offset 0 erased settings on every update.” The manifests also set "new_install_prompt_erase": true, which in esp-web-tools offers an optional full erase on a first install.
Note — A full erase, a merged
factory.binat 0x0, or any tool that wipes the chip will take the touch calibration, colour-check result, PIN and duress PIN, saved Wi-Fi networks, SquachMesh phrase and Squachy’s stats with it. The symptom is a board that runs the five-target calibration again “as though it were brand new.”
5.3 After installing: the three tools
Step 3 of the flasher holds three buttons that open the serial port again after the install. All three need a desktop browser with Web Serial and are disabled otherwise.
Table 5 — 3. After installing: the three tools
| Button | What it does | Mechanism |
|---|---|---|
| IDENTIFY MY BOARD | Reports the chip and its MAC | Loads [email protected], connects at 115200, prints IDENTIFIED: <chip description> · MAC <mac>, then resets the board |
| SET TIME & ZONE | Sends the computer’s clock and time zone | Writes TIME <epoch seconds> and ZONE <name> to the console at 2,000,000 baud, after waiting for the board to boot |
| DOWNLOAD WIGLE FILE | Saves a T-Watch S3 Plus wardrive log as a WiGLE upload file | Opens the watch’s native-USB port (filtered to Espressif’s USB vendor ID 0x303A) at 115200, sends a WIGLE console command and saves what comes back, for upload at wigle.net/uploads |
5.3.1 Identify My Board — what it can and cannot tell
The button’s caption says it “Reads the board over USB and says which build it runs,” but the code reads the chip type and the factory MAC through the ROM bootloader — it reports silicon, not the firmware build. It distinguishes an ESP32 from an S3 or a C5; it cannot tell an ST7789 batch from an ILI9341 batch, because both are the same ESP32.
5.3.2 Set Time & Zone
The 2.8” CYD has no RTC battery and never joins a network to scan, so the clock comes from one of: an NTP round trip during the boot update check (only with a saved network), this button, a squad member’s hello, or GPS on the GPS builds. What the button sets lasts as follows: “The zone is kept for good; the clock lasts until the board is unplugged, and a saved WiFi network puts it back at every boot. A T-Watch has its clock set for it after installing, and keeps the time from then on, even through a flat battery.” Until the clock is trusted, SD rows go to squachwatch-nodate.log (Vol 4 §5.2).
The same two commands can be typed by hand at 2,000,000 baud: TIME <epoch> and, for example, ZONE US EASTERN.
5.4 USB drivers and ports
Table 6 — 4. USB drivers and ports
| Board family | USB bridge | Console baud | Driver notes |
|---|---|---|---|
| 2.8” / 3.2” / 3.5” CYDs, RL Phantom | CH340-family (some CYDs CP2102) | 2,000,000 | WCH CH340 driver links on the flasher for Windows, macOS, Linux |
| AWOK 2.4” | CP210x | 921,600 | ”AWOK’s CP210x garbles at 2000000” |
| ESP32-S3 boards (T-Watch, StickS3, Cardputer ADV, Freenove S3, T-Deck Plus) | Native USB (CDC on boot) | 115,200 | No bridge driver; ARDUINO_USB_CDC_ON_BOOT=1 |
| CrowPanel Advance 7.0 | CH340K | 115,200 | ”macOS needs WCH’s driver”; no native USB |
| NM-CYD-C5 | Two ports: native USB and CH340 | 115,200 | Console is on the CH340 port only |
| Marauder V8 | CP210x | 115,200 |
The expected port names: USB-SERIAL CH340 on Windows, /dev/cu.usbserial-* on macOS, /dev/ttyUSB0 on Linux. The build guide notes that most operating systems already know the CH340/CP2102 and singles out Windows 7 and older as needing a manual CH340 install, while the FAQ says Windows “usually needs its driver” — in practice, install it if no port appears.
Warning — On the NM-CYD-C5, plugging into the native USB-C port instead of the CH340 port gives a board that “runs perfectly and prints nothing at all, which is indistinguishable from a board that failed to boot.” Either port will flash it.
5.5 Troubleshooting
5.5.1 Symptom table
Table 7 — 5.1 Symptom table
| Symptom | Most likely cause | Fix | Source |
|---|---|---|---|
| No serial port appears | Charge-only cable, or no CH340 driver | Data cable; install driver from the flasher’s links | docs/FAQ.md; docs/BUILD.md |
| ”Failed to connect to ESP32” | Board not entering download mode | Hold BOOT while plugging in; try another cable; check Device Manager for USB-SERIAL CH340; for PlatformIO, drop upload_speed from 921600 to 115200 | docs/BUILD.md, “Troubleshooting” |
| Solid white screen after a 2.8” flash | 80 MHz too fast for this panel, or wrong display driver | Untick 80 MHz and reflash; still white → the other 2.8” entry | docs/FAQ.md; web-flasher/index.html |
| Speckles or torn lines | 80 MHz marginal | Reflash without 80 MHz (cyd instead of cyd-fast) | docs/BUILD.md, “Which build?” |
| Colours wrong / negative | Panel inversion or RGB order | CHECK COLORS: INVERT and ORDER | docs/FAQ.md |
| Taps land in the wrong place | Calibration | CALIBRATE TOUCH; or hold a finger on the screen at boot to reset it | docs/FAQ.md |
| Boot loop on the newest release | Regression | Advanced → older version; report an issue | docs/FAQ.md |
| Detections not firing right after boot | Warm-up | Wait 5–10 s | docs/BUILD.md |
| Garbage on the serial console | Wrong baud | 2,000,000 on CYDs, 921,600 AWOK, 115,200 S3/C5 | docs/BUILD.md |
| NM-CYD-C5 silent console | Wrong USB port | Use the CH340 port | docs/NM-CYD-C5.md |
| Settings lost after flashing | Merged image at 0x0 or full erase | Use the four-part write (§6) | docs/NM-CYD-C5.md |
5.5.2 The white-screen decision tree
The single most common first-flash failure on the 2.8” board has a fixed procedure:
   2.8" CYD shows a solid white screen after flashing
                     │
                     ▼
     Was "80 MHz screen" ticked (cyd-fast)?
          │ yes                          │ no
          ▼                              ▼
   Reflash, same entry,           Reflash the OTHER 2.8" entry
   80 MHz UNTICKED (cyd)          (ST7789 ⇄ ILI9341), 80 MHz unticked
          │                              │
     still white?                   still white?
          │ yes                          │ yes
          ▼                              ▼
   Reflash "2.8" CYD · ILI9341"     Check the board code: is it really
   (cyd-ili9341), unticked          a 2432S028? (ESP32-32E boards use
                                    the ILI9341 build; see §2.4)
The reasoning behind it is in the display header: there is no software reset line on the CYD (“Setting RST to a wrong GPIO can hold the panel in reset and produce a solid white screen”), and the only difference between cyd and cyd-ili9341 is the TFT_eSPI driver and RGB order. A white screen is the panel ignoring commands for the wrong controller, not a damaged board — “It’s not broken.”
[FIGURE SLOT — Vol 5 §5] Side-by-side photo: a 2.8” CYD showing the solid white screen of a wrong display build, next to the same board after reflashing with the correct one showing the colour-check screen.
5.6 Flashing by hand
5.6.1 With PlatformIO
From a clone of the repository, pio run -e <env> -t upload builds and flashes one board. The -e matters: “A bare pio run builds the default set (cyd, cyd-ili9341, awok), and a bare pio run -t upload would try to flash all three to your one board.” Vol 6 covers the toolchain.
5.6.2 With esptool
The repository documents a manual esptool write for the C5 board, and the same four-part rule follows from the manifests for every chip:
esptool --port COM5 --baud 460800 --chip esp32c5 write-flash \
  0x2000 bootloader.bin  0x8000 partitions.bin \
  0xe000 boot_app0.bin   0x10000 firmware.bin
For a plain-ESP32 CYD the offsets from §2.6 apply (bootloader at 0x1000). The release binaries are not committed to the repository — the manifests point at files the release workflow assembles into the Pages site.
5.6.3 The maintainer’s guard rail
tools/flash_known.py is the project maintainer’s own bench script: it reads a board’s MAC over a port, looks it up in a table of known fleet boards, and only then flashes the environment recorded for that MAC — “an unknown board is refused, and the env is never a guess.” Its BOARDS table holds the maintainer’s specific units, so it is not usable as-is; the pattern — key the build to the MAC, not the port — is the useful part for anyone running several CYDs of different display batches.
5.7 Updating: over the air, signed, with rollback
5.7.1 The UPDATE FIRMWARE screen
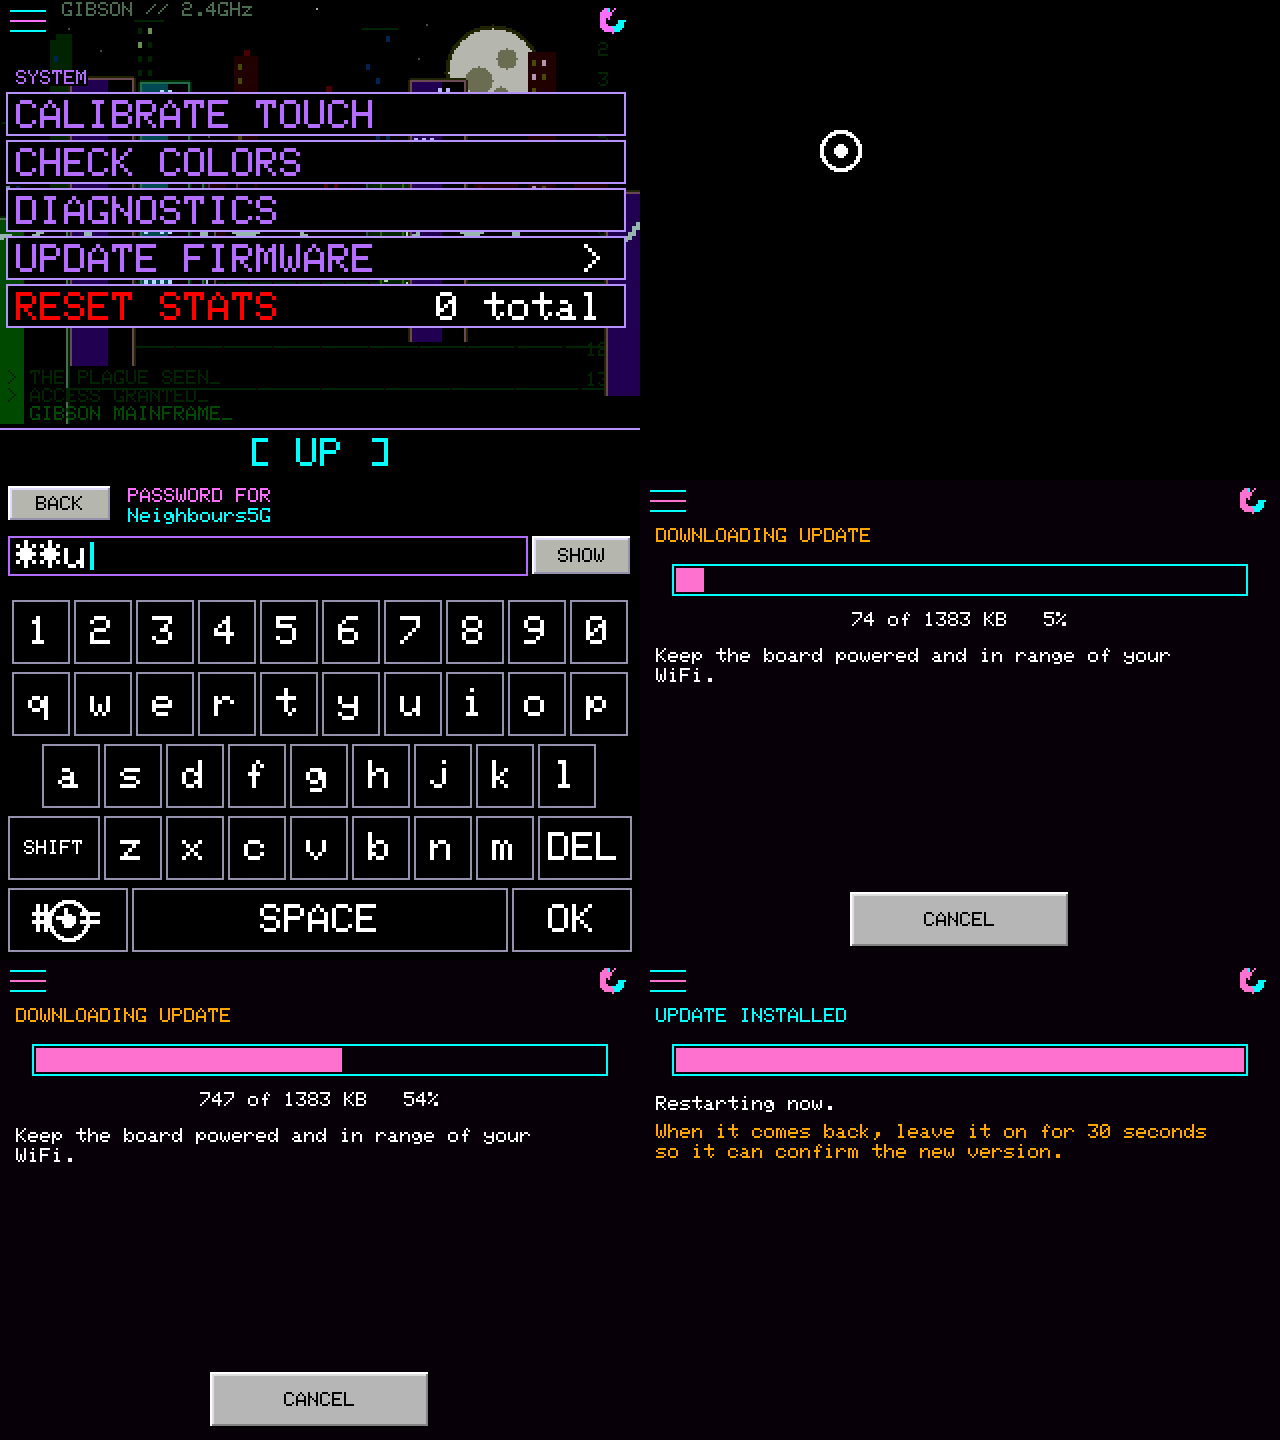
Settings → SYSTEM → UPDATE FIRMWARE shows the running version and offers UPDATE OVER WIFI, UPDATE OVER BLUETOOTH (BETA, S3 boards), UPDATE SQUAD and SWITCH TO. A Wi-Fi update joins a saved network (up to six are kept under WIFI NETWORKS) or lists networks in range and takes a password on the on-screen keyboard, then downloads “the release for its exact board from squachwatch.com.” “Detection and Bluetooth stay off until the board restarts.”
5.7.2 How an update is made safe
All of the safety lives in one transport-independent installer, OtaCore; Wi-Fi and Bluetooth are “only transports.”
  transport (WiFi HTTP / BLE GATT)
          │ image bytes
          ▼
  ┌──────────────────────────────────────────────────────────────┐
  │ OtaCore                                                       │
  │  1. stream into the SPARE app slot while the old one runs,    │
  │     hashing as it goes                                        │
  │  2. verify ECDSA P-256 signature over                         │
  │       SHA-256("SQWOTA1\n" + build name + "\n" + image)        │
  │     against the public key compiled into ota_pubkey.h         │
  │       ✗ BAD_SIGNATURE / NOT_SIGNED / TOO_OLD → refuse         │
  │  3. mark the new slot bootable, restart                       │
  └──────────────────────────────────────────────────────────────┘
          │
          ▼
  new image boots ON PROBATION
          │
   runs CONFIRM_MS = 30 000 ms? ──yes──▶ confirmed; stays
          │ no (crash / power cut)
          ▼
  bootloader returns to the previous slot (ESP32 rollback)
Table 8 — 7.2 How an update is made safe
| Mechanism | Detail | Source |
|---|---|---|
| Signature | ECDSA P-256, DER; private key is the OTA_SIGNING_KEY GitHub Actions secret; public key stored as a raw 65-byte curve point to avoid ~15 KB of PEM/ASN.1 parsing code | include/ota_core.h; include/ota_pubkey.h |
| Per-board binding | The signed message includes the build name (SQW_ENV, stamped by extra_script.py), so “a correctly signed image for a DIFFERENT board is refused too — a wrong display driver is a white screen, and a white screen cannot be navigated to switch back” | include/ota_core.h; extra_script.py |
| Downgrade | An older release is refused; reinstalling the same one is allowed “because that’s a repair” | docs/FAQ.md |
| Probation | CONFIRM_MS = 30000 | include/ota_core.h |
| Manual rollback | SWITCH TO boots the version in the other slot; settings stay | docs/FAQ.md |
| Slot sizes | 2 × 1.9 MB on 4 MB ESP32s (firmware ~1.42 MB when the table was introduced); 2 × 4 MB on the 16 MB S3 boards | partitions_ota.csv; partitions_twatch.csv |
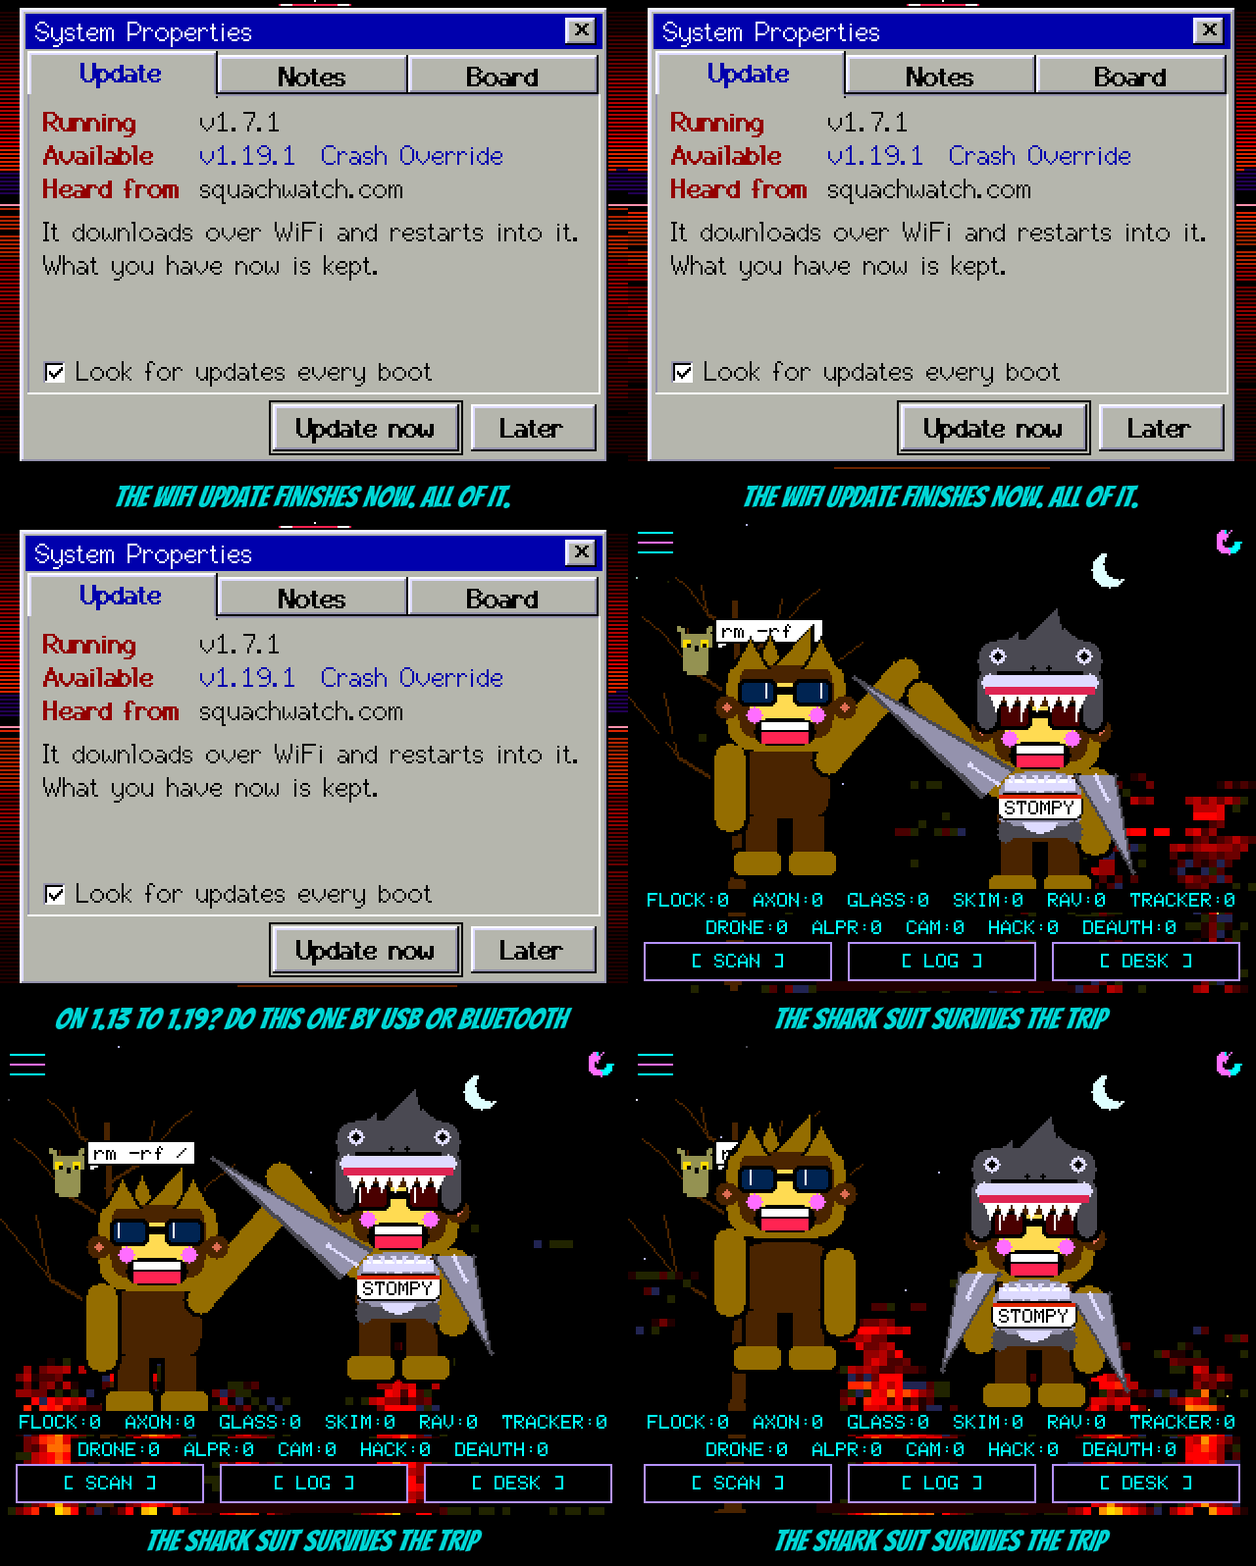
Note — The two-slot partition table arrived in v1.7.0, and a partition table cannot itself be changed over the air (“the bootloader reads it before any app runs”), so that release had to go out over USB. The same logic means a board on a very old release may need one USB install before OTA works; the FAQ names v1.13 through v1.19 as versions whose Wi-Fi updates “stall partway through,” fixed by one USB flash.
5.7.3 When a Wi-Fi update fails
Since v1.33.0 a failed Wi-Fi update names its cause; the board also falls back to the site’s fixed addresses if DNS fails. The causes are the OtaCore::Fail enumeration:
Table 9 — Since v1.33.0 a failed Wi-Fi update names its cause; the board also falls back to the site's fixed addresses if DNS fails. The causes are the OtaCore::Fail enumeration
| Fail code | Meaning |
|---|---|
WIFI_NOT_FOUND, WIFI_PASSWORD | Saved network absent, or wrong password |
NO_SITE | No connection at all |
SIGN_IN | A hotel/school/guest sign-in page answered instead |
NET_BLOCKED | The network refused, or answered with something not the project’s |
SITE_SLOW, SITE_DOWN | No reply in time; server error |
HTTPS_ONLY | The site redirected to HTTPS, which the board cannot follow |
BAD_SIGNATURE, NOT_SIGNED, DAMAGED, NOT_FIRMWARE | Image rejected |
TOO_OLD, TOO_BIG, LOW_MEMORY, RADIO_BUSY, LOCKED | Policy or resource refusals |
“Every failure message also tells you whether your current version is untouched (it almost always is),” and the universal fallback is the USB flasher.
5.7.4 Knowing an update exists
With a saved network, the board joins it for about a second at boot, asks squachwatch.com for the newest version of its own build, sets the clock, and disconnects “all before Bluetooth starts”; it never installs on its own. UPDATE CHECK on the SYSTEM page disables this. Squad hellos also carry each board’s version, so a board learns of a newer release from a squad member without Wi-Fi. The boot check is one of the device’s few transmissions (Vol 9).
Tip — A board flashed from a self-built tree still carries the project’s public key, because
ota_pubkey.his compiled in from the repository. That follows from the code rather than from any documented statement: such a board should accept the project’s own signed releases over the air, but nothing built locally can be pushed to it over the air without the private key — locally built images go on over USB.
5.8 Cheatsheet updates from this volume
Table 10 — 8. Cheatsheet updates from this volume
| Item | Value |
|---|---|
| First install | USB only — squachwatch.com, desktop browser with Web Serial |
| 2.8” default | ST7789 entry, 80 MHz ticked (cyd-fast) |
| White screen | untick 80 MHz → other 2.8” entry (ILI9341) → check board code |
| Download mode | hold BOOT while plugging in |
| Board finder | type the back-label code (e.g. ESP32-2432S028R); last letter R/C = resistive/capacitive |
| Flash offsets (ESP32) | 0x1000 bootloader · 0x8000 partitions · 0xE000 otadata · 0x10000 app; never a merged image at 0x0 |
| NVS | 0x9000, 20 KB — survives flasher, PlatformIO and OTA |
| Console baud | CYD 2,000,000 · AWOK 921,600 · S3/C5/CrowPanel 115,200 |
| Clock by hand | TIME <epoch>, ZONE US EASTERN on the console |
| OTA | Settings → SYSTEM → UPDATE FIRMWARE; ECDSA P-256 signed per build; 30 s probation; SWITCH TO rolls back |
| BLE OTA | S3 boards only, squachwatch.com/update, Chrome/Edge |
Comments (0)