GL-iNet GL-BE3600 · Volume 4
GL-iNet GL-BE3600 Volume 4 — Boot, Recovery, Flashing, and Custom Firmware
U-Boot, the Reset-button recovery flow, sysupgrade, and the paths to pure OpenWrt / immortalwrt / dawn
4.1 About this Volume
How firmware actually gets on this device — and how to get it back when something goes wrong. Five flashing paths in increasing order of nuclear:
- Admin Panel firmware upgrade (the everyday case).
- LuCI sysupgrade (when the panel can’t reach a release).
- SSH
sysupgradefrom a local file. - Reset-button recovery (the “I made a config mistake and locked myself out” path).
- U-Boot TFTP recovery (the “I bricked it harder” path).
Plus the ladder to non-GL-iNet firmware — pure upstream OpenWrt, immortalwrt, dawn — when the vendor build becomes a constraint instead of a convenience.
Volumes that depend on this:
- Vol 3 §3 for the GL-iNet vs OpenWrt difference.
- Vol 5, Vol 6, Vol 7 for what to rebuild after a flash that wiped the overlay.
4.2 Flash Layout
The 256 MB SPI-NAND is partitioned roughly:
Table 1 — The 256 MB SPI-NAND is partitioned roughly
| Partition | Approx size | Contents |
|---|---|---|
u-boot | 0.5 MB | Bootloader |
u-boot-env | 0.06 MB | Environment vars (boot count, last-good index) |
factory | 0.5 MB | RF calibration, MAC addresses (do not overwrite) |
kernel0 | 16 MB | Active kernel image |
rootfs0 | 96 MB | Active rootfs (squashfs + jffs2 overlay) |
kernel1 | 16 MB | Backup kernel (failsafe) |
rootfs1 | 96 MB | Backup rootfs |
art / caldata | 0.5 MB | Wireless calibration data |
| free / unused | rest | overlay growth |
Get the actual layout from a running system:
cat /proc/mtd
# dev:    size   erasesize  name
# mtd0: 00080000 00020000 "u-boot"
# mtd1: 00010000 00020000 "u-boot-env"
# ...
The dual-image (kernel0/rootfs0 + kernel1/rootfs1) layout is failsafe — if a flash goes bad mid-write, U-Boot can fall back to the other slot. sysupgrade writes to the inactive slot and switches the boot pointer.
The factory partition holds device-unique data (MAC, regulatory cal, board ID). Never overwrite this. The MAC 94:83:C4:C7:EA:E2 printed on the bottom tag was burned into this partition at the factory; if you wipe it, the device boots without a MAC and the Wi-Fi MAC defaults vary unpredictably.
4.3 Recovery Mode (the Reset-button Flow)
The everyday escape hatch when the device is reachable but misconfigured.
4.3.1 Triggering recovery
- Power off (unplug USB-C).
- Hold the Reset button on the bottom of the case.
- Plug USB-C back in while still holding Reset.
- Wait ~10 seconds with Reset held. The status LED transitions from solid to a fast blink pattern (typically blue or amber), indicating recovery mode.
- Release Reset.
- The device is now in U-Boot recovery, listening on
http://192.168.1.1(note: not the .8.1 default — recovery uses the OpenWrt default subnet).
4.3.2 What recovery mode is
- An HTTP server running directly inside U-Boot.
- Single page: “Upload firmware image” form.
- Accepts GL-iNet
.imgfiles and standardsysupgrade.binfiles for the chip. - No authentication (you have physical access; that’s the auth model).
4.3.3 Connecting to recovery
The router’s LAN port hands out 192.168.1.0/24 in recovery mode. Plug your laptop directly into a LAN port (recovery does not serve over Wi-Fi). Set your laptop to DHCP or static 192.168.1.10/24. Open http://192.168.1.1 in a browser.
4.3.4 What to flash from recovery
Table 2 — 3.4 What to flash from recovery
| File | Purpose |
|---|---|
GL-iNet release .img for BE3600 | Restore the GL-iNet build |
OpenWrt sysupgrade .bin for BE3600 | Migrate to upstream OpenWrt |
immortalwrt .bin for BE3600 | 3rd-party upstream-tracking build |
Backup .tar.gz of /etc/config/ | NOT here — that’s a sysupgrade restore, not a recovery flash |
After a recovery flash, the device reboots and comes up at 192.168.8.1 (or whatever the new firmware’s defaults are — pure OpenWrt comes up at 192.168.1.1).
4.3.5 What recovery mode is not
- Not a way to recover U-Boot itself. If U-Boot’s image is corrupted, you need TFTP-from-serial-console (§6).
- Not a way to factory-reset persistent state. Recovery mode flashes a complete image; it doesn’t differentiate a config-mistake from anything else.
4.4 The Everyday Flash Path — Admin Panel Upgrade
For routine version bumps when the device is healthy.
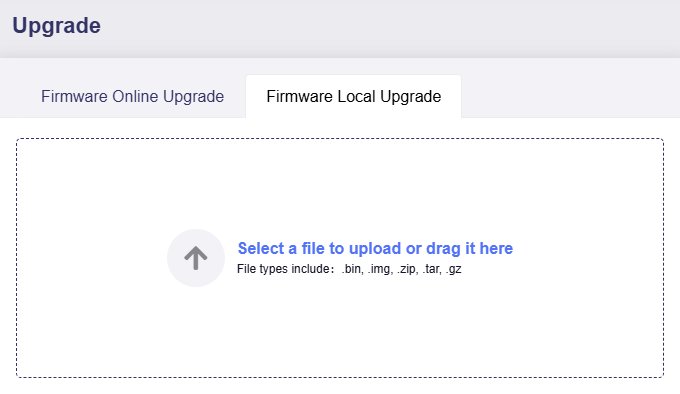
4.4.1 Admin Panel → Upgrade
- Admin Panel → System → Upgrade.
- Choose Online Upgrade (lets the panel pull from GL-iNet’s release server) or Local Upgrade (you uploaded a
.imgfile). - Keep settings checkbox — leave checked unless you want a clean slate. With it checked,
/etc/config/survives the flash. - Confirm. The panel uploads (if local), verifies signature (GL-iNet signs releases), reboots.
- Total time: 60–90 seconds. Status LED blinks during boot, settles to solid when ready.
4.4.2 LuCI sysupgrade
For the same operation through LuCI: LuCI → System → Backup / Flash Firmware → Flash new firmware image. Same semantics, less hand-holding.
4.4.3 SSH sysupgrade
For scripted / batch flashing:
# Copy the image up
scp /path/to/openwrt-...-sysupgrade.bin [email protected]:/tmp/

# SSH in and flash, keeping config
ssh [email protected]
sysupgrade -v /tmp/openwrt-...-sysupgrade.bin
# or, fresh flash discarding /etc/config/:
sysupgrade -n /tmp/openwrt-...-sysupgrade.bin
sysupgrade -v (verbose, keep config) is what the Admin Panel does under the hood. sysupgrade -n (no, don’t keep) is the cleaner-than-firstboot fresh-state flash.
4.4.4 Image signing
GL-iNet’s release .img files are signed. The device verifies the signature on the panel-upload path; flashing an unsigned image through the panel is rejected. Recovery mode (§3) does not verify signatures — it accepts any image valid for the chip. This is intentional: signed release path for normal users, unsigned path for “I’m flashing pure OpenWrt and I know what I’m doing”.
4.5 Pure OpenWrt — The Migration Path
When the GL-iNet build’s defaults or constraints become more nuisance than convenience.
4.5.1 Why migrate
- You want kernel features GL-iNet hasn’t enabled yet (some eBPF tooling, certain VPN modules).
- You don’t want the cloud client even disabled — you want it not present.
- You want to track upstream OpenWrt’s security cadence directly.
- You want a reproducible build (download the source, build with ImageBuilder).
4.5.2 Why not migrate
- You lose Admin Panel. All the one-tap mode/VPN/captive workflows go away. LuCI still works for everything OpenWrt can do, but the polish goes with the panel.
- You lose the OLED unless someone has ported the OLED daemon (community projects exist; they tend to lag releases).
- You lose
gl-mode, the mode-cycle state machine. - mwan3 isn’t installed by default on upstream — easy to add (
opkg install mwan3 luci-app-mwan3), but a manual step. - The Mode button does nothing until you write a
/etc/rc.button/modehandler.
4.5.3 The migration steps
# 1. Download the OpenWrt sysupgrade image for BE3600:
#    https://downloads.openwrt.org/releases/24.10.0/targets/mediatek/filogic/
#    Look for: openwrt-24.10.0-mediatek-filogic-glinet_gl-be3600-squashfs-sysupgrade.bin

# 2. Backup current GL-iNet config (in case you change your mind):
#    Admin Panel → System → Backup → Download.tar.gz

# 3. Boot to recovery (§3) and flash via 192.168.1.1 → upload the OpenWrt .bin.

# 4. After reboot, the router comes up at 192.168.1.1 (not .8.1 — pure OpenWrt defaults).
#    Set your laptop to DHCP, log in: ssh [email protected] (no password yet — set one).

# 5. Re-establish your config from scratch using the snippets in:
#    Vol 5 (networking)
#    Vol 6 (Wi-Fi)
#    Vol 7 (VPN)
The rebuild from upstream defaults takes 20–30 minutes for a typical configuration — slower than a panel-driven setup, but the result is something that survives opkg upgrade cycles without depending on GL-iNet’s release schedule.
4.5.4 Going back to GL-iNet build
Reverse the path: download GL-iNet’s BE3600 firmware .img, use recovery mode (§3) to flash. Your old /etc/config/ backup can be uploaded through the GL-iNet panel after first boot, but the GL-iNet-specific bits (mode, OLED) re-initialize on their own.
4.6 U-Boot TFTP — The Nuclear Option
When recovery mode (§3) doesn’t respond — typically because U-Boot’s environment is corrupted, the boot pointer is wedged, or the user accidentally wrote to the wrong partition.
4.6.1 What you need
- A USB-to-TTL serial adapter (3.3V logic — CP2102 or FTDI232 class).
- Soldering iron (no header on the BE3600 PCB; you’ll need to attach to test pads).
- A TFTP server on the laptop (
tftpd-hpaon Linux,tftpd64on Windows). - A
factory.binfor the BE3600 (different from sysupgrade format — TFTP requires the full image including U-Boot section).
4.6.2 The serial pinout
Inside the case (pop the top, two screws under the rubber feet):
- Three test pads near the SoC labeled TX / RX / GND.
- 115200 baud, 8N1.
- 3.3V logic — do not use a 5V FTDI cable.
Photographing your specific PCB before soldering is wise; small board revs sometimes shuffle pad positions.
4.6.3 The TFTP recovery flow
- Plug into the serial console; open a terminal at 115200.
- Power off, then power on. Watch for U-Boot’s prompt countdown (“Press any key to abort autoboot”).
- Drop into the U-Boot prompt with any key.
- From the prompt:
setenv ipaddr 192.168.1.1 setenv serverip 192.168.1.10 setenv autostart no tftpboot 0x80000000 factory.bin sf probe sf erase 0x0 0x10000000 sf write 0x80000000 0x0 ${filesize} reset - The router pulls
factory.binfrom your laptop’s TFTP server, writes it to flash, and reboots.
Specific commands vary by U-Boot version; check the device-specific OpenWrt wiki page if these don’t work.
4.6.4 When you actually need this
- You wrote to the
u-bootpartition (rare; usually requires explicitmtd write u-boot ...). - The boot environment is corrupted and
setenvfixes get reverted. - Recovery mode doesn’t trigger from the Reset button.
- The dual-image fallback also fails.
For 99% of “I bricked it” scenarios, recovery mode (§3) is enough.
4.7 Backup and Restore
4.7.1 What gets backed up
sysupgrade -b /tmp/backup.tar.gz creates a tarball of:
/etc/config/*(UCI configuration)/etc/dropbear/authorized_keys(your SSH keys)/etc/firewall.user(custom firewall rules)/root/(your home directory — small custom scripts)/etc/passwd,/etc/shadow,/etc/group- A small allowlist of GL-iNet-specific files (
/etc/glversion, etc.)
It does not back up:
/usr/or/lib/(system files)- Installed packages (re-install with opkg after restore)
- Logs (
/var/log/, but those are tmpfs anyway) - Wi-Fi captures or kismet output you wrote to
/tmp/
4.7.2 What to back up before risky changes
Before flashing custom firmware, doing a firstboot, or modifying U-Boot:
# Standard backup
sysupgrade -b /tmp/backup-$(date +%Y%m%d).tar.gz
scp [email protected]:/tmp/backup-*.tar.gz ./

# Plus the raw UCI tree (in case the tarball misses something custom):
ssh [email protected] 'tar czf - /etc/config /etc/dropbear /etc/firewall.user /root/' \
    > backup-$(date +%Y%m%d)-raw.tar.gz

# Plus a list of installed packages (so you can reinstall after a wipe):
ssh [email protected] 'opkg list-installed' > installed-packages.txt
4.7.3 Restoring
After a sysupgrade with -c (the default) the config is preserved automatically. After a clean-flash or factory reset:
scp backup-20260510.tar.gz [email protected]:/tmp/
ssh [email protected]
sysupgrade -r /tmp/backup-20260510.tar.gz
reboot
For migrating between GL-iNet build ↔ pure OpenWrt, do not restore directly — the configs are similar but not identical (GL-iNet’s glconfig and the mwan3 defaults will be unhappy). Instead, copy what you need by hand from the tarball.
4.8 Cheatsheet Updates
Inputs to Vol 12 from this volume:
- Recovery flow: hold Reset while powering on, 10 seconds, browse to
http://192.168.1.1over wired LAN. - Default management IP:
192.168.8.1(GL-iNet build) vs192.168.1.1(recovery + pure OpenWrt). - Backup before risky changes:
sysupgrade -bthenscpit off the device. opkg list-installed > packages.txtbefore any wipe, so reinstall is scriptable.- TFTP recovery requires serial console — don’t open the case unless recovery mode (§3) actually fails.
Comments (0)