PWNagotchi · Volume 8
PWNagotchi Volume 8 — Installation, Configuration, First-Run
Flash the jayofelony image, SSH over USB-OTG, walk through config.toml, calibrate the e-ink, and confirm the first capture
Before you flash, confirm you have:
Table 1 — Before you flash, confirm you have
| Item | Notes |
|---|---|
| Raspberry Pi Zero 2 W (or Pi Zero W) | Vol 2 §1; the Zero 2 W is strongly preferred |
| 40-pin GPIO header soldered | Pre-soldered (WH variant) or you’ve soldered one yourself |
| Waveshare 2.13” e-paper HAT v4 | Or chosen alternative; Vol 3 §3 |
| microSD card, 16+ GB, real | SanDisk High Endurance / Samsung PRO Endurance; Vol 2 §7 |
| LiPo + PowerBoost or PiSugar 3 | For portable use; not needed for first-boot via USB power |
| micro-USB data cable | The OTG-SSH workflow lives or dies on this — a power-only cable will silently not work |
| Workstation with internet + a microSD reader/writer | Windows / macOS / Linux all fine |
8.1 Download the jayofelony image
The canonical source: https://github.com/jayofelony/pwnagotchi/releases
Pick the image matching your Pi:
pwnagotchi-bookworm-arm64-vX.Y.Z.img.xzfor Pi Zero 2 W (64-bit; the right modern choice)pwnagotchi-buster-armhf-vX.Y.Z.img.xzfor original Pi Zero W (32-bit; older)
Image sizes are ~1.5-2 GB compressed, ~5-7 GB uncompressed. SHA-256 sums are published alongside; verify them. A corrupted image is a frustrating debug.
# After download:
sha256sum pwnagotchi-bookworm-arm64-v2.9.X.img.xz
# Compare to the SHA256SUM file from the release page.
8.2 Flash with Raspberry Pi Imager
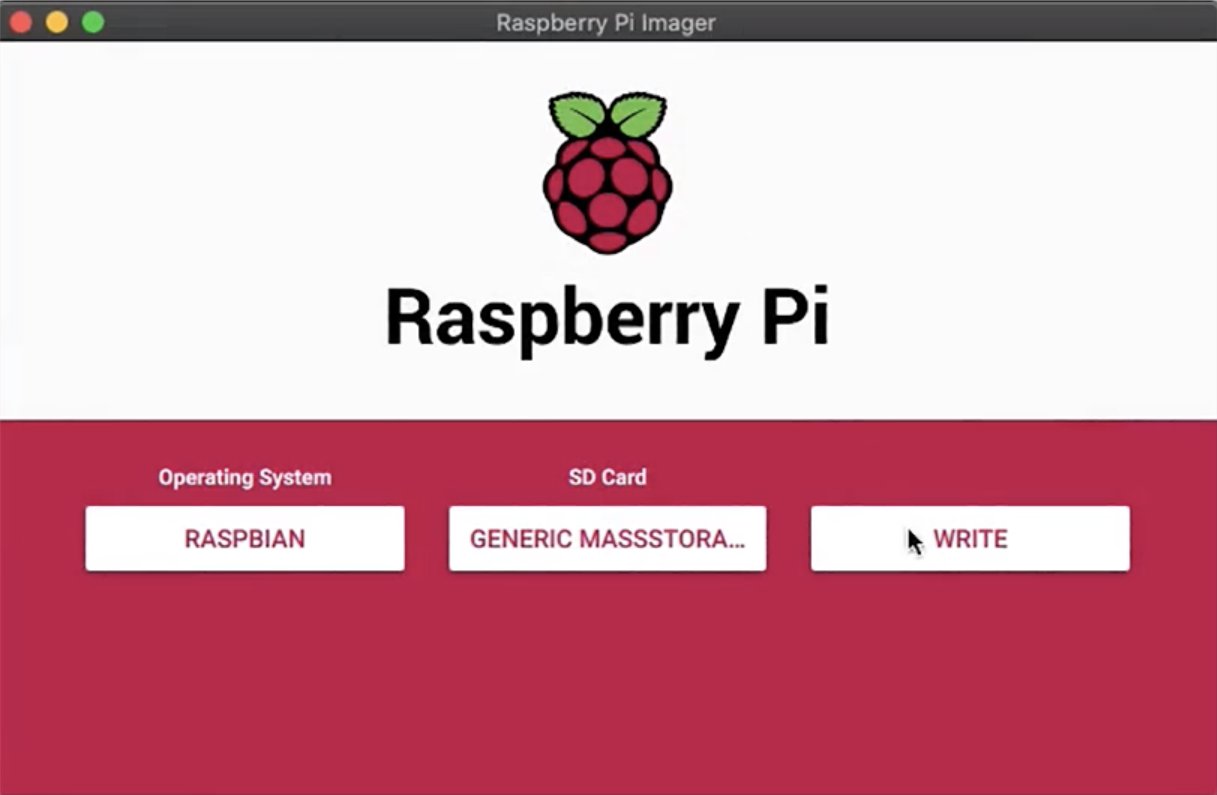
Raspberry Pi Imager is the recommended flasher because of its “advanced options” panel — you can pre-seed configuration without manually mounting the boot partition.
- Download Raspberry Pi Imager from https://www.raspberrypi.com/software/. (Available for Windows, macOS, Linux.)
- Launch. Click “CHOOSE OS” → “Use custom” → pick your downloaded
.img.xz(Imager handles xz decompression). - Click “CHOOSE STORAGE” → select your microSD.
- Click the gear icon (advanced options) before “WRITE”. Set:
- Hostname:
pwnagotchi - Enable SSH → Use public-key authentication only → paste your
~/.ssh/id_ed25519.pub(orid_rsa.pub) - (Optional) Configure Wi-Fi: this is for the control network the Pi joins when not in monitor mode. Useful for first-time OTA updates; not needed for OTG-SSH first-boot.
- Set username + password (optional override of
pi/raspberry)
- Hostname:
- Click “WRITE”. Confirm the overwrite. Wait ~3-5 min depending on USB speed and SD-card class.
If you’re using dd instead (Linux power-user route):
xz -d pwnagotchi-bookworm-arm64-v2.9.X.img.xz
sudo dd if=pwnagotchi-bookworm-arm64-v2.9.X.img of=/dev/sdX bs=4M conv=fsync status=progress
sync
(Replace /dev/sdX with your actual SD card device. Get this wrong and you’ll overwrite a host drive. lsblk first.)
8.3 Pre-boot tweaks (optional)
Before unmounting the SD card, you can drop files into the boot/ partition to override boot-time behavior:
ssh(empty file) — already enabled by Pi Imager’s advanced options, but if you flashed viaddyou need this. Justtouch /boot/ssh.wpa_supplicant.conf— to join a Wi-Fi network on first boot. Format:country=US ctrl_interface=DIR=/var/run/wpa_supplicant GROUP=netdev update_config=1 network={ ssid="MyHomeNet" psk="HomeNetPassword" key_mgmt=WPA-PSK }
8.4 First boot
- Eject the microSD from your workstation. Insert it into the Pi.
- Attach the e-ink HAT to the Pi’s 40-pin GPIO header. Push down firmly until the connector seats fully — every pin should mate. If the HAT sits crooked or pins look bent, stop and reseat.
- Connect a known-good micro-USB data cable from the Pi’s inner micro-USB port (the OTG one — closer to the SD slot) to your workstation. Do not connect a separate power supply.
- Wait ~90 seconds. You should see:
- The Pi’s ACT LED blinking actively (it’s booting).
- After ~30-45 seconds, the e-ink display refreshes once (flashes black-white-content) showing the boot face.
- On the workstation, a new network interface enumerates as “RNDIS/Ethernet Gadget” (Windows),
usb0(Linux), oren6/en7(macOS).
- The Pi assigns itself
10.0.0.1and offers DHCP to your workstation on10.0.0.0/24. Confirm withipconfig(Windows) orifconfig(Linux/mac) — your workstation should have an IP like10.0.0.2or similar.
If the e-ink shows nothing after 90 seconds:
- Check the HAT is fully seated.
- Confirm the SD card is properly seated and the image flashed cleanly.
ssh [email protected]and see if you can reach the Pi at all — if SSH works but e-ink doesn’t, the display config is wrong (Vol 3 §11).
8.5 First SSH
ssh [email protected]
# Default password (if you didn't set one in Imager): raspberry
# Default username: pi (or what you set in Imager)
If your SSH key was pre-seeded in Imager you should not be prompted for a password. If you do get prompted, use the password you set (or raspberry if you accepted the default).
First commands once in:
sudo systemctl status pwnagotchi
sudo systemctl status bettercap
sudo systemctl status pwngrid-peer
sudo journalctl -u pwnagotchi -n 50
You’re looking for all three units to be active (running). If pwnagotchi.service is “activating (auto-restart)” — the daemon is crash-looping. Usually it’s a display driver mismatch; check the journal.
8.6 Confirm monitor mode is working
sudo iw devExpected output includes something like:
phy#0
    Interface mon0
        ifindex 3
        wdev 0x2
        addr xx:xx:xx:xx:xx:xx
        type monitor
If you don’t see type monitor, the brcmfmac firmware isn’t the patched build, or monitor mode failed to enable. Try:
sudo systemctl restart pwnagotchi
sudo iw dev
If still no monitor mode, see Vol 9 §5 — fix_brcmf plugin.
8.7 Walk through config.toml
The default jayofelony config.toml is well-commented. Below are the fields you should review on first install, in order of importance:
8.7.1 The bare minimum
main.name = "MyFirstGotchi"               # rename from the default

main.whitelist = [
    "MyHomeNetwork",                       # name of your own SSID — don't harvest yourself
    "aa:bb:cc:dd:ee:ff",                   # BSSID of your AP (more precise)
]

[ui.web]
enabled = true
username = "admin"
password = "<CHANGE-THIS-NOW>"             # mandatory

[ui.display]
type = "waveshare_4"                       # match your panel
rotation = 0
After editing, sudo systemctl restart pwnagotchi and tail the journal. Check the e-ink shows the new gotchi name.
8.7.2 Mode selection
[personality]
mode = "ai"                                # ai (RL — default) / auto (no RL, autonomous) / manu (manual / static)
advertise = true                           # broadcast on pwngrid; turn off at public venues
If you’re going to use AI mode, also confirm [personality.ai] enabled = true further down (it should be by default).
8.7.3 Common plugins to enable
[main.plugins.grid]                         # the pwngrid plugin (peer discovery)
enabled = true
report = false                              # don't upload to pwnagotchi.ai/grid (defunct)

[main.plugins.auto-update]
enabled = false                             # disable for reproducibility; enable if you want OTAs

[main.plugins.pisugar]                      # only if you have the PiSugar 3 HAT
enabled = true

[main.plugins.gps]
enabled = false                             # enable if you have a UART GPS attached
8.8 Calibrating the e-ink
If the e-ink shows ghosting (residual from a previous image), force a deep-cleaning refresh:
sudo systemctl stop pwnagotchi
python3 -c "from pwnagotchi.ui.hw.waveshare_4 import WaveshareV4; w = WaveshareV4(); w.init(); w.clear()"
(Replace the import with your driver class as appropriate.)
Then sudo systemctl start pwnagotchi. The next boot face renders clean.
If the e-ink shows wrong rotation, set [ui.display].rotation and restart. The valid values are 0 / 90 / 180 / 270 (degrees).
8.9 First capture — testing the pipeline
To verify capture works without waiting hours for a chance handshake:
- Bring a personal phone or laptop within ~10 m of the Pwnagotchi.
- Disconnect the device from your home Wi-Fi (turn off Wi-Fi, then turn back on — forces a fresh association).
- Watch
journalctl -u pwnagotchi -fin the SSH session. - Within ~30-60 seconds you should see a log line like:
[pwnagotchi] saw new AP "MyHomeNet" (aa:bb:cc:dd:ee:ff) on ch 6 [pwnagotchi] captured handshake aa:bb:cc:dd:ee:ff - The e-ink face should briefly change to “happy” / “excited”.
- Confirm the
.pcapfile:
You should seels -la /root/handshakes/MyHomeNet_aa:bb:cc:dd:ee:ff.pcap.
If steps 1-5 don’t produce a capture in ~10 minutes despite a confirmed association, see Vol 5 §9 diagnostics.
NOTE — your own network only. This first-capture test should target your network exclusively. Targeting a neighbor’s AP or a venue Wi-Fi is illegal in most jurisdictions. The whitelist you set in §8.1 specifies which networks to ignore; here you’re testing against a NON-whitelisted network — which can be your phone’s hotspot, your laptop’s hotspot, or your home AP with the whitelist temporarily disabled.
8.10 Transferring captures to your workstation
# From workstation:
rsync -avz [email protected]:/root/handshakes/ ~/pwnagotchi-loot/
Now you have your .pcap files locally. Standard hashcat workflow:
# Convert pcap to hashcat 22000 format:
hcxpcapngtool -o my_handshakes.22000 *.pcap

# Then crack:
hashcat -m 22000 my_handshakes.22000 /path/to/rockyou.txt
(Cracking is out of scope for this deep dive; see hashcat docs.)
8.11 Disconnecting from OTG, going portable
Once configured and tested:
- SSH in.
sudo poweroff. Wait for the ACT LED to stop blinking.- Disconnect USB.
- Connect the LiPo + boost / PiSugar / battery.
- Power on (PiSugar has a power button; PowerBoost is always-on once battery connected).
- The Pi boots, the gotchi face renders, capture begins.
Subsequent SSH access:
- Via Wi-Fi if you pre-seeded
wpa_supplicant.conf— the Pi joins the configured network and you SSH to its DHCP-assigned address. - Via USB-OTG-as-Ethernet by plugging back into the workstation (poweroff first or you’ll have two power sources).
- Via the web UI at
http://<gotchi-ip>:8080/from any browser on the same network.
8.12 The “I bricked it” recovery
The Pwnagotchi is hard to fully brick because the SD card is removable. Recovery procedure:
- Power off.
- Pop the SD card out of the Pi, into your workstation.
- Mount the boot partition (FAT32 — Windows / macOS / Linux all see it).
- Edit
/boot/config.txtor replace files as needed. - Re-insert SD into Pi. Boot.
If everything’s wedged, re-flash the image — at most you lose configuration + captures. Save /root/handshakes/ and /etc/pwnagotchi/config.toml first (mount the rootfs partition for this; only works from Linux as the partition is ext4).
8.13 First-run checklist
Before declaring the install “done”:
- Pi boots, e-ink renders boot face within ~90 sec of power-on
-
pwnagotchi,bettercap,pwngrid-peerallactive (running)persystemctl -
iw devshows a monitor interface (mon0,type monitor) -
journalctl -u pwnagotchi -n 100is clean — no recurring errors -
config.tomlhas your name, whitelist, web UI password, correct display driver - Web UI accessible at
http://10.0.0.2:8080/(or your gotchi’s address) with the new credentials - First test capture against your own (non-whitelisted) network succeeded
-
.pcapfile present in/root/handshakes/ - Gotchi disconnects from USB and runs cleanly on battery
If all eight are green, the install is done. The Pwnagotchi is now functional. Proceed to Vol 9 (plugins) or Vol 10 (operations) depending on what you want to do next.
8.14 Cheatsheet updates from this volume
Items to roll into Vol 12 (laminate-ready cheatsheet):
- “Flash jayofelony bookworm-arm64 image. Pre-seed SSH key + hostname in Pi Imager.” (§3)
- “First boot via inner micro-USB to workstation; SSH
[email protected].” (§5, §6)- “Always change
[ui.web]password before going portable.” (§8.1)- “Whitelist your own SSIDs in
main.whitelist.” (§8.1)- “Confirm monitor mode with
iw devbefore declaring the install done.” (§7)
Comments (0)