Parrot OS · Volume 11
Parrot OS Volume 11 — Integration with the Hack Tools Hardware Lineup
The udev rules, group memberships, USB passthrough, and tool installations that connect Parrot to every device already on the bench
11.1 The hub at a glance — what plugs into the T480
Every device in the Hack Tools hub (../) talks to a host computer at some point. With Parrot as the daily-driver Linux host, the T480 is the central node. This volume documents how to wire each device to Parrot cleanly — udev rules, group memberships, drivers, tools.
The inventory (cross-reference each tool’s own subproject for deep detail):
Table 1 — The inventory (cross-reference each tool's own subproject for deep detail)
| Tool | USB ID | Connection | Linux driver | Required user group / udev |
|---|---|---|---|---|
| HackRF One | 1d50:6089 | USB 2 | libusb (no kernel driver) | plugdev + udev rule |
| HackRF One PortaPack H2+ | n/a (sits on HackRF) | (via HackRF USB) | same | same as HackRF |
| Flipper Zero | 0483:5740 | USB CDC ACM | usbserial / cdc_acm | dialout + udev rule |
| Bus Pirate 6 | 1209:7331 | USB CDC ACM | cdc_acm | dialout + udev rule |
| Proxmark3 RDV4 (aspirational) | 9ac4:4b8f | USB CDC ACM | cdc_acm | dialout + udev rule |
| Clockwork PicoCalc | 2e8a:000a (RP2040 BOOTSEL) | USB | bootloader: mass storage; app: cdc_acm | plugdev + udev rule |
| Clockwork uConsole (aspirational) | n/a (full Linux SBC) | runs its own OS | n/a | n/a |
| M5Stack Cardputer ADV (aspirational) | 303a:1001 / 10c4:ea60 (CH9102 on some) | USB CDC ACM | cdc_acm | dialout + udev rule |
| M5Stick S3 (aspirational) | 303a:1001 | USB CDC ACM | cdc_acm | dialout + udev rule |
| DSTIKE Hackheld | 1a86:7523 (CH340) | USB CDC ACM | ch341 | dialout + udev rule |
| AWOK Dual Touch V3 | 1a86:7523 / 303a:1001 | USB CDC ACM | ch341 or cdc_acm | dialout + udev rule |
| Ruckus Game Over | 303a:1001 | USB CDC ACM | cdc_acm | dialout + udev rule |
| AWOK ESP32 C5 (aspirational) | 303a:1003 | USB CDC ACM | cdc_acm | dialout + udev rule |
| Quansheng UV-K5 | 1a86:7523 (CH340 in K5 programming cable) | USB CDC ACM | ch341 | dialout + udev rule |
| RTL-SDR | 0bda:2838 | USB | librtlsdr / no kernel driver | plugdev + udev rule + blacklist dvb_usb_rtl28xxu |
| Nyan Box (aspirational) | 1a86:55d4 or 1a86:7523 | USB CDC ACM | ch341 | dialout + udev rule |
| Wired Hatters Banshee (aspirational) | TBD | USB CDC ACM + USB HID + Ethernet | cdc_acm + usbhid + cdc_ether | dialout + plugdev + udev rule |
| WiFi Pineapple (aspirational) | n/a (Ethernet / Wi-Fi host) | network device | n/a | n/a |
| Ducky Script family — Rubber Ducky / Bash Bunny / Key Croc / O.MG Cable | varies | enumerates as HID + Mass Storage; arming via tools | n/a | varies |
| ESP32 Marauder firmware (on AWOK Dual Touch V3 + Flipper WiFi Devboard) | (see host device above) | (see host device above) | (see host device above) | (see host device above) |
| GL-iNet GL-BE3600 | n/a | Wi-Fi / Ethernet | n/a | n/a |
| Rayhunter (on Orbic Speed RC400L) | n/a (Wi-Fi hotspot — talk to it over Wi-Fi or USB tethering) | n/a | n/a | n/a |
11.2 The udev + group permissions model
11.2.1 Why this matters
Linux’s default permissions on /dev/ttyUSB0, /dev/ttyACM0, /dev/hidraw0, /dev/bus/usb/* are root:root or root:plugdev or root:dialout. An unprivileged user can’t read/write them without permission. The two solutions:
sudoevery tool — works, but inconvenient and slightly dangerous (sudo’d Python scripts shouldn’t be a routine).- udev rules + group membership — set permissive group ownership on the device node when it appears, and add your user to that group. The right answer.
11.2.2 The two relevant groups
dialout— Linux convention for serial devices (/dev/ttyS*,/dev/ttyUSB*,/dev/ttyACM*). MCU dev boards, GPS, modems, radios with serial control.plugdev— Linux convention for “user-pluggable” devices needing raw USB access (USB-talking-via-libusb tools — HackRF, RTL-SDR, Proxmark3 in some modes).
Add user to both:
sudo usermod -aG dialout,plugdev,wireshark,libvirt,kvm,docker $USER
# Log out and back in for the changes to apply.
groups | tr ' ' '\n' | sort
11.2.3 udev rule basics
udev rules live in /etc/udev/rules.d/. Files named NN-name.rules (NN sorts; typically 60- and 99-). A rule looks like:
SUBSYSTEM=="usb", ATTRS{idVendor}=="1d50", ATTRS{idProduct}=="6089", MODE="0666", GROUP="plugdev"This says: when a USB device with VID 1d50 PID 6089 (HackRF One) appears, set its device node’s permissions to 0666 (rw for everyone) and ownership to the plugdev group.
After dropping a rule file:
sudo udevadm control --reload-rules
sudo udevadm trigger
(Or unplug + replug the device.)
11.2.4 Finding USB vendor / product IDs
lsusb
# Bus 002 Device 003: ID 1d50:6089 Great Scott Gadgets HackRF One

lsusb -v -d 1d50:6089       # detailed descriptor
Or watch as a device is plugged:
sudo dmesg -w11.3 HackRF One + PortaPack — drivers, GNU Radio, udev
The HackRF One is a USB libusb device. Reference: ../HackRF One/ deep dive.
11.3.1 Install tools
sudo apt install hackrf libhackrf-dev libhackrf0parrot-tools-network may include some; apt install hackrf ensures the CLI tools (hackrf_transfer, hackrf_info, hackrf_spiflash) and the libhackrf library.
11.3.2 udev rule
A rule typically ships with the hackrf package — verify:
ls /etc/udev/rules.d/ | grep hackrf
ls /lib/udev/rules.d/ | grep hackrf
If absent, create /etc/udev/rules.d/53-hackrf.rules:
ATTRS{idVendor}=="1d50", ATTRS{idProduct}=="6089", SYMLINK+="hackrf-one-%k", MODE="660", GROUP="plugdev"
ATTRS{idVendor}=="1d50", ATTRS{idProduct}=="cc15", SYMLINK+="hackrf-jawbreaker-%k", MODE="660", GROUP="plugdev"
Reload + trigger:
sudo udevadm control --reload-rules
sudo udevadm trigger
11.3.3 Verify
Plug HackRF. Then:
hackrf_info
# Should show: Found HackRF, Serial number: ..., Board ID Number: 2 (HackRF One), Firmware Version: ...
11.3.4 GNU Radio
sudo apt install gnuradio gr-osmosdr gnuradio-docLaunch gnuradio-companion for the GUI flowgraph builder. The HackRF appears via the osmocom Source block. Reference: [HackRF One deep dive Vol 8](/hackrf-one/vol-8/) (GNU Radio workflow).
11.3.5 SDR# (mono-arch) / SDR++ / GQRX
- GQRX —
sudo apt install gqrx-sdr. The default Linux SDR app. Works with HackRF, RTL-SDR, others. - SDR++ — cross-platform GUI; AppImage from https://www.sdrpp.org/. Modern, polished.
- SDR# — Windows-native; runs in Wine but the native Windows install is the better option for SDR# specifically.
11.3.6 PortaPack H2+ note
The PortaPack is a daughterboard for HackRF One that adds a screen + keyboard. It runs Mayhem firmware on the HackRF (replacing the default HackRF firmware). The PortaPack-equipped HackRF does not talk to libhackrf when running Mayhem — it’s a standalone device at that point. To use the HackRF from Parrot, flash back to stock HackRF firmware (hackrf_spiflash).
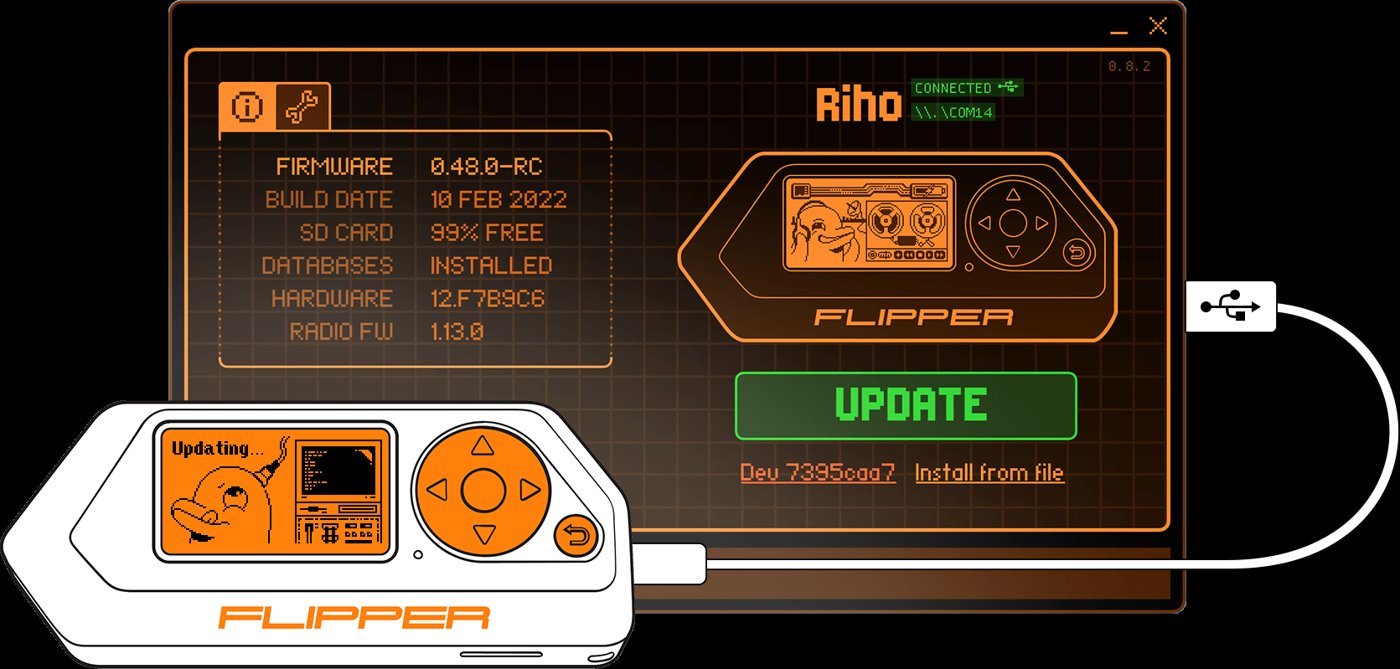
11.4 Flipper Zero — qFlipper, serial, USB descriptors
Reference: ../Flipper Zero/ deep dive.
11.4.1 udev rule
# Save as /etc/udev/rules.d/42-flipperzero.rules
sudo tee /etc/udev/rules.d/42-flipperzero.rules > /dev/null <<'EOF'
# Flipper Zero serial
SUBSYSTEM=="tty", ATTRS{idVendor}=="0483", ATTRS{idProduct}=="5740", MODE="0660", GROUP="dialout"
# Flipper Zero DFU (firmware update mode)
SUBSYSTEM=="usb", ATTRS{idVendor}=="0483", ATTRS{idProduct}=="df11", MODE="0660", GROUP="plugdev"
EOF

sudo udevadm control --reload-rules
sudo udevadm trigger
11.4.2 qFlipper
The official desktop app for firmware updates + file management:
# AppImage from https://flipperzero.one/update
wget https://update.flipperzero.one/qFlipper/.../qFlipper-x86_64-1.3.3.AppImage -O ~/Applications/qFlipper.AppImage
chmod +x ~/Applications/qFlipper.AppImage
~/Applications/qFlipper.AppImage
Or Flatpak:
flatpak install flathub one.flipperzero.qFlipper11.4.3 Serial console via CLI
# After dialout group membership:
picocom -b 115200 /dev/ttyACM0
# (or /dev/ttyACM1, whichever Flipper enumerates as)

# Flipper CLI prompts on serial: type "help" for commands.
# Ctrl+a Ctrl+x to exit picocom.
11.4.4 ufbt (unleashed Flipper build tool)
For building FAPs (Flipper Application Packages):
pipx install ufbt
# Workflow:
mkdir myfap && cd myfap
ufbt init
# Edit application.fam + the source files
ufbt           # builds .fap
ufbt launch    # builds + uploads + runs on connected Flipper
11.5 Bus Pirate 6 — serial console, firmware updates
Reference: ../Bus Pirate 6/ deep dive.
11.5.1 udev
sudo tee /etc/udev/rules.d/43-buspirate.rules > /dev/null <<'EOF'
# Bus Pirate 6 (RP2350B) serial CDC
SUBSYSTEM=="tty", ATTRS{idVendor}=="1209", ATTRS{idProduct}=="7331", MODE="0660", GROUP="dialout"
# RP2350 BOOTSEL mode (mass storage for UF2 flashing)
SUBSYSTEM=="usb", ATTRS{idVendor}=="2e8a", ATTRS{idProduct}=="000f", MODE="0660", GROUP="plugdev"
EOF

sudo udevadm control --reload-rules
sudo udevadm trigger
11.5.2 Serial console
picocom -b 115200 /dev/ttyACM0The Bus Pirate prompts with HiZ> or similar. The BP6 deep dive Vol 3 covers the command set.
11.5.3 Firmware update (DFU mode)
Hold BOOTSEL while plugging USB → board appears as mass storage. Drag the .uf2 firmware file onto it → it reboots into the new firmware.
11.6 Proxmark3 RDV4 (aspirational)
When acquired:
sudo apt install proxmark3

sudo tee /etc/udev/rules.d/44-proxmark.rules > /dev/null <<'EOF'
SUBSYSTEM=="tty", ATTRS{idVendor}=="9ac4", ATTRS{idProduct}=="4b8f", MODE="0660", GROUP="dialout"
SUBSYSTEM=="usb", ATTRS{idVendor}=="9ac4", ATTRS{idProduct}=="4b8f", MODE="0660", GROUP="plugdev"
EOF

sudo udevadm control --reload-rules
sudo udevadm trigger

# Launch
proxmark3 /dev/ttyACM0
11.7 Clockwork PicoCalc + uConsole
Reference: ../Clockwork PicoCalc/, ../Clockwork uConsole/.
11.7.1 PicoCalc
RP2040/RP2350-based handheld. Flashed via BOOTSEL + UF2 drag-drop. udev:
sudo tee /etc/udev/rules.d/45-pico.rules > /dev/null <<'EOF'
# RP2040 BOOTSEL
SUBSYSTEM=="usb", ATTRS{idVendor}=="2e8a", ATTRS{idProduct}=="000a", MODE="0660", GROUP="plugdev"
# RP2350 BOOTSEL
SUBSYSTEM=="usb", ATTRS{idVendor}=="2e8a", ATTRS{idProduct}=="000f", MODE="0660", GROUP="plugdev"
# Running CDC ACM
SUBSYSTEM=="tty", ATTRS{idVendor}=="2e8a", MODE="0660", GROUP="dialout"
EOF

sudo udevadm control --reload-rules
sudo udevadm trigger
Pico SDK install on Parrot:
sudo apt install cmake gcc-arm-none-eabi libnewlib-arm-none-eabi libstdc++-arm-none-eabi-newlib
git clone https://github.com/raspberrypi/pico-sdk.git ~/pico-sdk
export PICO_SDK_PATH=~/pico-sdk
# Add to ~/.zshrc
11.7.2 uConsole
The uConsole runs its own Linux distro (officially Raspberry Pi OS-derived for CM4 variants). Connect to it via SSH from Parrot once it has a network. No udev rules needed for the unit itself; for its USB peripherals connecting via the uConsole’s CM4, install drivers on the uConsole side.
11.8 M5Stack Cardputer ADV / M5Stick S3 — esptool, PlatformIO
Reference: ../M5Stack Cardputer ADV/, ../M5Stick S3/.
11.8.1 udev for ESP32-S3 devices
sudo tee /etc/udev/rules.d/46-esp32.rules > /dev/null <<'EOF'
# ESP32-S3 native USB
SUBSYSTEM=="tty", ATTRS{idVendor}=="303a", ATTRS{idProduct}=="1001", MODE="0660", GROUP="dialout"
# CP2102 (some ESP32 dev boards)
SUBSYSTEM=="tty", ATTRS{idVendor}=="10c4", ATTRS{idProduct}=="ea60", MODE="0660", GROUP="dialout"
# CH9102 / CH340 (some Cardputer revisions)
SUBSYSTEM=="tty", ATTRS{idVendor}=="1a86", ATTRS{idProduct}=="55d4", MODE="0660", GROUP="dialout"
SUBSYSTEM=="tty", ATTRS{idVendor}=="1a86", ATTRS{idProduct}=="7523", MODE="0660", GROUP="dialout"
EOF

sudo udevadm control --reload-rules
sudo udevadm trigger
11.8.2 esptool
pipx install esptool

# Verify connectivity
esptool.py --port /dev/ttyACM0 chip_id
esptool.py --port /dev/ttyACM0 flash_id
11.8.3 PlatformIO
pipx install platformio
# Or: pip install --user platformio

pio --version
Init a project:
mkdir cardputer-test && cd cardputer-test
pio project init --board m5stack-stickc-plus    # adjust per M5 board ID
# Edit platformio.ini + src/main.cpp
pio run                          # build
pio run --target upload          # flash
pio device monitor               # serial console
11.8.4 Arduino IDE (alternative)
For users who prefer Arduino IDE:
sudo apt install arduino   # Parrot may have older Arduino IDE 1.x
# Or, modern Arduino IDE 2.x AppImage from arduino.cc
Then: File → Preferences → Additional boards manager URLs → add ESP32: https://raw.githubusercontent.com/espressif/arduino-esp32/gh-pages/package_esp32_index.json. Tools → Board Manager → install esp32 by Espressif Systems.
11.9 DSTIKE Hackheld + AWOK Dual Touch V3 + Ruckus Game Over — ESP32 family udev
These are all ESP-class devices. The Vol 8 udev rules above (CH340, ESP32-S3 native) cover them all. References: ../DSTIKE Hackheld/, ../AWOK Dual Touch V3/, ../Ruckus Game Over/.
For firmware flashing on each:
- DSTIKE Hackheld (ESP8266) — Spacehuhn web flasher (Chrome/Edge with Web Serial), or
esptool.pyfor offline. See DSTIKE Hackheld Vol 9. - AWOK Dual Touch V3 (ESP32 ×2) — JustCallMeKoko Marauder web flasher, or
esptool.py. See AWOK Dual Touch V3 deep dive. - Ruckus Game Over (ESP32-S3) — Marauder web flasher or
esptool.py. See Ruckus Game Over deep dive.
Web flashers from Chromium-based browsers on Parrot work — make sure user has dialout group access.
11.10 Quansheng UV-K5 — k5prog, k5spectrum
Quansheng UV-K5 programming cable uses the CH340 chip. udev from § 8.1 covers it.
# Install k5prog (modern Quansheng UV-K5 flasher)
git clone https://github.com/sq5bpf/k5prog.git
cd k5prog
make
sudo make install

# Read current firmware
k5prog -r -F backup.bin -p /dev/ttyUSB0

# Write new firmware
k5prog -F newfirmware.bin -w -p /dev/ttyUSB0
Reference: ../Quansheng UV-K5/ deep dive (aspirational).
11.11 RTL-SDR + SDR# / SDR++ / GQRX
Reference: ../RTL-SDR/.
11.11.1 The DVB-T blacklist trick
RTL-SDR dongles are originally TV tuners (DVB-T) — Linux auto-binds the dvb_usb_rtl28xxu driver, which prevents SDR use. Blacklist it:
echo "blacklist dvb_usb_rtl28xxu" | sudo tee /etc/modprobe.d/blacklist-rtl.conf
echo "blacklist rtl2832" | sudo tee -a /etc/modprobe.d/blacklist-rtl.conf
sudo update-initramfs -u
sudo reboot
After reboot, the dongle stays unclaimed and librtlsdr can grab it.
11.11.2 Install + udev
sudo apt install rtl-sdr librtlsdr-dev gqrx-sdr

sudo tee /etc/udev/rules.d/47-rtl-sdr.rules > /dev/null <<'EOF'
SUBSYSTEM=="usb", ATTRS{idVendor}=="0bda", ATTRS{idProduct}=="2838", MODE="0660", GROUP="plugdev"
SUBSYSTEM=="usb", ATTRS{idVendor}=="0bda", ATTRS{idProduct}=="2832", MODE="0660", GROUP="plugdev"
EOF

sudo udevadm control --reload-rules
sudo udevadm trigger

# Verify
rtl_test
# Sample rate 2048000 Hz; reads from device.
11.11.3 GQRX
gqrx # GUI; choose RTL-SDR as input device on first launch11.12 GL-iNet GL-BE3600 — networking integration
Reference: ../GL-iNet GL-BE3600/. The Beryl AX Pro is a travel router; it doesn’t plug into the T480 directly. Integration is over Wi-Fi or Ethernet.
Use cases:
- Travel Wi-Fi: T480 connects to Beryl’s SSID; Beryl’s WAN connects to hotel Wi-Fi or hotel Ethernet. Beryl handles captive portals, hides T480 MAC from the hotel network.
- Lab segmentation: Beryl as a dedicated network for lab VMs, separate from home Wi-Fi.
- VPN bridge: Beryl runs OpenVPN/WireGuard client; all traffic from T480 (connected via Beryl) routes through the VPN at the router level.
11.13 Rayhunter on Orbic Speed RC400L
Reference: ../Rayhunter/. Rayhunter (EFF’s IMSI catcher detector) runs on an Orbic Speed RC400L Verizon hotspot. Connect to it from Parrot via:
- Wi-Fi tethering (Orbic’s built-in hotspot mode): T480 joins the Orbic’s SSID; the Rayhunter web UI is at the gateway IP.
- USB tethering: USB-C cable → Orbic enumerates as a USB network device. Verified by
lsusb+ip link show(look forusb0orenx*interface).
Defensive-only tool — capture cellular tower data, detect anomalies. No active attacks.
11.14 USB passthrough to KVM VMs
Vol 10 § 6.3 introduced this. The Vol 11 context: when you want a hardware tool to live inside a guest VM (a Windows VM for SDR# / a Kali VM for engagement isolation), USB passthrough from the host (Parrot) to the guest is the mechanism.
11.14.1 Passing a HackRF to a Windows guest
- VM running.
- virt-manager → VM Details → Add Hardware → USB Host Device.
- Pick “Great Scott Gadgets HackRF One” from the list.
- Click Finish. The HackRF disappears from Parrot’s
lsusband appears in the Windows guest’s Device Manager. - In the Windows VM, install Zadig driver tool, switch the HackRF to WinUSB driver, then SDR# / hackrf_info.exe sees it.
To return the device to the host: virt-manager → VM Details → select the USB Host Device entry → Remove. The HackRF appears on Parrot’s lsusb again.
11.14.2 The “always pass” pattern
For devices that should always go to a specific VM:
- virt-manager → VM Details → Add Hardware → USB Host Device → check “USB Redirector” (for Spice-based VMs).
- Or edit the VM’s XML directly via
virsh edit <vm-name>and add a<hostdev>block bound by VID:PID. The device passes on every VM start.
11.14.3 USB passthrough for Wi-Fi cards
Want to give a USB Wi-Fi card (Alfa AWUS036ACS) exclusively to a Kali VM? Same procedure. The Kali VM gets a real Wi-Fi card; Parrot uses the built-in Wi-Fi. Useful for keeping engagement Wi-Fi traffic isolated from your personal Wi-Fi.
11.15 The single bootstrap script — scripts/post_install.sh
A consolidated script that does most of the above in one run. Drop in Parrot OS/scripts/post_install.sh:
#!/usr/bin/env bash
# Parrot OS post-install bootstrap — Hack Tools hub integration
# Run as: sudo bash post_install.sh <username>

set -euo pipefail

USER="${1:?usage: $0 <username>}"

echo "==> System update"
apt update
apt full-upgrade -y
apt autoremove -y

echo "==> Adding $USER to relevant groups"
usermod -aG dialout,plugdev,wireshark,libvirt,kvm,docker $USER

echo "==> Installing standard pentest tools (Parrot metapackages)"
apt install -y \
    parrot-tools-network parrot-tools-web parrot-tools-wireless \
    parrot-tools-passwords parrot-tools-forensics parrot-tools-reverse \
    parrot-tools-exploit parrot-tools-pwn parrot-tools-sniffer \
    parrot-tools-vuln parrot-tools-anon parrot-tools-info \
    parrot-tools-rfid parrot-tools-iot parrot-tools-mobile

echo "==> Installing additional packages"
apt install -y \
    wireshark tshark \
    gnuradio gqrx-sdr gr-osmosdr rtl-sdr hackrf \
    git tig tmux zsh fzf ripgrep fd-find bat htop btop \
    keepassxc flameshot obs-studio \
    qemu-system-x86 libvirt-daemon-system virt-manager bridge-utils ovmf swtpm \
    docker.io docker-compose \
    pipx golang cargo rustc \
    minicom picocom screen tio \
    tlp tlp-rdw thermald powertop \
    fprintd libpam-fprintd timeshift fwupd \
    code  # VS Code; remove if using VSCodium instead

echo "==> udev rules for hardware tools"
cat > /etc/udev/rules.d/50-hack-tools.rules <<'EOF'
# HackRF One
ATTRS{idVendor}=="1d50", ATTRS{idProduct}=="6089", SYMLINK+="hackrf-%k", MODE="0660", GROUP="plugdev"

# Flipper Zero serial + DFU
SUBSYSTEM=="tty", ATTRS{idVendor}=="0483", ATTRS{idProduct}=="5740", MODE="0660", GROUP="dialout"
SUBSYSTEM=="usb", ATTRS{idVendor}=="0483", ATTRS{idProduct}=="df11", MODE="0660", GROUP="plugdev"

# Bus Pirate 6
SUBSYSTEM=="tty", ATTRS{idVendor}=="1209", ATTRS{idProduct}=="7331", MODE="0660", GROUP="dialout"

# Raspberry Pi RP2040 + RP2350 (BOOTSEL)
SUBSYSTEM=="usb", ATTRS{idVendor}=="2e8a", MODE="0660", GROUP="plugdev"
SUBSYSTEM=="tty", ATTRS{idVendor}=="2e8a", MODE="0660", GROUP="dialout"

# ESP32-S3 native USB
SUBSYSTEM=="tty", ATTRS{idVendor}=="303a", MODE="0660", GROUP="dialout"

# CH340 / CH9102 (DSTIKE, AWOK, UV-K5 prog cable, generic ESP32)
SUBSYSTEM=="tty", ATTRS{idVendor}=="1a86", MODE="0660", GROUP="dialout"

# CP2102 (generic ESP32)
SUBSYSTEM=="tty", ATTRS{idVendor}=="10c4", ATTRS{idProduct}=="ea60", MODE="0660", GROUP="dialout"

# Proxmark3 RDV4
SUBSYSTEM=="tty", ATTRS{idVendor}=="9ac4", ATTRS{idProduct}=="4b8f", MODE="0660", GROUP="dialout"
SUBSYSTEM=="usb", ATTRS{idVendor}=="9ac4", ATTRS{idProduct}=="4b8f", MODE="0660", GROUP="plugdev"

# RTL-SDR
SUBSYSTEM=="usb", ATTRS{idVendor}=="0bda", ATTRS{idProduct}=="2838", MODE="0660", GROUP="plugdev"
SUBSYSTEM=="usb", ATTRS{idVendor}=="0bda", ATTRS{idProduct}=="2832", MODE="0660", GROUP="plugdev"
EOF

echo "==> RTL-SDR DVB-T blacklist"
cat > /etc/modprobe.d/blacklist-rtl.conf <<'EOF'
blacklist dvb_usb_rtl28xxu
blacklist rtl2832
EOF
update-initramfs -u

echo "==> Reload udev"
udevadm control --reload-rules
udevadm trigger

echo "==> Enable services"
systemctl enable --now libvirtd
systemctl enable --now docker
systemctl enable --now tlp
systemctl enable --now thermald
systemctl enable --now fwupd

echo "==> Pipx tools (run as $USER)"
sudo -u $USER bash <<EOF
pipx install netexec
pipx install impacket
pipx install volatility3
pipx install esptool
pipx install platformio
pipx install ufbt
pipx install asciinema
pipx install chezmoi
EOF

echo "==> Done. Log out and back in for group changes."
echo "==> Then run 'fwupdmgr refresh && fwupdmgr update' for firmware."
echo "==> Plug in each hardware tool once to verify udev rules took effect."
Run:
sudo bash scripts/post_install.sh <username>
# Then log out + back in.
11.16 Cheatsheet additions
- Add user to all relevant groups:
sudo usermod -aG dialout,plugdev,wireshark,libvirt,kvm,docker $USER. - Reload udev:
sudo udevadm control --reload-rules && sudo udevadm trigger. - Find USB IDs:
lsusb; details:lsusb -v -d VID:PID. - Watch new USB plugs:
sudo dmesg -w. - HackRF verify:
hackrf_info. - Flipper serial:
picocom -b 115200 /dev/ttyACM0. - RTL-SDR blacklist:
/etc/modprobe.d/blacklist-rtl.confblacklistdvb_usb_rtl28xxu+rtl2832, thenupdate-initramfs -u. - GNU Radio companion:
gnuradio-companion. - PlatformIO build + flash:
pio run && pio run --target upload. - esptool chip ID:
esptool.py --port /dev/ttyACM0 chip_id. - virt-manager USB passthrough: VM Details → Add Hardware → USB Host Device.
- k5prog UV-K5 backup:
k5prog -r -F backup.bin -p /dev/ttyUSB0. - Post-install bootstrap:
sudo bash scripts/post_install.sh <username>.
Comments (0)